All posts by Pat Patterson

Exploring aws-lite, a Community-Driven JavaScript SDK for AWS

Post Syndicated from Pat Patterson original https://www.backblaze.com/blog/exploring-aws-lite-a-community-driven-javascript-sdk-for-aws/
A decorative image showing the Backblaze and aws-lite logos.

One of the benefits of the Backblaze B2 Storage Cloud having an S3 compatible API is that developers can take advantage of the wide range of Amazon Web Services SDKs when building their apps. The AWS team has released over a dozen SDKs covering a broad range of programming languages, including Java, Python, and JavaScript, and the latter supports both frontend (browser) and backend (Node.js) applications.

With all of this tooling available, you might be surprised to discover aws-lite. In the words of its creators, it is “a simple, extremely fast, extensible Node.js client for interacting with AWS services.” After meeting Brian LeRoux, cofounder and chief technology officer (CTO) of Begin, the company that created the aws-lite project, at the AWS re:Invent conference last year, I decided to give aws-lite a try and share the experience. Read on for the learnings I discovered along the way.
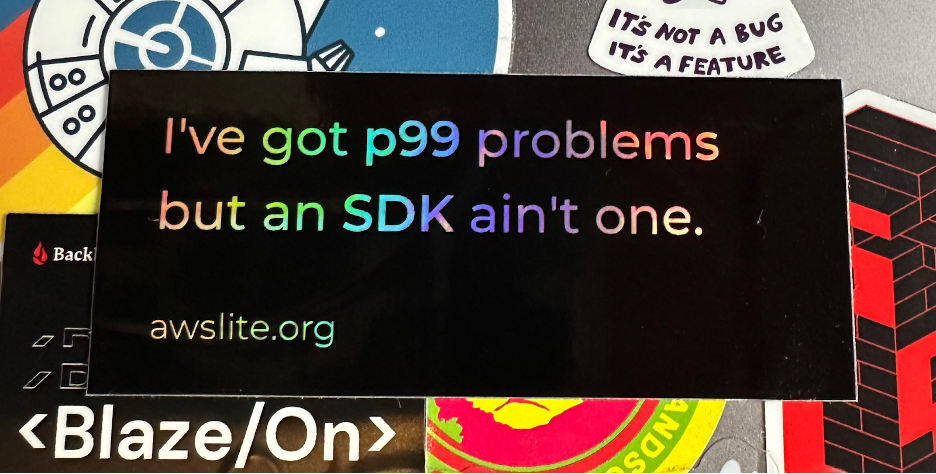
A photo showing an aws-lite promotional sticker that says, I've got p99 problems but an SDK ain't one, as well as a Backblaze promotional sticker that says Blaze/On.
Brian bribed me to try out aws-lite with a shiny laptop sticker!

Why Not Just Use the AWS SDK for JavaScript?

The AWS SDK has been through a few iterations. The initial release, way back in May 2013, focused on Node.js, while version 2, released in June 2014, added support for JavaScript running on a web page. We had to wait until December 2020 for the next major revision of the SDK, with version 3 adding TypeScript support and switching to an all-new modular architecture.

However, not all developers saw version 3 as an improvement. Let’s look at a simple example of the evolution of the SDK. The simplest operation you can perform against an S3 compatible cloud object store, such as Backblaze B2, is to list the buckets in an account. Here’s how you would do that in the AWS SDK for JavaScript v2:

var AWS = require('aws-sdk');

var client = new AWS.S3({
  region: 'us-west-004', 
  endpoint: 's3.us-west-004.backblazeb2.com'
});

client.listBuckets(function (err, data) {
  if (err) {
    console.log("Error", err);
  } else {
    console.log("Success", data.Buckets);
  }
});

Looking back from 2023, passing a callback function to the listBuckets() method looks quite archaic! Version 2.3.0 of the SDK, released in 2016, added support for JavaScript promises, and, since async/await arrived in JavaScript in 2017, today we can write the above example a little more clearly and concisely:

const AWS = require('aws-sdk');

const client = new AWS.S3({
  region: 'us-west-004', 
  endpoint: 's3.us-west-004.backblazeb2.com'
});

try {
  const data = await client.listBuckets().promise();
  console.log("Success", data.Buckets);  
} catch (err) {
  console.log("Error", err);
}

One major drawback with version 2 of the AWS SDK for JavaScript is that it is a single, monolithic, JavaScript module. The most recent version, 2.1539.0, weighs in at 92.9MB of code and resources. Even the most minimal app using the SDK has to include all that, plus another couple of MB of dependencies, causing performance issues in resource-constrained environments such as internet of things (IoT) devices, or browsers on low-end mobile devices.

Version 3 of the AWS SDK for JavaScript aimed to fix this, taking a modular approach. Rather than a single JavaScript module there are now over 300 packages published under the @aws-sdk/ scope on NPM. Now, rather than the entire SDK, an app using S3 need only install @aws-sdk/client-s3, which, with its dependencies, adds up to just 20MB.

So, What’s the Problem With AWS SDK for JavaScript v3?

One issue is that, to fully take advantage of modularization, you must adopt an unfamiliar coding style, creating a command object and passing it to the client’s send() method. Here is the “new way” of listing buckets:

const { S3Client, ListBucketsCommand } = require("@aws-sdk/client-s3");

// Since v3.378, S3Client can read region and endpoint, as well as
// credentials, from configuration, so no need to pass any arguments
const client = new S3Client();

try {
  // Inexplicably, you must pass an empty object to 
  // ListBucketsCommand() to avoid the SDK throwing an error
  const data = await client.send(new ListBucketsCommand({}));
  console.log("Success", data.Buckets);  
} catch (err) {
  console.log("Error", err);
}

The second issue is that, to help manage the complexity of keeping the SDK packages in sync with the 200+ services and their APIs, AWS now generates the SDK code from the API specifications. The problem with generated code is that, as the aws-lite home page says, it can result in “large dependencies, poor performance, awkward semantics, difficult to understand documentation, and errors without usable stack traces.”

A couple of these effects are evident even in the short code sample above. The underlying ListBuckets API call does not accept any parameters, so you might expect to be able to call the ListBucketsCommand constructor without any arguments. In fact, you have to supply an empty object, otherwise the SDK throws an error. Digging into the error reveals that a module named middleware-sdk-s3 is validating that, if the object passed to the constructor has a Bucket property, it is a valid bucket name. This is a bit odd since, as I mentioned above, ListBuckets doesn’t take any parameters, let alone a bucket name. The documentation for ListBucketsCommand contains two code samples, one with the empty object, one without. (I filed an issue for the AWS team to fix this.)

“Okay,” you might be thinking, “I’ll just carry on using v2.” After all, the AWS team is still releasing regular updates, right? Not so fast! When you run the v2 code above, you’ll see the following warning before the list of buckets:

(node:35814) NOTE: We are formalizing our plans to enter AWS SDK for JavaScript (v2) into maintenance mode in 2023.
Please migrate your code to use AWS SDK for JavaScript (v3).
For more information, check the migration guide at https://a.co/7PzMCcy

At some (as yet unspecified) time in the future, v2 of the SDK will enter maintenance mode, during which, according to the AWS SDKs and Tools maintenance policy, “AWS limits SDK releases to address critical bug fixes and security issues only.” Sometime after that, v2 will reach the end of support, and it will no longer receive any updates or releases.

Getting Started With aws-lite

Faced with a forced migration to what they judged to be an inferior SDK, Brian’s team got to work on aws-lite, posting the initial code to the aws-lite GitHub repository in September last year, under the Apache 2.0 open source license. At present the project comprises a core client and 13 plugins covering a range of AWS services including S3, Lambda, and DynamoDB.

Following the instructions on the aws-lite site, I installed the client module and the S3 plugin, and implemented the ListBuckets sample:

import awsLite from '@aws-lite/client';

const aws = await awsLite();

try {
  const data = await aws.S3.ListBuckets();
  console.log("Success", data.Buckets);
} catch (err) {
  console.log("Error", err);
}

For me, this combines the best of both worlds—concise code, like AWS SDK v2, and full support for modern JavaScript features, like v3. Best of all, the aws-lite client, S3 plugin, and their dependencies occupy just 284KB of disk space, which is less than 2% of the modular AWS SDK’s 20MB, and less than 0.5% of the monolith’s 92.9MB!

Caveat Developer!

(Not to kill the punchline here, but for those of you who might not have studied Latin or law, this is a play on the phrase, “caveat emptor”, meaning “buyer beware”.)

I have to mention, at this point, that aws-lite is still very much under construction. Only a small fraction of AWS services are covered by plugins, although it is possible (with a little extra code) to use the client to call services without a plugin. Also, not all operations are covered by the plugins that do exist. For example, at present, the S3 plugin supports 10 of the most frequently used S3 operations, such as PutObject, GetObject, and ListObjectsV2, leaving the remaining 89 operations TBD.

That said, it’s straightforward to add more operations and services, and the aws-lite team welcomes pull requests. We’re big believers in being active participants in the open source community, and I’ve already contributed the ListBuckets operation, a fix for HeadObject, and I’m working on adding tests for the S3 plugin using a mock S3 server. If you’re a JavaScript developer working with cloud services, this is a great opportunity to contribute to an open source project that promises to make your coding life better!

The post Exploring aws-lite, a Community-Driven JavaScript SDK for AWS appeared first on Backblaze Blog | Cloud Storage & Cloud Backup.
Data-Driven Decisions With Snowflake and Backblaze B2

Post Syndicated from Pat Patterson original https://www.backblaze.com/blog/data-driven-decisions-wwith-snowflake-and-backblaze-b2/

A decorative image showing the Backblaze and Snowflake images superimposed over a cloud.

Since its launch in 2014 as a cloud-based data warehouse, Snowflake has evolved into a broad data-as-a-service platform addressing a wide variety of use cases, including artificial intelligence (AI), machine learning (ML), collaboration across organizations, and data lakes. Last year, Snowflake introduced support for S3 compatible cloud object stores, such as Backblaze B2 Cloud Storage. Now, Snowflake customers can access unstructured data such as images and videos, as well as structured and semi-structured data such as CSV, JSON, Parquet, and XML files, directly in the Snowflake Platform, served up from Backblaze B2.

Why access external data from Snowflake, when Snowflake is itself a data as a service (DaaS) platform with a cloud-based relational database at its core? To put it simply, not all data belongs in Snowflake. Organizations use cloud object storage solutions such as Backblaze B2 as a cost-effective way to maintain both master and archive data, with multiple applications reading and writing that data. In this situation, Snowflake is just another consumer of the data. Besides, data storage in Snowflake is much more expensive than in Backblaze B2, raising the possibility of significant cost savings as a result of optimizing your data’s storage location.

Snowflake Basics

At Snowflake’s core is a cloud-based relational database. You can create tables, load data into them, and run SQL queries just as you can with a traditional on-premises database. Given Snowflake’s origin as a data warehouse, it is currently better suited to running analytical queries against large datasets than as an operational database serving a high volume of transactions, but Snowflake Unistore’s hybrid tables feature (currently in private preview) aims to bridge the gap between transactional and analytical workloads.

As a DaaS platform, Snowflake runs on your choice of public cloud—currently Amazon Web Services (AWS), Microsoft Azure, and Google Cloud Platform—but insulates you from the details of managing storage, compute, and networking infrastructure. Having said that, sometimes you need to step outside the Snowflake box to access data that you are managing in your own cloud object storage account. I’ll explain exactly how that works in this blog post, but, first, let’s take a quick look at how we classify data according to its degree of structure, as this can have a big impact on your decision of where to store it.

Structured and Semi-Structured Data

Structured data conforms to a rigid data model. Relational database tables are the most familiar example—a table’s schema describes required and optional fields and their data types, and it is not possible to insert rows into the table that contain additional fields not listed in the schema. Aside from relational databases, file formats such as Apache Parquet, Optimized Row Columnar (ORC), and Avro can all store structured data; each file format specifies a schema that fully describes the data stored within a file. Here’s an example of a schema for a Parquet file:

% parquet meta customer.parquet

File path:  /data/customer.parquet
...
Schema:
message hive_schema {
  required int64 custkey;
  required binary name (STRING);
  required binary address (STRING);
  required int64 nationkey;
  required binary phone (STRING);
  required int64 acctbal;
  optional binary mktsegment (STRING);
  optional binary comment (STRING);
}

Semi-structured data, as its name suggests, is more flexible. File formats such as CSV, XML and JSON need not use a formal schema, since they can be self-describing. That is, an application can infer the structure of the data as it reads the file, a mechanism often termed “schema-on-read.” 

This simple JSON example illustrates the principle. You can see how it’s possible for an application to build the schema of a product record as it reads the file:

{
  "products" : [
    {
      "name" : "Paper Shredder",
      "description" : "Crosscut shredder with auto-feed"
    },
    {
      "name" : "Stapler",
      "color" : "Red"
    },
    {
      "name" : "Sneakers",
      "size" : "11"
    }
  ]
}

Accessing Structured and Semi-Structured Data Stored in Backblaze B2 from Snowflake

You can access data located in cloud object storage external to Snowflake, such as Backblaze B2, by creating an external stage. The external stage is a Snowflake database object that holds a URL for the external location, as well as configuration (e.g., credentials) required to access the data. For example:

CREATE STAGE b2_stage
  URL = 's3compat://your-b2-bucket-name/'
  ENDPOINT = 's3.your-region.backblazeb2.com'
  REGION = 'your-region'
  CREDENTIALS = (
    AWS_KEY_ID = 'your-application-key-id'
    AWS_SECRET_KEY = 'your-application-key'
  );

You can create an external table to query data stored in an external stage as if the data were inside a table in Snowflake, specifying the table’s columns as well as filenames, file formats, and data partitioning. Just like the external stage, the external table is a database object, located in a Snowflake schema, that stores the metadata required to access data stored externally to Snowflake, rather than the data itself.

Every external table automatically contains a single VARIANT type column, named value, that can hold arbitrary collections of fields. An external table definition for semi-structured data needs no further column definitions, only metadata such as the location of the data. For example:

CREATE EXTERNAL TABLE product
  LOCATION = @b2_stage/data/
  FILE_FORMAT = (TYPE = JSON)
  AUTO_REFRESH = false;

When you query the external table, you can reference elements within the value column, like this:

SELECT value:name
  FROM product
  WHERE value:color = ‘Red’;
+------------+
| VALUE:NAME |
|------------|
| "Stapler"  |
+------------+

Since structured data has a more rigid layout, you must define table columns (technically, in Snowflake, these are referred to as “pseudocolumns”), corresponding to the fields in the data files, in terms of the value column. For example:

CREATE EXTERNAL TABLE customer (
    custkey number AS (value:custkey::number),
    name varchar AS (value:name::varchar),
    address varchar AS (value:address::varchar),
    nationkey number AS (value:nationkey::number),
    phone varchar AS (value:phone::varchar),
    acctbal number AS (value:acctbal::number),
    mktsegment varchar AS (value:mktsegment::varchar),
    comment varchar AS (value:comment::varchar)
  )
  LOCATION = @b2_stage/data/
  FILE_FORMAT = (TYPE = PARQUET)
  AUTO_REFRESH = false;

Once you’ve created the external table, you can write SQL statements to query the data stored externally, just as if it were inside a table in Snowflake:

SELECT phone
  FROM customer
  WHERE name = ‘Acme, Inc.’;
+----------------+
| PHONE          |
|----------------|
| "111-222-3333" |
+----------------+

The Backblaze B2 documentation includes a pair of technical articles that go further into the details, describing how to export data from Snowflake to an external table stored in Backblaze B2, and how to create an external table definition for existing structured data stored in Backblaze B2.

Accessing Unstructured Data Stored in Backblaze B2 from Snowflake

The term “unstructured”, in this context, refers to data such as images, audio, and video, that cannot be defined in terms of a data model. You still need to create an external stage to access unstructured data located outside of Snowflake, but, rather than creating external tables and writing SQL queries, you typically access unstructured data from custom code running in Snowflake’s Snowpark environment.

Here’s an excerpt from a Snowflake user-defined function, written in Python, that loads an image file from an external stage:

from snowflake.snowpark.files import SnowflakeFile

# The file_path argument is a scoped Snowflake file URL to a file in the 
# external stage, created with the BUILD_SCOPED_FILE_URL function. 
# It has the form
# https://abc12345.snowflakecomputing.com/api/files/01b1690e-0001-f66c-...
def generate_image_label(file_path):

  # Read the image file 
  with SnowflakeFile.open(file_path, 'rb') as f:
    image_bytes = f.readall()

  ...

In this example, the user-defined function reads an image file from an external stage, then runs an ML model on the image data to generate a label for the image according to its content. A Snowflake task using this user-defined function can insert rows into a table of image names and labels as image files are uploaded into a Backblaze B2 Bucket. You can learn more about this use case in particular, and loading unstructured data from Backblaze B2 into Snowflake in general, from the Backblaze Tech Day ‘23 session that I co-presented with Snowflake Product Manager Saurin Shah:

Choices, Choices: Where Should I Store My Data?

Given that, currently, Snowflake charges at least $23/TB/month for data storage on its platform compared to Backblaze B2 at $6/TB/month, it might seem tempting to move your data wholesale from Snowflake to Backblaze B2 and create external tables to replace tables currently residing in Snowflake. There are, however, a couple of caveats to mention: performance and egress costs.

The same query on the same dataset will run much more quickly against tables inside Snowflake than the corresponding external tables. A comprehensive analysis of performance and best practices for Snowflake external tables is a whole other blog post, but, as an example, one of my queries that completes in 30 seconds against a table in Snowflake takes three minutes to run against the same data in an external table.

Similarly, when you query an external table located in Backblaze B2, Snowflake must download data across the internet. Data formats such as Parquet can make this very efficient, organizing data column-wise and compressing it to minimize the amount of data that must be transferred. But, some amount of data still has to be moved from Backblaze B2 to Snowflake. Downloading data from Backblaze B2 is free of charge for up to 3x your average monthly data footprint, then $0.01/GB for additional egress, so there is a trade-off between data storage cost and data transfer costs for frequently-accessed data.

Some data naturally lives on one platform or the other. Frequently-accessed tables should probably be located in Snowflake. Media files, that might only ever need to be downloaded once to be processed by code running in Snowpark, belong in Backblaze B2. The gray area is large datasets that will only be accessed a few times a month, where the performance disparity is not an issue, and the amount of data transferred might fit into Backblaze B2’s free egress allowance. By understanding how you access your data, and doing some math, you’re better able to choose the right cloud storage tool for your specific tasks.

The post Data-Driven Decisions With Snowflake and Backblaze B2 appeared first on Backblaze Blog | Cloud Storage & Cloud Backup.

How to Run AI/ML Workloads on CoreWeave + Backblaze

Post Syndicated from Pat Patterson original https://www.backblaze.com/blog/how-to-run-ai-ml-workloads-on-coreweave-backblaze/

A decorative image showing the Backblaze and CoreWeave logos superimposed on clouds.

Backblaze compute partner CoreWeave is a specialized GPU cloud provider designed to power use cases such as AI/ML, graphics, and rendering up to 35x faster and for 80% less than generalized public clouds. Brandon Jacobs, an infrastructure architect at CoreWeave, joined us earlier this year for Backblaze Tech Day ‘23. Brandon and I co-presented a session explaining both how to backup CoreWeave Cloud storage volumes to Backblaze B2 Cloud Storage and how to load a model from Backblaze B2 into the CoreWeave Cloud inference stack.

Since we recently published an article covering the backup process, in this blog post I’ll focus on loading a large language model (LLM) directly from Backblaze B2 into CoreWeave Cloud.

Below is the session recording from Tech Day; feel free to watch it instead of, or in addition to, reading this article.

More About CoreWeave

In the Tech Day session, Brandon covered the two sides of CoreWeave Cloud: 

  1. Model training and fine tuning. 
  2. The inference service. 

To maximize performance, CoreWeave provides a fully-managed Kubernetes environment running on bare metal, with no hypervisors between your containers and the hardware.

CoreWeave provides a range of storage options: storage volumes that can be directly mounted into Kubernetes pods as block storage or a shared file system, running on solid state drives (SSDs) or hard disk drives (HDDs), as well as their own native S3 compatible object storage. Knowing that, you’re probably wondering, “Why bother with Backblaze B2, when CoreWeave has their own object storage?”

The answer echoes the first few words of this blog post—CoreWeave’s object storage is a specialized implementation, co-located with their GPU compute infrastructure, with high-bandwidth networking and caching. Backblaze B2, in contrast, is general purpose cloud object storage, and includes features such as Object Lock and lifecycle rules, that are not as relevant to CoreWeave’s object storage. There is also a price differential. Currently, at $6/TB/month, Backblaze B2 is one-fifth of the cost of CoreWeave’s object storage.

So, as Brandon and I explained in the session, CoreWeave’s native storage is a great choice for both the training and inference use cases, where you need the fastest possible access to data, while Backblaze B2 shines as longer term storage for training, model, and inference data as well as the destination for data output from the inference process. In addition, since Backblaze and CoreWeave are bandwidth partners, you can transfer data between our two clouds with no egress fees, freeing you from unpredictable data transfer costs.

Loading an LLM From Backblaze B2

To demonstrate how to load an archived model from Backblaze B2, I used CoreWeave’s GPT-2 sample. GPT-2 is an earlier version of the GPT-3.5 and GPT-4 LLMs used in ChatGPT. As such, it’s an accessible way to get started with LLMs, but, as you’ll see, it certainly doesn’t pass the Turing test!

This sample comprises two applications: a transformer and a predictor. The transformer implements a REST API, handling incoming prompt requests from client apps, encoding each prompt into a tensor, which the transformer passes to the predictor. The predictor applies the GPT-2 model to the input tensor, returning an output tensor to the transformer for decoding into text that is returned to the client app. The two applications have different hardware requirements—the predictor needs a GPU, while the transformer is satisfied with just a CPU, so they are configured as separate Kubernetes pods, and can be scaled up and down independently.

Since the GPT-2 sample includes instructions for loading data from Amazon S3, and Backblaze B2 features an S3 compatible API, it was a snap to modify the sample to load data from a Backblaze B2 Bucket. In fact, there was just a single line to change, in the s3-secret.yaml configuration file. The file is only 10 lines long, so here it is in its entirety:

apiVersion: v1
kind: Secret
metadata:
  name: s3-secret
  annotations:
     serving.kubeflow.org/s3-endpoint: s3.us-west-004.backblazeb2.com
type: Opaque
data:
  AWS_ACCESS_KEY_ID: <my-backblaze-b2-application-key-id>
  AWS_SECRET_ACCESS_KEY: <my-backblaze-b2-application-key>

As you can see, all I had to do was set the serving.kubeflow.org/s3-endpoint metadata annotation to my Backblaze B2 Bucket’s endpoint and paste in an application key and its ID.

While that was the only Backblaze B2-specific edit, I did have to configure the bucket and path where my model was stored. Here’s an excerpt from gpt-s3-inferenceservice.yaml, which configures the inference service itself:

apiVersion: serving.kubeflow.org/v1alpha2
kind: InferenceService
metadata:
  name: gpt-s3
  annotations:
    # Target concurrency of 4 active requests to each container
    autoscaling.knative.dev/target: "4"
    serving.kubeflow.org/gke-accelerator: Tesla_V100
spec:
  default:
    predictor:
      minReplicas: 0 # Allow scale to zero
      maxReplicas: 2 
      serviceAccountName: s3-sa # The B2 credentials are retrieved from the service account
      tensorflow:
        # B2 bucket and path where the model is stored
        storageUri: s3://<my-bucket>/model-storage/124M/
        runtimeVersion: "1.14.0-gpu"
        ...

Aside from storageUri configuration, you can see how the predictor application’s pod is configured to scale from between zero and two instances (“replicas” in Kubernetes terminology). The remainder of the file contains the transformer pod configuration, allowing it to scale from zero to a single instance.

Running an LLM on CoreWeave Cloud

Spinning up the inference service involved a kubectl apply command for each configuration file and a short wait for the CoreWeave GPU cloud to bring up the compute and networking infrastructure. Once the predictor and transformer services were ready, I used curl to submit my first prompt to the transformer endpoint:

% curl -d '{"instances": ["That was easy"]}' http://gpt-s3-transformer-default.tenant-dead0a.knative.chi.coreweave.com/v1/models/gpt-s3:predict
{"predictions": ["That was easy for some people, it's just impossible for me,\" Davis said. \"I'm still trying to" ]}

In the video, I repeated the exercise, feeding GPT-2’s response back into it as a prompt a few times to generate a few paragraphs of text. Here’s what it came up with:

“That was easy: If I had a friend who could take care of my dad for the rest of his life, I would’ve known. If I had a friend who could take care of my kid. He would’ve been better for him than if I had to rely on him for everything.

The problem is, no one is perfect. There are always more people to be around than we think. No one cares what anyone in those parts of Britain believes,

The other problem is that every decision the people we’re trying to help aren’t really theirs. If you have to choose what to do”

If you’ve used ChatGPT, you’ll recognize how far LLMs have come since GPT-2’s release in 2019!

Run Your Own Large Language Model

While CoreWeave’s GPT-2 sample is an excellent introduction to the world of LLMs, it’s a bit limited. If you’re looking to get deeper into generative AI, another sample, Fine-tune Large Language Models with CoreWeave Cloud, shows how to fine-tune a model from the more recent EleutherAI Pythia suite.

Since CoreWeave is a specialized GPU cloud designed to deliver best-in-class performance up to 35x faster and 80% less expensive than generalized public clouds, it’s a great choice for workloads such as AI, ML, rendering, and more, and, as you’ve seen in this blog post, easy to integrate with Backblaze B2 Cloud Storage, with no data transfer costs. For more information, contact the CoreWeave team.

The post How to Run AI/ML Workloads on CoreWeave + Backblaze appeared first on Backblaze Blog | Cloud Storage & Cloud Backup.

Digging Deeper Into Object Lock

Post Syndicated from Pat Patterson original https://www.backblaze.com/blog/digging-deeper-into-object-lock/

A decorative image showing data inside of a vault.

Using Object Lock for your data is a smart choice—you can protect your data from ransomware, meet compliance requirements, beef up your security policy, or preserve data for legal reasons. But, it’s not a simple on/off switch, and accidentally locking your data for 100 years is a mistake you definitely don’t want to make.

Today we’re taking a deeper dive into Object Lock and the related legal hold feature, examining the different levels of control that are available, explaining why developers might want to build Object Lock into their own applications, and showing exactly how to do that. While the code samples are aimed at our developer audience, anyone looking for a deeper understanding of Object Lock should be able to follow along.

I presented a webinar on this topic earlier this year that covers much the same ground as this blog post, so feel free to watch it instead of, or in addition to, reading this article. 

Check Out the Docs

For even more information on Object Lock, check out our Object Lock overview in our Technical Documentation Portal as well as these how-tos about how to enable Object Lock using the Backblaze web UI, Backblaze B2 Native API, and the Backblaze S3 Compatible API:

What Is Object Lock?

In the simplest explanation, Object Lock is a way to lock objects (aka files) stored in Backblaze B2 so that they are immutable—that is, they cannot be deleted or modified, for a given period of time, even by the user account that set the Object Lock rule. Backblaze B2’s implementation of Object Lock was originally known as File Lock, and you may encounter the older terminology in some documentation and articles. For consistency, I’ll use the term “object” in this blog post, but in this context it has exactly the same meaning as “file.”

Object Lock is a widely offered feature included with backup applications such as Veeam and MSP360, allowing organizations to ensure that their backups are not vulnerable to deliberate or accidental deletion or modification for some configurable retention period.

Ransomware mitigation is a common motivation for protecting data with Object Lock. Even if an attacker were to compromise an organization’s systems to the extent of accessing the application keys used to manage data in Backblaze B2, they would not be able to delete or change any locked data. Similarly, Object Lock guards against insider threats, where the attacker may try to abuse legitimate access to application credentials.

Object Lock is also used in industries that store sensitive or personal identifiable information (PII) such as banking, education, and healthcare. Because they work with such sensitive data, regulatory requirements dictate that data be retained for a given period of time, but data must also be deleted in particular circumstances. 

For example, the General Data Protection Regulation (GDPR), an important component of the EU’s privacy laws and an international regulatory standard that drives best practices, may dictate that some data must be deleted when a customer closes their account. A related use case is where data must be preserved due to litigation, where the period for which data must be locked is not fixed and depends on the type of lawsuit at hand. 

To handle these requirements, Backblaze B2 offers two Object Lock modes—compliance and governance—as well as the legal hold feature. Let’s take a look at the differences between them.

Compliance Mode: Near-Absolute Immutability

When objects are locked in compliance mode, not only can they not be deleted or modified while the lock is in place, but the lock also cannot be removed during the specified retention period. It is not possible to remove or override the compliance lock to delete locked data until the lock expires, whether you’re attempting to do so via the Backblaze web UI or either of the S3 Compatible or B2 Native APIs. Similarly, Backblaze Support is unable to unlock or delete data locked under compliance mode in response to a support request, which is a safeguard designed to address social engineering attacks where an attacker impersonates a legitimate user.

What if you inadvertently lock many terabytes of data for several years? Are you on the hook for thousands of dollars of storage costs? Thankfully, no—you have one escape route, which is to close your Backblaze account. Closing the account is a multi-step process that requires access to both the account login credentials and two-factor verification (if it is configured) and results in the deletion of all data in that account, locked or unlocked. This is a drastic step, so we recommend that developers create one or more “burner” Backblaze accounts for use in developing and testing applications that use Object Lock, that can be closed if necessary without disrupting production systems.

There is one lock-related operation you can perform on compliance-locked objects: extending the retention period. In fact, you can keep extending the retention period on locked data any number of times, protecting that data from deletion until you let the compliance lock expire.

Governance Mode: Override Permitted

In our other Object Lock option, objects can be locked in governance mode for a given retention period. But, in contrast to compliance mode, the governance lock can be removed or overridden via an API call, if you have an application key with appropriate capabilities. Governance mode handles use cases that require retention of data for some fixed period of time, with exceptions for particular circumstances.

When I’m trying to remember the difference between compliance and governance mode, I think of the phrase, “Twenty seconds to comply!”, uttered by the ED-209 armed robot in the movie “RoboCop.” It turned out that there was no way to override ED-209’s programming, with dramatic, and fatal, consequences.

ED-209: as implacable as compliance mode.

Legal Hold: Flexible Preservation

While the compliance and governance retention modes lock objects for a given retention period, legal hold is more like a toggle switch: you can turn it on and off at any time, again with an application key with sufficient capabilities. As its name suggests, legal hold is ideal for situations where data must be preserved for an unpredictable period of time, such as while litigation is proceeding.

The compliance and governance modes are mutually exclusive, which is to say that only one may be in operation at any time. Objects locked in governance mode can be switched to compliance mode, but, as you might expect from the above explanation, objects locked in compliance mode cannot be switched to governance mode until the compliance lock expires.

Legal hold, on the other hand, operates independently, and can be enabled and disabled regardless of whether an object is locked in compliance or governance mode.

How does this work? Consider an object that is locked in compliance or governance mode and has legal hold enabled:

  • If the legal hold is removed, the object remains locked until the retention period expires.
  • If the retention period expires, the object remains locked until the legal hold is removed.

Object Lock and Versioning

By default, Backblaze B2 Buckets have versioning enabled, so as you upload successive objects with the same name, previous versions are preserved automatically. None of the Object Lock modes prevent you from uploading a new version of a locked object; the lock is specific to the object version to which it was applied.

You can also hide a locked object so it doesn’t appear in object listings. The hidden version is retained and can be revealed using the Backblaze web UI or an API call.

As you might expect, locked object versions are not subject to deletion by lifecycle rules—any attempt to delete a locked object version via a lifecycle rule will fail.

How to Use Object Lock in Applications

Now that you understand the two modes of Object Lock, plus legal hold, and how they all work with object versions, let’s look at how you can take advantage of this functionality in your applications. I’ll include code samples for Backblaze B2’s S3 Compatible API written in Python, using the AWS SDK, aka Boto3, in this blog post. You can find details on working with Backblaze B2’s Native API in the documentation.

Application Key Capabilities for Object Lock

Every application key you create for Backblaze B2 has an associated set of capabilities; each capability allows access to a specific functionality in Backblaze B2. There are seven capabilities relevant to object lock and legal hold. 

Two capabilities relate to bucket settings:

  1. readBucketRetentions 
  2. writeBucketRetentions

Three capabilities relate to object settings for retention: 

  1. readFileRetentions 
  2. writeFileRetentions 
  3. bypassGovernance

And, two are specific to Object Lock: 

  1. readFileLegalHolds 
  2. writeFileLegalHolds 

The Backblaze B2 documentation contains full details of each capability and the API calls it relates to for both the S3 Compatible API and the B2 Native API.

When you create an application key via the web UI, it is assigned capabilities according to whether you allow it access to all buckets or just a single bucket, and whether you assign it read-write, read-only, or write-only access.

An application key created in the web UI with read-write access to all buckets will receive all of the above capabilities. A key with read-only access to all buckets will receive readBucketRetentions, readFileRetentions, and readFileLegalHolds. Finally, a key with write-only access to all buckets will receive bypassGovernance, writeBucketRetentions, writeFileRetentions, and writeFileLegalHolds.

In contrast, an application key created in the web UI restricted to a single bucket is not assigned any of the above permissions. When an application using such a key uploads objects to its associated bucket, they receive the default retention mode and period for the bucket, if they have been set. The application is not able to select a different retention mode or period when uploading an object, change the retention settings on an existing object, or bypass governance when deleting an object.

You may want to create application keys with more granular permissions when working with Object Lock and/or legal hold. For example, you may need an application restricted to a single bucket to be able to toggle legal hold for objects in that bucket. You can use the Backblaze B2 CLI to create an application key with this, or any other set of capabilities. This command, for example, creates a key with the default set of capabilities for read-write access to a single bucket, plus the ability to read and write the legal hold setting:

% b2 create-key --bucket my-bucket-name my-key-name listBuckets,readBuckets,listFiles,readFiles,shareFiles,writeFiles,deleteFiles,readBucketEncryption,writeBucketEncryption,readBucketReplications,writeBucketReplications,readFileLegalHolds,writeFileLegalHolds

Enabling Object Lock

You must enable Object Lock on a bucket before you can lock any objects therein; you can do this when you create the bucket, or at any time later, but you cannot disable Object Lock on a bucket once it has been enabled. Here’s how you create a bucket with Object Lock enabled:

s3_client.create_bucket(
    Bucket='my-bucket-name',
    ObjectLockEnabledForBucket=True
)

Once a bucket’s settings have Object Lock enabled, you can configure a default retention mode and period for objects that are created in that bucket. Only compliance mode is configurable from the web UI, but you can set governance mode as the default via an API call, like this:

s3_client.put_object_lock_configuration(
    Bucket='my-bucket-name',
    ObjectLockConfiguration={
        'ObjectLockEnabled': 'Enabled',
        'Rule': {
            'DefaultRetention': {
                'Mode': 'GOVERNANCE',
                'Days': 7
            }
        }
    }
)

You cannot set legal hold as a default configuration for the bucket.

Locking Objects

Regardless of whether you set a default retention mode for the bucket, you can explicitly set a retention mode and period when you upload objects, or apply the same settings to existing objects, provided you use an application key with the appropriate writeFileRetentions or writeFileLegalHolds capability.

Both the S3 PutObject operation and Backblaze B2’s b2_upload_file include optional parameters for specifying retention mode and period, and/or legal hold. For example:

s3_client.put_object(
    Body=open('/path/to/local/file', mode='rb'),
    Bucket='my-bucket-name',
    Key='my-object-name',
    ObjectLockMode='GOVERNANCE',
    ObjectLockRetainUntilDate=datetime(
        2023, 9, 7, hour=10, minute=30, second=0
    )
)

Both APIs implement additional operations to get and set retention settings and legal hold for existing objects. Here’s an example of how you apply a governance mode lock:

s3_client.put_object_retention(
    Bucket='my-bucket-name',
    Key='my-object-name',
    VersionId='some-version-id',
    Retention={
        'Mode': 'GOVERNANCE',  # Required, even if mode is not changed
        'RetainUntilDate': datetime(
            2023, 9, 5, hour=10, minute=30, second=0
        )
    }
)

The VersionId parameter is optional: the operation applies to the current object version if it is omitted.

You can also use the web UI to view, but not change, an object’s retention settings, and to toggle legal hold for an object:

A screenshot highlighting where to enable Object Lock via the Backblaze web UI.

Deleting Objects in Governance Mode

As mentioned above, a key difference between the compliance and governance modes is that it is possible to override governance mode to delete an object, given an application key with the bypassGovernance capability. To do so, you must identify the specific object version, and pass a flag to indicate that you are bypassing the governance retention restriction:

# Get object details, including version id of current version
object_info = s3_client.head_object(
    Bucket='my-bucket-name',
    Key='my-object-name'
)

# Delete the most recent object version, bypassing governance
s3_client.delete_object(
    Bucket='my-bucket-name',
    Key='my-object-name',
    VersionId=object_info['VersionId'],
    BypassGovernanceRetention=True
)

There is no way to delete an object in legal hold; the legal hold must be removed before the object can be deleted.

Protect Your Data With Object Lock and Legal Hold

Object Lock is a powerful feature, and with great power… you know the rest. Here are some of the questions you should ask when deciding whether to implement Object Lock in your applications:

  • What would be the impact of malicious or accidental deletion of your application’s data?
  • Should you lock all data according to a central policy, or allow users to decide whether to lock their data, and for how long?
  • If you are storing data on behalf of users, are there special circumstances where a lock must be overridden?
  • Which users should be permitted to set and remove a legal hold? Does it make sense to build this into the application rather than have an administrator use a tool such as the Backblaze B2 CLI to manage legal holds?

If you already have a Backblaze B2 account, you can start working with Object Lock today; otherwise, create an account to get started.

The post Digging Deeper Into Object Lock appeared first on Backblaze Blog | Cloud Storage & Cloud Backup.

How We Achieved Upload Speeds Faster Than AWS S3

Post Syndicated from Pat Patterson original https://www.backblaze.com/blog/2023-performance-improvements/

An image of a city skyline with lines going up to a cloud.

You don’t always need the absolute fastest cloud storage—your performance requirements depend on your use case, business objectives, and security needs. But still, faster is usually better. And Backblaze just announced innovation on B2 Cloud Storage that delivers a lot more speed: most file uploads will now be up to 30% faster than AWS S3. 

Today, I’m diving into all of the details of this performance improvement, how we did it, and what it means for you.

The TL:DR

The Results: Customers who rely on small file uploads (1MB or less) can expect to see 10–30% faster uploads on average based on our tests, all without any change to durability, availability, or pricing. 

What Does This Mean for You? 

All B2 Cloud Storage customers will benefit from these performance enhancements, especially those who use Backblaze B2 as a storage destination for data protection software. Small uploads of 1MB or less make up about 70% of all uploads to B2 Cloud Storage and are common for backup and archive workflows. Specific benefits of the performance upgrades include:

  • Secures data in offsite backup faster.
  • Frees up time for IT administrators to work on other projects.
  • Decreases congestion on network bandwidth.
  • Deduplicates data more efficiently.

Veeam® is dedicated to working alongside our partners to innovate and create a united front against cyber threats and attacks. The new performance improvements released by Backblaze for B2 Cloud Storage furthers our mission to provide radical resilience to our joint customers.

—Andreas Neufert, Vice President, Product Management, Alliances, Veeam

When Can I Expect Faster Uploads?

Today. The performance upgrades have been fully rolled out across Backblaze’s global data regions.

How We Did It

Prior to this work, when a customer uploaded a file to Backblaze B2, the data was written to multiple hard disk drives (HDDs). Those operations had to be completed before returning a response to the client. Now, we write the incoming data to the same HDDs and also, simultaneously, to a pool of solid state drives (SSDs) we call a “shard stash,” waiting only for the HDD writes to make it to the filesystems’ in-memory caches and the SSD writes to complete before returning a response. Once the writes to HDD are complete, we free up the space from the SSDs so it can be reused.

Since writing data to an SSD is much faster than writing to HDDs, the net result is faster uploads. 

That’s just a brief summary; if you’re interested in the technical details (as well as the results of some rigorous testing), read on!

The Path to Performance Upgrades

As you might recall from many Drive Stats blog posts and webinars, Backblaze stores all customer data on HDDs, affectionately termed ‘spinning rust’ by some. We’ve historically reserved SSDs for Storage Pod (storage server) boot drives. 

Until now. 

That’s right—SSDs have entered the data storage chat. To achieve these performance improvements, we combined the performance of SSDs with the cost efficiency of HDDs. First, I’ll dig into a bit of history to add some context to how we went about the upgrades.

HDD vs. SSD

IBM shipped the first hard drive way back in 1957, so it’s fair to say that the HDD is a mature technology. Drive capacity and data rates have steadily increased over the decades while cost per byte has fallen dramatically. That first hard drive, the IBM RAMAC 350, had a total capacity of 3.75MB, and cost $34,500. Adjusting for inflation, that’s about $375,000, equating to $100,000 per MB, or $100 billion per TB, in 2023 dollars.

A photograph of people pushing one of the first hard disk drives into a truck.
An early hard drive shipped by IBM. Source.

Today, the 16TB version of the Seagate Exos X16—an HDD widely deployed in the Backblaze B2 Storage Cloud—retails for around $260, $16.25 per TB. If it had the same cost per byte as the IBM RAMAC 250, it would sell for $1.6 trillion—around the current GDP of China!

SSDs, by contrast, have only been around since 1991, when SanDisk’s 20MB drive shipped in IBM ThinkPad laptops for an OEM price of about $1,000. Let’s consider a modern SSD: the 3.2TB Micron 7450 MAX. Retailing at around $360, the Micron SSD is priced at $112.50 per TB, nearly seven times as much as the Seagate HDD.

So, HDDs easily beat SSDs in terms of storage cost, but what about performance? Here are the numbers from the manufacturers’ data sheets:

Seagate Exos X16 Micron 7450 MAX
Model number ST16000NM001G MTFDKCB3T2TFS
Capacity 16TB 3.2TB
Drive cost $260 $360
Cost per TB $16.25 $112.50
Max sustained read rate (MB/s) 261 6,800
Max sustained write rate (MB/s) 261 5,300
Random read rate, 4kB blocks, IOPS 170/440* 1,000,000
Random write rate, 4kB blocks, IOPS 170/440* 390,000

Since HDD platters rotate at a constant rate, 7,200 RPM in this case, they can transfer more blocks per revolution at the outer edge of the disk than close to the middle—hence the two figures for the X16’s transfer rate.

The SSD is over 20 times as fast at sustained data transfer than the HDD, but look at the difference in random transfer rates! Even when the HDD is at its fastest, transferring blocks from the outer edge of the disk, the SSD is over 2,200 times faster reading data and nearly 900 times faster for writes.

This massive difference is due to the fact that, when reading data from random locations on the disk, the platters have to complete an average of 0.5 revolutions between blocks. At 7,200 rotations per minute (RPM), that means that the HDD spends about 4.2ms just spinning to the next block before it can even transfer data. In contrast, the SSD’s data sheet quotes its latency as just 80µs (that’s 0.08ms) for reads and 15µs (0.015ms) for writes, between 84 and 280 times faster than the spinning disk.

Let’s consider a real-world operation, say, writing 64kB of data. Assuming the HDD can write that data to sequential disk sectors, it will spin for an average of 4.2ms, then spend 0.25ms writing the data to the disk, for a total of 4.5ms. The SSD, in contrast, can write the data to any location instantaneously, taking just 27µs (0.027ms) to do so. This (somewhat theoretical) 167x speed advantage is the basis for the performance improvement.

Why did I choose a 64kB block? As we mentioned in a recent blog post focusing on cloud storage performance, in general, bigger files are better when it comes to the aggregate time required to upload a dataset. However, there may be other requirements that push for smaller files. Many backup applications split data into fixed size blocks for upload as files to cloud object storage. There is a trade-off in choosing the block size: larger blocks improve backup speed, but smaller blocks reduce the amount of storage required. In practice, backup blocks may be as small as 1MB or even 256kB. The 64kB blocks we used in the calculation above represent the shards that comprise a 1MB file.

The challenge facing our engineers was to take advantage of the speed of solid state storage to accelerate small file uploads without breaking the bank.

Improving Write Performance for Small Files

When a client application uploads a file to the Backblaze B2 Storage Cloud, a coordinator pod splits the file into 16 data shards, creates four additional parity shards, and writes the resulting 20 shards to 20 different HDDs, each in a different Pod.

Note: As HDD capacity increases, so does the time required to recover after a drive failure, so we periodically adjust the ratio between data shards and parity shards to maintain our eleven nines durability target. In the past, you’ve heard us talk about 17 + 3 as the ratio but we also run 16 + 4 and our very newest vaults use a 15 + 5 scheme.

Each Pod writes the incoming shard to its local filesystem; in practice, this means that the data is written to an in-memory cache and will be written to the physical disk at some point in the near future. Any requests for the file can be satisfied from the cache, but the data hasn’t actually been persistently stored yet.

We need to be absolutely certain that the shards have been written to disk before we return a “success” response to the client, so each Pod executes an fsync system call to transfer (“flush”) the shard data from system memory through the HDD’s write cache to the disk itself before returning its status to the coordinator. When the coordinator has received at least 19 successful responses, it returns a success response to the client. This ensures that, even if the entire data center was to lose power immediately after the upload, the data would be preserved.

As we explained above, for small blocks of data, the vast majority of the time spent writing the data to disk is spent waiting for the drive platter to spin to the correct location. Writing shards to SSD could result in a significant performance gain for small files, but what about that 7x cost difference?

Our engineers came up with a way to have our cake and eat it too by harnessing the speed of SSDs without a massive increase in cost. Now, upon receiving a file of 1MB or less, the coordinator splits it into shards as before, then simultaneously sends the shards to a set of 20 Pods and a separate pool of servers, each populated with 10 of the Micron SSDs described above—a “shard stash.” The shard stash servers easily win the “flush the data to disk” race and return their status to the coordinator in just a few milliseconds. Meanwhile, each HDD Pod writes its shard to the filesystem, queues up a task to flush the shard data to the disk, and returns an acknowledgement to the coordinator.

Once the coordinator has received replies establishing that at least 19 of the 20 Pods have written their shards to the filesystem, and at least 19 of the 20 shards have been flushed to the SSDs, it returns its response to the client. Again, if power was to fail at this point, the data has already been safely written to solid state storage.

We don’t want to leave the data on the SSDs any longer than we have to, so, each Pod, once it’s finished flushing its shard to disk, signals to the shard stash that it can purge its copy of the shard.

Real-World Performance Gains

As I mentioned above, that calculated 167x performance advantage of SSDs over HDDs is somewhat theoretical. In the real world, the time required to upload a file also depends on a number of other factors—proximity to the data center, network speed, and all of the software and hardware between the client application and the storage device, to name a few.

The first Backblaze region to receive the performance upgrade was U.S. East, located in Reston, Virginia. Over a 12-day period following the shard stash deployment there, the average time to upload a 256kB file was 118ms, while a 1MB file clocked in at 137ms. To replicate a typical customer environment, we ran the test application at our partner Vultr’s New Jersey data center, uploading data to Backblaze B2 across the public internet.

For comparison, we ran the same test against Amazon S3’s U.S. East (Northern Virginia) region, a.k.a. us-east-1, from the same machine in New Jersey. On average, uploading a 256kB file to S3 took 157ms, with a 1MB file taking 153ms.

So, comparing the Backblaze B2 U.S. East region to the Amazon S3 equivalent, we benchmarked the new, improved Backblaze B2 as 30% faster than S3 for 256kB files and 10% faster than S3 for 1MB files.

These low-level tests were confirmed when we timed Veeam Backup & Replication software backing up 1TB of virtual machines with 256k block sizes. Backing the server up to Amazon S3 took three hours and 12 minutes; we measured the same backup to Backblaze B2 at just two hours and 15 minutes, 40% faster than S3.

Test Methodology

We wrote a simple Python test app using the AWS SDK for Python (Boto3). Each test run involved timing 100 file uploads using the S3 PutObject API, with a 10ms delay between each upload. (FYI, the delay is not included in the measured time.) The test app used a single HTTPS connection across the test run, following best practice for API usage. We’ve been running the test on a VM in Vultr’s New Jersey region every six hours for the past few weeks against both our U.S. East region and its AWS neighbor. Latency to the Backblaze B2 API endpoint averaged 5.7ms, to the Amazon S3 API endpoint 7.8ms, as measured across 100 ping requests.

What’s Next?

At the time of writing, shard stash servers have been deployed to all of our data centers, across all of our regions. In fact, you might even have noticed small files uploading faster already. It’s important to note that this particular optimization is just one of a series of performance improvements that we’ve implemented, with more to come. It’s safe to say that all of our Backblaze B2 customers will enjoy faster uploads and downloads, no matter their storage workload.

The post How We Achieved Upload Speeds Faster Than AWS S3 appeared first on Backblaze Blog | Cloud Storage & Cloud Backup.

Big Performance Improvements in Rclone 1.64.0, but Should You Upgrade?

Post Syndicated from Pat Patterson original https://www.backblaze.com/blog/big-performance-improvements-in-rclone-1-64-0-but-should-you-upgrade/

A decorative image showing a diagram about multithreading, as well as the Rclone and Backblaze logos.

Rclone is an open source, command line tool for file management, and it’s widely used to copy data between local storage and an array of cloud storage services, including Backblaze B2 Cloud Storage. Rclone has had a long association with Backblaze—support for Backblaze B2 was added back in January 2016, just two months before we opened Backblaze B2’s public beta, and five months before the official launch—and it’s become an indispensable tool for many Backblaze B2 customers. 

Rclone v1.64.0, released last week, includes a new implementation of multithreaded data transfers, promising much faster data transfer of large files between cloud storage services. 

Does it deliver? Should you upgrade? Read on to find out!

Multithreading to Boost File Transfer Performance

Something of a Swiss Army Knife for cloud storage, rclone can copy files, synchronize directories, and even mount remote storage as a local filesystem. Previous versions of rclone were able to take advantage of multithreading to accelerate the transfer of “large” files (by default at least 256MB), but the benefits were limited. 

When transferring files from a storage system to Backblaze B2, rclone would read chunks of the file into memory in a single reader thread, starting a set of multiple writer threads to simultaneously write those chunks to Backblaze B2. When the source storage was a local disk (the common case) as opposed to remote storage such as Backblaze B2, this worked really well—the operation of moving files from local disk to Backblaze B2 was quite fast. However, when the source was another remote storage—say, transferring from Amazon S3 to Backblaze B2, or even Backblaze B2 to Backblaze B2—data chunks were read into memory by that single reader thread at about the same rate as they could be written to the destination, meaning that all but one of the writer threads were idle.

What’s the Big Deal About Rclone v1.64.0?

Rclone v1.64.0 completely refactors multithreaded transfers. Now rclone starts a single set of threads, each of which both reads a chunk of data from the source service into memory, and then writes that chunk to the destination service, iterating through a subset of chunks until the transfer is complete. The threads transfer their chunks of data in parallel, and each transfer is independent of the others. This architecture is both simpler and much, much faster.

Show Me the Numbers!

How much faster? I spun up a virtual machine (VM) via our compute partner, Vultr, and downloaded both rclone v1.64.0 and the preceding version, v1.63.1. As a quick test, I used Rclone’s copyto command to copy 1GB and 10GB files from Amazon S3 to Backblaze B2, like this:

rclone --no-check-dest copyto s3remote:my-s3-bucket/1gigabyte-test-file b2remote:my-b2-bucket/1gigabyte-test-file

Note that I made no attempt to “tune” rclone for my environment by setting the chunk size or number of threads. I was interested in the out of the box performance. I used the --no-check-dest flag so that rclone would overwrite the destination file each time, rather than detecting that the files were the same and skipping the copy.

I ran each copyto operation three times, then calculated the average time. Here are the results; all times are in seconds:

Rclone version 1GB 10GB
1.63.1 52.87 725.04
1.64.0 18.64 240.45

As you can see, the difference is significant! The new rclone transferred both files around three times faster than the previous version.

So, copying individual large files is much faster with the latest version of rclone. How about migrating a whole bucket containing a variety of file sizes from Amazon S3 to Backblaze B2, which is a more typical operation for a new Backblaze customer? I used rclone’s copy command to transfer the contents of an Amazon S3 bucket—2.8GB of data, comprising 35 files ranging in size from 990 bytes to 412MB—to a Backblaze B2 Bucket:

rclone --fast-list --no-check-dest copyto s3remote:my-s3-bucket b2remote:my-b2-bucket

Much to my dismay, this command failed, returning errors related to the files being corrupted in transfer, for example:

2023/09/18 16:00:37 ERROR : tpcds-benchmark/catalog_sales/20221122_161347_00795_djagr_3a042953-d0a2-4b8d-8c4e-6a88df245253: corrupted on transfer: sizes differ 244695498 vs 0

Rclone was reporting that the transferred files in the destination bucket contained zero bytes, and deleting them to avoid the use of corrupt data.

After some investigation, I discovered that the files were actually being transferred successfully, but a bug in rclone 1.64.0 caused the app to incorrectly interpret some successful transfers as corrupted, and thus delete the transferred file from the destination. 

I was able to use the --ignore-size flag to workaround the bug by disabling the file size check so I could continue with my testing:

rclone --fast-list --no-check-dest --ignore-size copyto s3remote:my-s3-bucket b2remote:my-b2-bucket

A Word of Caution to Control Your Transaction Fees

Note the use of the --fast-list flag. By default, rclone’s method of reading the contents of cloud storage buckets minimizes memory usage at the expense of making a “list files” call for every subdirectory being processed. Backblaze B2’s list files API, b2_list_file_names, is a class C transaction, priced at $0.004 per 1,000 with 2,500 free per day. This doesn’t sound like a lot of money, but using rclone with large file hierarchies can generate a huge number of transactions. Backblaze B2 customers have either hit their configured caps or incurred significant transaction charges on their account when using rclone without the --fast-list flag.

We recommend you always use --fast-list with rclone if at all possible. You can set an environment variable so you don’t have to include the flag in every command:

export RCLONE_FAST_LIST=1

Again, I performed the copy operation three times, and averaged the results:

Rclone version 2.8GB tree
1.63.1 56.92
1.64.0 42.47

Since the bucket contains both large and small files, we see a lesser, but still significant, improvement in performance with rclone v1.64.0—it’s about 33% faster than the previous version with this set of files.

So, Should I Upgrade to the Latest Rclone?

As outlined above, rclone v1.64.0 contains a bug that can cause copy (and presumably also sync) operations to fail. If you want to upgrade to v1.64.0 now, you’ll have to use the --ignore-size workaround. If you don’t want to use the workaround, it’s probably best to hold off until rclone releases v1.64.1, when the bug fix will likely be deployed—I’ll come back and update this blog entry when I’ve tested it!

The post Big Performance Improvements in Rclone 1.64.0, but Should You Upgrade? appeared first on Backblaze Blog | Cloud Storage & Cloud Backup.

How to Use Cloud Replication to Automate Environments

Post Syndicated from Pat Patterson original https://www.backblaze.com/blog/how-to-use-cloud-replication-to-automate-environments/

A decorative image showing a workflow from a computer, to a checklist, to a server stack.

A little over a year ago, we announced general availability of Backblaze Cloud Replication, the ability to automatically copy data across buckets, accounts, or regions. There are several ways to use this service, but today we’re focusing on how to use Cloud Replication to replicate data between environments like testing, staging, and production when developing applications. 

First we’ll talk about why you might want to replicate environments and how to go about it. Then, we’ll get into the details: there are some nuances that might not be obvious when you set out to use Cloud Replication in this way, and we’ll talk about those so that you can replicate successfully.

Other Ways to Use Cloud Replication

In addition to replicating between environments, there are two main reasons you might want to use Cloud Replication:

  • Data Redundancy: Replicating data for security, compliance, and continuity purposes.
  • Data Proximity: Bringing data closer to distant teams or customers for faster access.

Maintaining a redundant copy of your data sounds, well, redundant, but it is the most common use case for cloud replication. It supports disaster recovery as part of a broad cyber resilience framework, reduces the risk of downtime, and helps you comply with regulations.

The second reason (replicating data to bring it geographically closer to end users) has the goal of improving performance and user experience. We looked at this use case in detail in the webinar Low Latency Multi-Region Content Delivery with Fastly and Backblaze.

Four Levels of Testing: Unit, Integration, System, and Acceptance

An image of the character, "The Most Interesting Man in the World", with the title "I don't always test my code, but when I do, I do it in production."
Friendly reminder to both drink and code responsibly (and probably not at the same time).

The Most Interesting Man in the World may test his code in production, but most of us prefer to lead a somewhat less “interesting” life. If you work in software development, you are likely well aware of the various types of testing, but it’s useful to review them to see how different tests might interact with data in cloud object storage.

Let’s consider a photo storage service that stores images in a Backblaze B2 Bucket. There are several real-world Backblaze customers that do exactly this, including Can Stock Photo and CloudSpot, but we’ll just imagine some of the features that any photo storage service might provide that its developers would need to write tests for.

Unit Tests

Unit tests test the smallest components of a system. For example, our photo storage service will contain code to manipulate images in a B2 Bucket, so its developers will write unit tests to verify that each low-level operation completes successfully. A test for thumbnail creation, for example, might do the following:

  1. Directly upload a test image to the bucket.
  2. Run the “‘Create Thumbnail” function against the test image.
  3. Verify that the resulting thumbnail image has indeed been created in the expected location in the bucket with the expected dimensions.
  4. Delete both the test and thumbnail images.

A large application might have hundreds, or even thousands, of unit tests, and it’s not unusual for development teams to set up automation to run the entire test suite against every change to the system to help guard against bugs being introduced during the development process.

Typically, unit tests require a blank slate to work against, with test code creating and deleting files as illustrated above. In this scenario, the test automation might create a bucket, run the test suite, then delete the bucket, ensuring a consistent environment for each test run.

Integration Tests

Integration tests bring together multiple components to test that they interact correctly. In our photo storage example, an integration test might combine image upload, thumbnail creation, and artificial intelligence (AI) object detection—all of the functions executed when a user adds an image to the photo storage service. In this case, the test code would do the following:

  1. Run the Add Image” procedure against a test image of a specific subject, such as a cat.
  2. Verify that the test and thumbnail images are present in the expected location in the bucket, the thumbnail image has the expected dimensions, and an entry has been created in the image index with the “cat” tag.
  3. Delete the test and thumbnail images, and remove the image’s entry from the index.

Again, integration tests operate against an empty bucket, since they test particular groups of functions in isolation, and require a consistent, known environment.

System Tests

The next level of testing, system testing, verifies that the system as a whole operates as expected. System testing can be performed manually by a QA engineer following a test script, but is more likely to be automated, with test software taking the place of the user. For example, the Selenium suite of open source test tools can simulate a user interacting with a web browser.   A system test for our photo storage service might operate as follows:

  1. Open the photo storage service web page.
  2. Click the upload button.
  3. In the resulting file selection dialog, provide a name for the image, navigate to the location of the test image, select it, and click the submit button.
  4. Wait as the image is uploaded and processed.
  5. When the page is updated, verify that it shows that the image was uploaded with the provided name.
  6. Click the image to go to its details.
  7. Verify that the image metadata is as expected. For example, the file size and object tag match the test image and its subject.

When we test the system at this level, we usually want to verify that it operates correctly against real-world data, rather than a synthetic test environment. Although we can generate “dummy data” to simulate the scale of a real-world system, real-world data is where we find the wrinkles and edge cases that tend to result in unexpected system behavior. For example, a German-speaking user might name an image “Schloss Schönburg.” Does the system behave correctly with non-ASCII characters such as ö in image names? Would the developers think to add such names to their dummy data?

A picture of Schönburg Castle in the Rhine Valley at sunset.
Non-ASCII characters: our excuse to give you your daily dose of seratonin. Source.

Acceptance Tests

The final testing level, acceptance testing, again involves the system as a whole. But, where system testing verifies that the software produces correct results without crashing, acceptance testing focuses on whether the software works for the user. Beta testing, where end-users attempt to work with the system, is a form of acceptance testing. Here, real-world data is essential to verify that the system is ready for release.

How Does Cloud Replication Fit Into Testing Environments?

Of course, we can’t just use the actual production environment for system and acceptance testing, since there may be bugs that destroy data. This is where Cloud Replication comes in: we can create a replica of the production environment, complete with its quirks and edge cases, against which we can run tests with no risk of destroying real production data. The term staging environment is often used in connection with acceptance testing, with test(ing) environments used with unit, integration, and system testing.

Caution: Be Aware of PII!

Before we move on to look at how you can put replication into practice, it’s worth mentioning that it’s essential to determine whether you should be replicating the data at all, and what safeguards you should place on replicated data—and to do that, you’ll need to consider whether or not it is or contains personally identifiable information (PII).

The National Institute of Science and Technology (NIST) document SP 800-122 provides guidelines for identifying and protecting PII. In our example photo storage site, if the images include photographs of people that may be used to identify them, then that data may be considered PII.

In most cases, you can still replicate the data to a test or staging environment as necessary for business purposes, but you must protect it at the same level that it is protected in the production environment. Keep in mind that there are different requirements for data protection in different industries and different countries or regions, so make sure to check in with your legal or compliance team to ensure everything is up to standard.

In some circumstances, it may be preferable to use dummy data, rather than replicating real-world data. For example, if the photo storage site was used to store classified images related to national security, we would likely assemble a dummy set of images rather than replicating production data.

How Does Backblaze Cloud Replication Work?

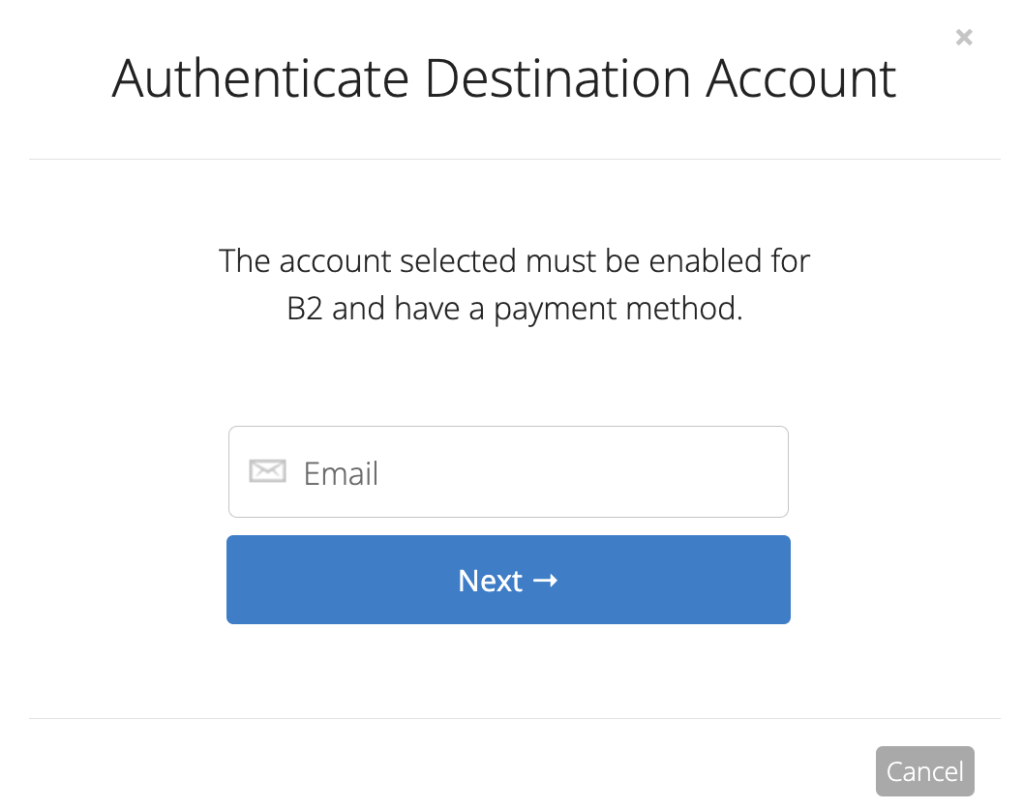
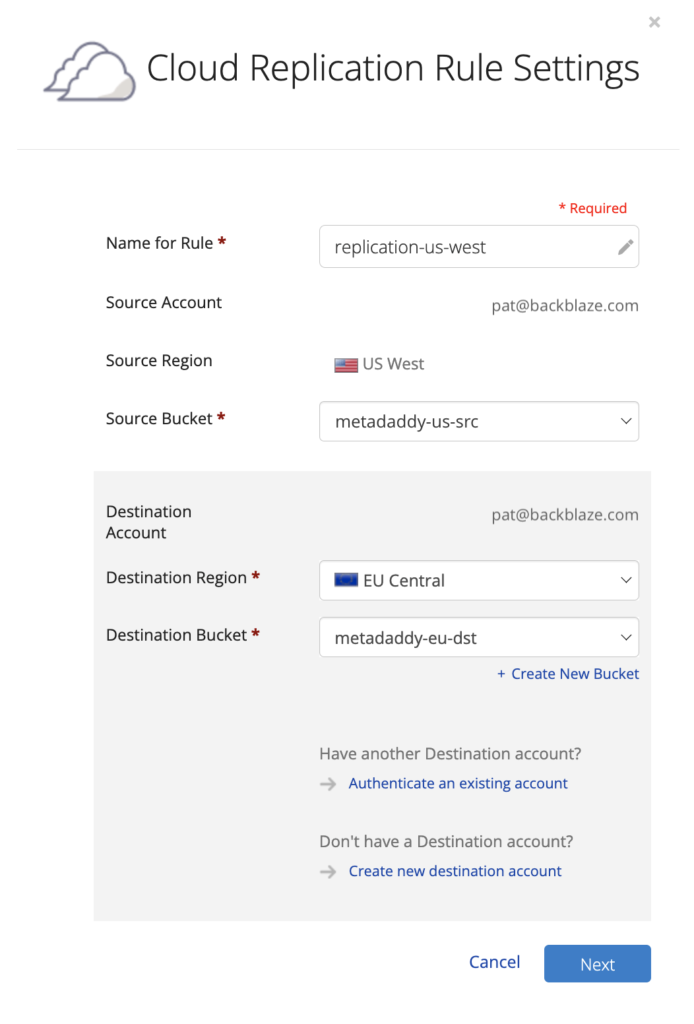
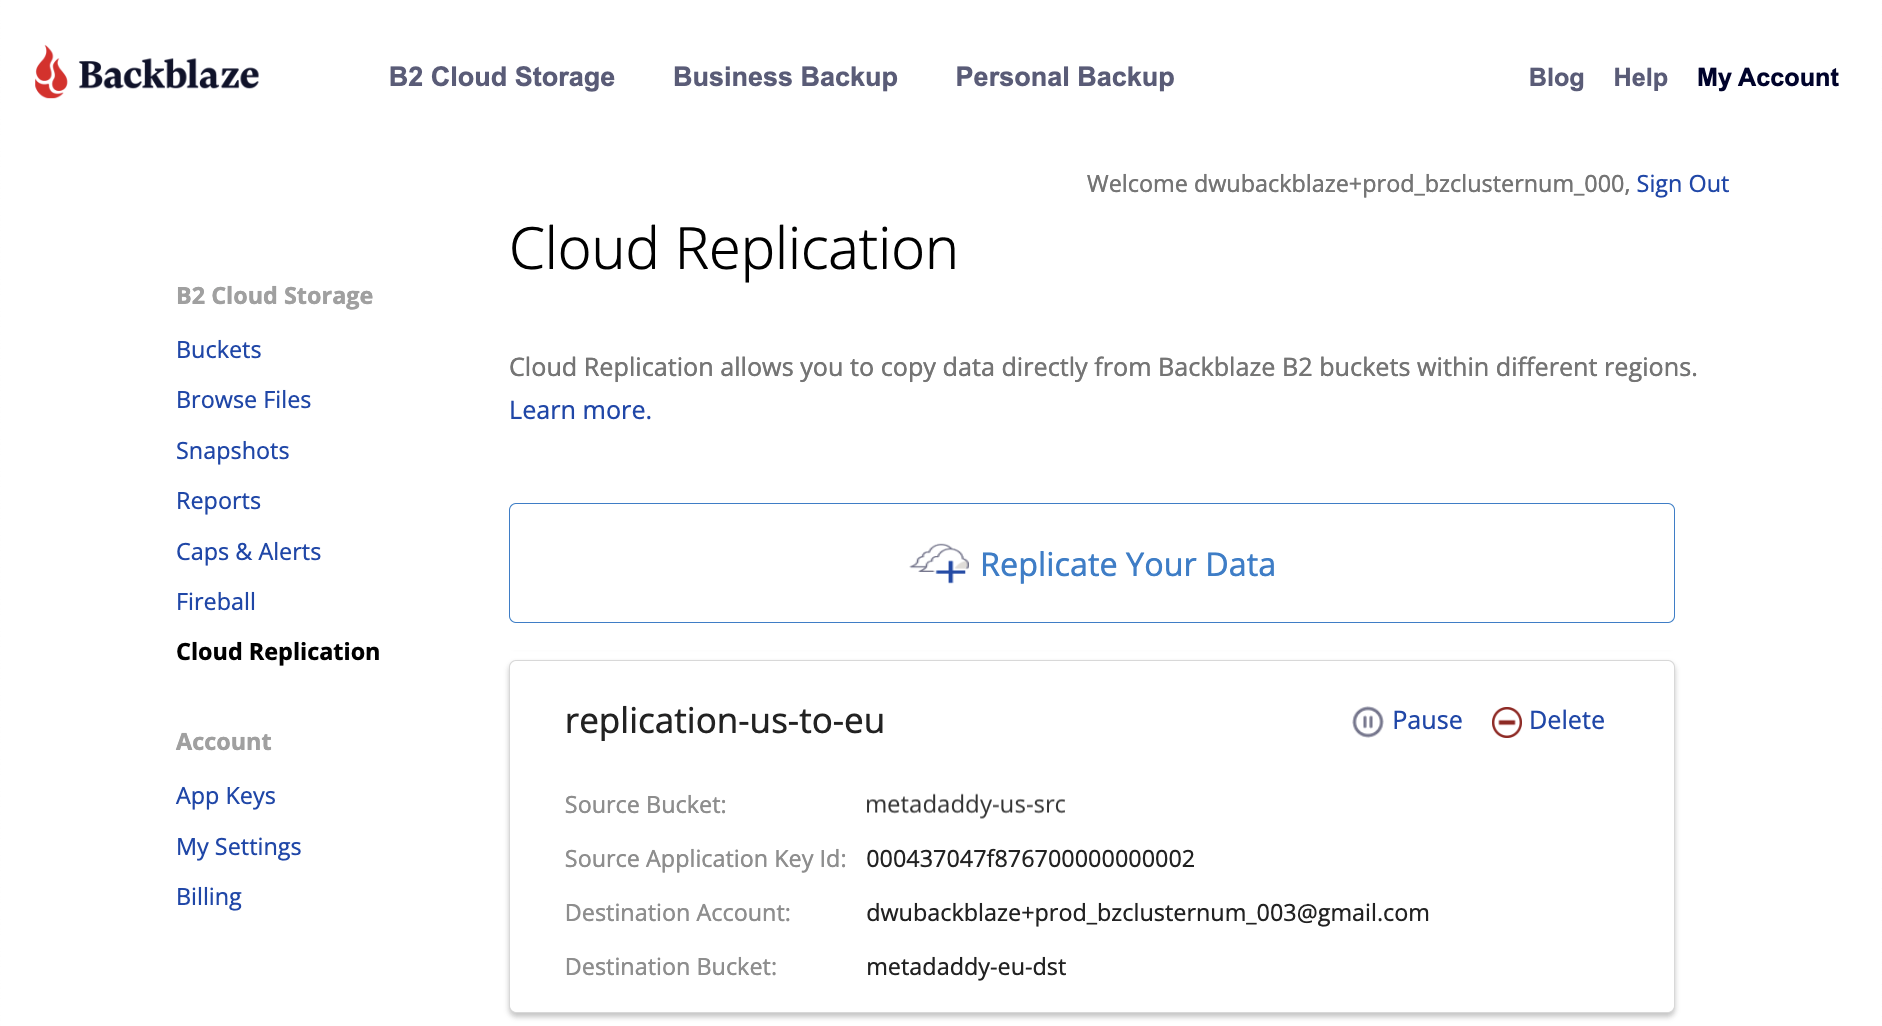
To replicate data in Backblaze B2, you must create a replication rule via either the web console or the B2 Native API. The replication rule specifies the source and destination buckets for replication and, optionally, advanced replication configuration. The source and destination buckets can be located in the same account, different accounts in the same region, or even different accounts in different regions; replication works just the same in all cases. While standard Backblaze B2 Cloud Storage rates apply to replicated data storage, note that Backblaze does not charge service or egress fees for replication, even between regions.

It’s easier to create replication rules in the web console, but the API allows access to two advanced features not currently accessible from the web console: 

  1. Setting a prefix to constrain the set of files to be replicated. 
  2. Excluding existing files from the replication rule. 

Don’t worry: this blog post provides a detailed explanation of how to create replication rules via both methods.

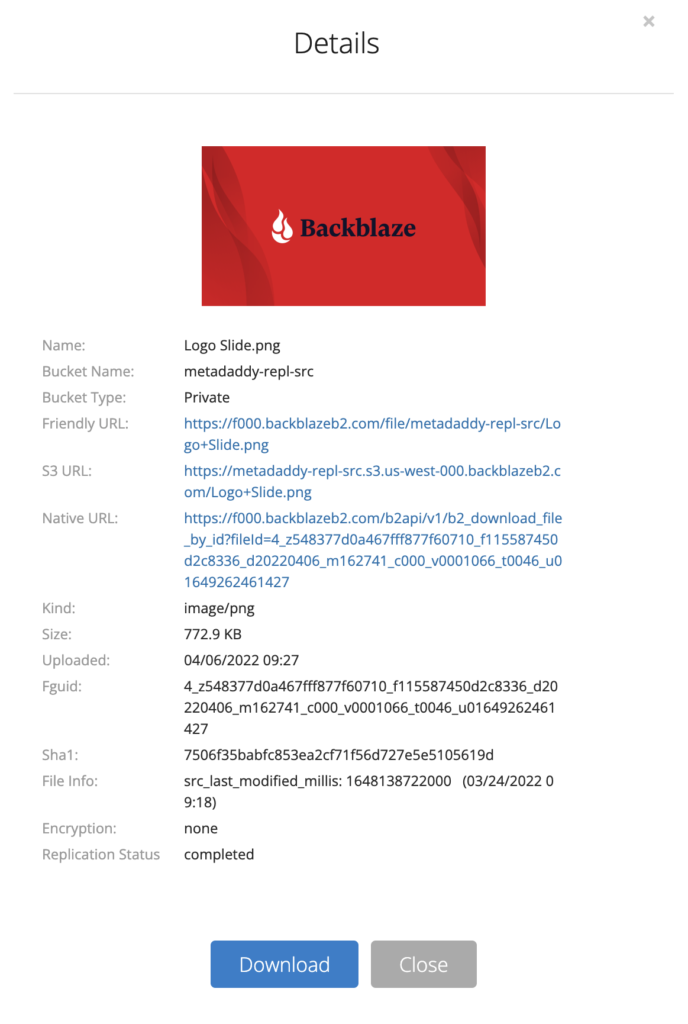
Once you’ve created the replication rule, files will begin to replicate at midnight UTC, and it can take several hours for the initial replication if you have a large quantity of data. Files uploaded after the initial replication rule is active are automatically replicated within a few seconds, depending on file size. You can check whether a given file has been replicated either in the web console or via the b2-get-file-info API call. Here’s an example using curl at the command line:

 % curl -s -H "Authorization: ${authorizationToken}" \
    -d "{\"fileId\":  \"${fileId}\"}" \
    "${apiUrl}/b2api/v2/b2_get_file_info" | jq .
{
  "accountId": "15f935cf4dcb",
  "action": "upload",
  "bucketId": "11d5cf096385dc5f841d0c1b",
  ...
  "replicationStatus": "pending",
  ...
}

In the example response, replicationStatus returns the response pending; once the file has been replicated, it will change to completed.

Here’s a short Python script that uses the B2 Python SDK to retrieve replication status for all files in a bucket, printing the names of any files with pending status:

import argparse
import os

from dotenv import load_dotenv

from b2sdk.v2 import B2Api, InMemoryAccountInfo
from b2sdk.replication.types import ReplicationStatus

# Load credentials from .env file into environment
load_dotenv()

# Read bucket name from the command line
parser = argparse.ArgumentParser(description='Show files with "pending" replication status')
parser.add_argument('bucket', type=str, help='a bucket name')
args = parser.parse_args()

# Create B2 API client and authenticate with key and ID from environment
b2_api = B2Api(InMemoryAccountInfo())
b2_api.authorize_account("production", os.environ["B2_APPLICATION_KEY_ID"], os.environ["B2_APPLICATION_KEY"])

# Get the bucket object
bucket = b2_api.get_bucket_by_name(args.bucket)

# List all files in the bucket, printing names of files that are pending replication
for file_version, folder_name in bucket.ls(recursive=True):
    if file_version.replication_status == ReplicationStatus.PENDING:
        print(file_version.file_name)

Note: Backblaze B2’s S3-compatible API (just like Amazon S3 itself) does not include replication status when listing bucket contents—so for this purpose, it’s much more efficient to use the B2 Native API, as used by the B2 Python SDK.

You can pause and resume replication rules, again via the web console or the API. No files are replicated while a rule is paused. After you resume replication, newly uploaded files are replicated as before. Assuming that the replication rule does not exclude existing files, any files that were uploaded while the rule was paused will be replicated in the next midnight-UTC replication job.

How to Replicate Production Data for Testing

The first question is: does your system and acceptance testing strategy require read-write access to the replicated data, or is read-only access sufficient?

Read-Only Access Testing

If read-only access suffices, it might be tempting to create a read-only application key to test against the production environment, but be aware that testing and production make different demands on data. When we run a set of tests against a dataset, we usually don’t want the data to change during the test. That is: the production environment is a moving target, and we don’t want the changes that are normal in production to interfere with our tests. Creating a replica gives you a snapshot of real-world data against which you can run a series of tests and get consistent results.

It’s straightforward to create a read-only replica of a bucket: you just create a replication rule to replicate the data to a destination bucket, allow replication to complete, then pause replication. Now you can run system or acceptance tests against a static replica of your production data.

To later bring the replica up to date, simply resume replication and wait for the nightly replication job to complete. You can run the script shown in the previous section to verify that all files in the source bucket have been replicated.

Read-Write Access Testing

Alternatively, if, as is usually the case, your tests will create, update, and/or delete files in the replica bucket, there is a bit more work to do. Since testing intends to change the dataset you’ve replicated, there is no easy way to bring the source and destination buckets back into sync—changes may have happened in both buckets while your replication rule was paused. 

In this case, you must delete the replication rule, replicated files, and the replica bucket, then create a new destination bucket and rule. You can reuse the destination bucket name if you wish since, internally, replication status is tracked via the bucket ID.

Always Test Your Code in an Environment Other Than Production

In short, we all want to lead interesting lives—but let’s introduce risk in a controlled way, by testing code in the proper environments. Cloud Replication lets you achieve that end while remaining nimble, which means you get to spend more time creating interesting tests to improve your product and less time trying to figure out why your data transformed in unexpected ways.  

Now you have everything you need to create test and staging environments for applications that use Backblaze B2 Cloud Object Storage. If you don’t already have a Backblaze B2 account, sign up here to receive 10GB of storage, free, to try it out.

The post How to Use Cloud Replication to Automate Environments appeared first on Backblaze Blog | Cloud Storage & Cloud Backup.
Discover the Secret to Lightning-Fast Big Data Analytics: Backblaze + Vultr Beats Amazon S3/EC2 by 39%

Post Syndicated from Pat Patterson original https://www.backblaze.com/blog/discover-the-secret-to-lightning-fast-big-data-analytics-backblaze-vultr-beats-amazon-s3-ec2-by-39/

A decorative image showing the Vultr and Backblaze logos on a trophy.

Over the past few months, we’ve explained how to store and query analytical data in Backblaze B2, and how to query the Drive Stats dataset using the Trino SQL query engine. Prompted by the recent expansion of Backblaze’s strategic partnership with Vultr, we took a closer look at how the Backblaze B2 + Vultr Cloud Compute combination performs for big data analytical workloads in comparison to similar services on Amazon Web Services (AWS). 

Running an industry-standard benchmark, and because AWS is almost five times more expensive, we were expecting to see a trade-off between better performance on the single cloud AWS deployment and lower cost on the multi-cloud Backblaze/Vultr equivalent, but we were very pleasantly surprised by the results we saw.

Spoiler alert: not only was the Backblaze B2 + Vultr combination significantly cheaper than Amazon S3/EC2, it also outperformed the Amazon services by a wide margin. Read on for the details—we cover a lot of background on this experiment, but you can skip straight ahead to the results of our tests if you’d rather get to the good stuff.

First, Some History: The Evolution of Big Data Storage Architecture

Back in 2004, Google’s MapReduce paper lit a fire under the data processing industry, proposing a new “programming model and an associated implementation for processing and generating large datasets.” MapReduce was applicable to many real-world data processing tasks, and, as its name implies, presented a straightforward programming model comprising two functions (map and reduce), each operating on sets of key/value pairs. This model allowed programs to be automatically parallelized and executed on large clusters of commodity machines, making it well suited for tackling “big data” problems involving datasets ranging into the petabytes.

The Apache Hadoop project, founded in 2005, produced an open source implementation of MapReduce, as well as the Hadoop Distributed File System (HDFS), which handled data storage. A Hadoop cluster could comprise hundreds, or even thousands, of nodes, each one responsible for both storing data to disk and running MapReduce tasks. In today’s terms, we would say that each Hadoop node combined storage and compute.

With the advent of cloud computing, more flexible big data frameworks, such as Apache Spark, decoupled storage from compute. Now organizations could store petabyte-scale datasets in cloud object storage, rather than on-premises clusters, with applications running on cloud compute platforms. Fast intra-cloud network connections and the flexibility and elasticity of the cloud computing environment more than compensated for the fact that big data applications were now accessing data via the network, rather than local storage.

Today we are moving into the next phase of cloud computing. With specialist providers such as Backblaze and Vultr each focusing on a core capability, can we move storage and compute even further apart, into different data centers? Our hypothesis was that increased latency and decreased bandwidth would severely impact performance, perhaps by a factor of two or three, but cost savings might still make for an attractive alternative to colocating storage and compute at a hyperscaler such as AWS. The tools we chose to test this hypothesis were the Trino open source SQL Query Engine and the TPC-DS benchmark.

Benchmarking Deployment Options With TPC-DS

The TPC-DS benchmark is widely used to measure the performance of systems operating on online analytical processing (OLAP) workloads, so it’s well suited for comparing deployment options for big data analytics.

A formal TPC-DS benchmark result measures query response time in single-user mode, query throughput in multiuser mode and data maintenance performance, giving a price/performance metric that can be used to compare systems from different vendors. Since we were focused on query performance rather than data loading, we simply measured the time taken for each configuration to execute TPC-DS’s set of 99 queries.

Helpfully, Trino includes a tpcds catalog with a range of schemas each containing the tables and data to run the benchmark at a given scale. After some experimentation, we chose scale factor 10, corresponding to approximately 10GB of raw test data, as it was a good fit for our test hardware configuration. Although this test dataset was relatively small, the TPC-DS query set simulates a real-world analytical workload of complex queries, and took several minutes to complete on the test systems. It would be straightforward, though expensive and time consuming, to repeat the test for larger scale factors.

We generated raw test data from the Trino tpcds catalog with its sf10 (scale factor 10) schema, resulting in 3GB of compressed Parquet files. We then used Greg Rahn’s version of the TPC-DS benchmark tools, tpcds-kit, to generate a standard TPC-DS 99-query script, modifying the script syntax slightly to match Trino’s SQL dialect and data types. We ran the set of 99 queries in single user mode three times on each of three combinations of compute/storage platforms: EC2/S3, EC2/B2 and Vultr/B2. The EC2/B2 combination allowed us to isolate the effect of moving storage duties to Backblaze B2 while keeping compute on Amazon EC2.

A note on data transfer costs: AWS does not charge for data transferred between an Amazon S3 bucket and an Amazon EC2 instance in the same region. In contrast, the Backblaze + Vultr partnership allows customers free data transfer between Backblaze B2 and Vultr Cloud Compute across any combination of regions.

Deployment Options for Cloud Compute and Storage

AWS

The EC2 configuration guide for Starburst Enterprise, the commercial version of Trino, recommends a r4.4xlarge EC2 instance, a memory-optimized instance offering 16 virtual CPUs and 122 GiB RAM, running Amazon Linux 2.

Following this lead, we configured an r4.4xlarge instance with 32GB of gp2 SSD local disk storage in the us-west-1 (Northern California) region. The combined hourly cost for the EC2 instance and SSD storage was $1.19.

We created an S3 bucket in the same us-west-1 region. After careful examination of the Amazon S3 Pricing Guide, we determined that the storage cost for the data on S3 was $0.026 per GB per month.

Vultr

We selected Vultr’s closest equivalent to the EC2 r4.4xlarge instance: a Memory Optimized Cloud Compute instance with 16 vCPUs, 128GB RAM plus 800GB of NVMe local storage, running Debian 11, at a cost of $0.95/hour in Vultr’s Silicon Valley region. Note the slight difference in the amount of available RAM–Vultr’s virtual machine (VM) includes an extra 6GB, despite its lower cost.

Backblaze B2

We created a Backblaze B2 Bucket located in the Sacramento, California data center of our U.S. West region, priced at $0.005/GB/month, about one-fifth the cost of Amazon S3.

Trino Configuration

We used the official Trino Docker image configured identically on the two compute platforms. Although a production Trino deployment would typically span several nodes, for simplicity, time savings, and cost-efficiency we brought up a single-node test deployment. We dedicated 78% of the VM’s RAM to Trino, and configured its Hive connector to access the Parquet files via the S3 compatible API. We followed the Trino/Backblaze B2 getting started tutorial to ensure consistency between the environments.

Benchmark Results

The table shows the time taken to complete the TPC-DS benchmark’s 99 queries. We calculated the mean of three runs for each combination of compute and storage. All times are in minutes and seconds, and a lower time is better.

A graph showing TPC/DS benchmark query times.

We used Trino on Amazon EC2 accessing data on Amazon S3 as our starting point; this configuration ran the benchmark in 20:43. 

Next, we kept Trino on Amazon EC2 and moved the data to Backblaze B2. We saw a surprisingly small difference in performance, considering that the data was no longer located in the same AWS region as the application. The EC2/B2 Storage Cloud combination ran the benchmark just 38 seconds slower (that’s about 3%), clocking in at 21:21.

When we looked at Trino running on Vultr accessing data on Amazon S3, we saw a significant increase in performance. On Vultr/S3, the benchmark ran in 15:07, 27% faster than the EC2/S3 combination. We suspect that this is due to Vultr providing faster vCPUs, more available memory, faster networking, or a combination of the three. Determining the exact reason for the performance delta would be an interesting investigation, but was out of scope for this exercise.

Finally, looking at Trino on Vultr accessing data on Backblaze B2, we were astonished to see that not only did this combination post the fastest benchmark time of all, Trino on Vultr/Backblaze B2’s time of 12:39 was 16% faster than Vultr/S3 and 39% faster than Trino on EC2/S3!

Note: this is not a formal TPC-DS result, and the query times generated cannot be compared outside this benchmarking exercise.

The Bottom Line: Higher Performance at Lower Cost

For the scale factor 10 TPC-DS data set and queries, with comparably specified instances, Trino running on Vultr retrieving data from B2 is 39% faster than Trino on EC2 pulling data from S3, with 20% lower compute cost and 76% lower storage cost.

You can get started with both Backblaze B2 and Vultr free of charge—click here to sign up for Backblaze B2, with 10GB free storage forever, and click here for $250 of free credit at Vultr.

The post Discover the Secret to Lightning-Fast Big Data Analytics: Backblaze + Vultr Beats Amazon S3/EC2 by 39% appeared first on Backblaze Blog | Cloud Storage & Cloud Backup.

Go Wild with Wildcards in the Backblaze B2 Command Line Tool 3.7.1

Post Syndicated from Pat Patterson original https://www.backblaze.com/blog/go-wild-with-wildcards-in-backblaze-b2-command-line-tool-3-7-1/

File transfer tools such as Cyberduck, FileZilla Pro, and Transmit implement a graphical user interface (GUI), which allows users to manage and transfer files across local storage and any number of services, including cloud object stores such as Backblaze B2 Cloud Storage. Some tasks, however, require a little more power and flexibility than a GUI can provide. This is where a command line interface (CLI) shines. A CLI typically provides finer control over operations than a GUI tool, and makes it straightforward to automate repetitive tasks. We recently released version 3.7.0 (and then, shortly thereafter, version 3.7.1) of the Backblaze B2 Command Line Tool, alongside version 1.19.0 of the underlying Backblaze B2 Python SDK. Let’s take a look at the highlights in the new releases, and why you might want to use the Backblaze B2 CLI rather than the AWS equivalent.

Battle of the CLI’s: Backblaze B2 vs. AWS

As you almost certainly already know, Backblaze B2 has an S3-compatible API in addition to its original API, now known as the B2 Native API. In most cases, we recommend using the S3-compatible API, since a rich ecosystem of S3 tools and knowledge has evolved over the years.

While the AWS CLI works perfectly well with Backblaze B2, and we explain how to use it in our B2 Developer Quick-Start Guide, it’s slightly clunky. The AWS CLI allows you to set your access key id and secret access key via either environment variables or a configuration file, but you must override the default endpoint on the command line with every command, like this:

% aws --endpoint-url https://s3.us-west-004.backblazeb2.com s3api list-buckets

This is very tiresome if you’re working interactively at the command line! In contrast, the B2 CLI retrieves the correct endpoint from Backblaze B2 when it authenticates, so the command line is much more concise:

% b2 list-buckets

Additionally, the CLI provides fine-grain access to Backblaze B2-specific functionality, such as application key management and replication.

Automating Common Tasks with the B2 Command Line Tool

If you’re already familiar with CLI tools, feel free to skip to the next section.

Imagine you’ve uploaded a large number of WAV files to a Backblaze B2 Bucket for transcoding into .mp3 format. Once the transcoding is complete, and you’ve reviewed a sample of the .mp3 files, you decide that you can delete the .wav files. You can do this in a GUI tool, opening the bucket, navigating to the correct location, sorting the files by extension, selecting all of the .wav files, and deleting them. However, the CLI can do this in a single command:

% b2 rm --withWildcard --recursive my-bucket 'audio/*.wav'

If you want to be sure you’re deleting the correct files, you can add the --dryRun option to show the files that would be deleted, rather than actually deleting them:

% b2 rm --dryRun --withWildcard --recursive my-bucket 'audio/*.wav'
audio/aardvark.wav
audio/barracuda.wav
...
audio/yak.wav
audio/zebra.wav

You can find a complete list of the CLI’s commands and their options in the documentation.

Let’s take a look at what’s new in the latest release of the Backblaze B2 CLI.

Major Changes in B2 Command Line Tool Version 3.7.0

New rm command

The most significant addition in 3.7.0 is a whole new command: rm. As you might expect, rm removes files. The CLI has always included the low-level delete-file-version command (to delete a single file version) but you had to call that multiple times and combine it with other commands to remove all versions of a file, or to remove all files with a given prefix.

The new rm command is significantly more powerful, allowing you to delete all versions of a file in a single command:

% b2 rm --versions --withWildcard --recursive my-bucket images/san-mateo.png

Let’s unpack that command:

  • %: represents the command shell’s prompt. (You don’t type this.)
  • b2: the B2 CLI executable.
  • rm: the command we’re running.
  • --versions: apply the command to all versions. Omitting this option applies the command to just the most recent version.
  • --withWildcard: treat the folderName argument as a pattern to match the file name.
  • --recursive: descend into all folders. (This is required with –withWildcard.)
  • my-bucket: the bucket name.
  • images/san-mateo.png: the file to be deleted. There are no wildcard characters in the pattern, so the file name must match exactly. Note: there is no leading ‘/’ in Backblaze B2 file names.

As mentioned above, the --dryRun argument allows you to see what files would be deleted, without actually deleting them. Here it is with the ‘*’ wildcard to apply the command to all versions of the .png files in /images. Note the use of quotes to avoid the command shell expanding the wildcard:

% b2 rm --dryRun --versions --withWildcard --recursive my-bucket 'images/*.png'
images/amsterdam.png
images/sacramento.png

DANGER ZONE: by omitting --withWildcard and the folderName argument, you can delete all of the files in a bucket. We strongly recommend you use --dryRun first, to check that you will be deleting the correct files.

% b2 rm --dryRun --versions –recursive my-bucket
index.html
images/amsterdam.png
images/phoenix.jpeg
images/sacramento.png
stylesheets/style.css

New --withWildcard option for the ls command

The ls command gains the --withWildcard option. It operates identically as described above. In fact, b2 rm --dryRun --withWildcard --recursive executes the exact same code as b2 ls --withWildcard --recursive. For example:

% b2 ls --withWildcard --recursive my-bucket 'images/*.png'
images/amsterdam.png
images/sacramento.png

You can combine --withWildcard with any of the existing options for ls, for example --long:

% b2 ls --long --withWildcard --recursive my-bucket 'images/*.png'
4_z71d55dummyid381234ed0c1b_f108f1dummyid163b_d2dummyid_m165048_c004
_v0402014_t0016_u01dummyid48198 upload 2023-02-09 16:50:48 714686 images/amsterdam.png
4_z71d55dummyid381234ed0c1b_f1149bdummyid1141_d2dummyid_m165048_c004
_v0402010_t0048_u01dummyid48908 upload 2023-02-09 16:50:48 549261 images/sacramento.png

New --incrementalMode option for upload-file and sync

The new --incrementalMode option saves time and bandwidth when working with files that grow over time, such as log files, by only uploading the changes since the last upload. When you use the --incrementalMode option with upload-file or sync, the B2 CLI looks for an existing file in the bucket with the b2FileName that you supplied, and notes both its length and SHA-1 digest. Let’s call that length l. The CLI then calculates the SHA-1 digest of the first l bytes of the local file. If the digests match, then the CLI can instruct Backblaze B2 to create a new file comprising the existing file and the remaining bytes of the local file.

That was a bit complicated, so let’s look at a concrete example. My web server appends log data to a file, access.log. I’ll see how big it is, get its SHA-1 digest, and upload it to a B2 Bucket:

% ls -l access.log
-rw-r--r-- 1 ppatterson staff 5525849 Feb 9 15:55 access.log

% sha1sum access.log
ff46904e56c7f9083a4074ea3d92f9be2186bc2b access.log

The upload-file command outputs all of the file’s metadata, but we’ll focus on the SHA-1 digest, file info, and size.

% b2 upload-file my-bucket access.log access.log
...
{
...
"contentSha1": "ff46904e56c7f9083a4074ea3d92f9be2186bc2b",
...
"fileInfo": {
"src_last_modified_millis": "1675986940381"
},
...
"size": 5525849,
...
}

As you might expect, the digest and size match those of the local file.

Time passes, and our log file grows. I’ll first upload it as a different file, so that we can see the default behavior when the B2 Cloud Storage file is simply replaced:

% ls -l access.log
-rw-r--r-- 1 ppatterson staff 11047145 Feb 9 15:57 access.log

% sha1sum access.log
7c97866ff59330b67aa96d7a481578d62e030788 access.log

% b2 upload-file my-bucket access.log new-access.log
{
...
"contentSha1": "7c97866ff59330b67aa96d7a481578d62e030788",
...
"fileInfo": {
"src_last_modified_millis": "1675987069538"
},
...
"size": 11047145,
...
}

Everything is as we might expect—the CLI uploaded 11,047,145 bytes to create a new file, which is 5,521,296 bytes bigger than the initial upload.

Now I’ll use the --incrementalMode option to replace the first Backblaze B2 file:

% b2 upload-file --quiet my-bucket access.log access.log
...
{
...
"contentSha1": "none",
...
"fileInfo": {
"large_file_sha1": "7c97866ff59330b67aa96d7a481578d62e030788",
"plan_id": "ea6b099b48e7eb7fce01aba18dbfdd72b56eb0c2",
"src_last_modified_millis": "1675987069538"
},
...
"size": 11047145,
...
}

The digest is exactly the same, but it has moved from contentSha1 to fileInfo.large_file_sha1, indicating that the file was uploaded as separate parts, resulting in a large file. The CLI didn’t need to upload the initial 5,525,849 bytes of the local file; it instead instructed Backblaze B2 to combine the existing file with the final 5,521,296 bytes of the local file to create a new version of the file.

There are several more new features and fixes to existing functionality in version 3.7.0—make sure to check out the B2 CLI changelog for a complete list.

Major Changes in B2 Python SDK 1.19.0

Most of the changes in the B2 Python SDK support the new features in the B2 CLI, such as adding wildcard matching to the Bucket.ls operation and adding support for incremental upload and sync. Again, you can inspect the B2 Python SDK changelog for a comprehensive list.

Get to Grips with B2 Command Line Tool Version 3.7.0 3.7.1

Whether you’re working on Windows, Mac or Linux, it’s straightforward to install or update the B2 CLI; full instructions are provided in the Backblaze B2 documentation.

Note that the latest version is now 3.7.1. The only changes from 3.7.0 are a handful of corrections to help text and that the Mac binary is no longer provided, due to shortcomings in the Mac version of PyInstaller. Instead, we provide the Mac version of the CLI via the Homebrew package manager.

The post Go Wild with Wildcards in the Backblaze B2 Command Line Tool 3.7.1 appeared first on Backblaze Blog | Cloud Storage & Cloud Backup.

Build a Cloud Storage App in 30 Minutes

Post Syndicated from Pat Patterson original https://www.backblaze.com/blog/build-a-cloud-storage-app-in-30-minutes/

The working title for this developer tutorial was originally the “Polyglot Quickstart.” It made complete sense to me—it’s a “multilingual” guide that shows developers how to get started with Backblaze B2 using different programming languages—Java, Python, and the command line interface (CLI). But the folks on our publishing and technical documentation teams wisely advised against such an arcane moniker.

Editor’s Note

Full disclosure, I had to look up the word polyglot. Thanks, Merriam-Webster, for the assist.

Polyglot, adjective.
1a: speaking or writing several languages: multilingual
1b: composed of numerous linguistic groups; a polyglot population
2: containing matter in several languages; a polyglot sign
3: composed of elements from different languages
4: widely diverse (as in ethnic or cultural origins); a polyglot cuisine

Fortunately for you, readers, and you, Google algorithms, we landed on the much easier to understand Backblaze B2 Developer Quick-Start Guide, and we’re launching it today. Read on to learn all about it.

Start Building Applications on Backblaze B2 in 30 Minutes or Less

Yes, you heard that correctly. Whether or not you already have experience working with cloud object storage, this tutorial will get you started building applications that use Backblaze B2 Cloud Storage in 30 minutes or less. You’ll learn how scripts and applications can interact with Backblaze B2 via the AWS SDKs and CLI and the Backblaze S3-compatible API.

The tutorial covers how to:

  • Sign up for a Backblaze B2 account.
  • Create a public bucket, upload and view files, and create an application key using the Backblaze B2 web console.
  • Interact with the Backblaze B2 Storage Cloud using Java, Python, and the CLI: listing the contents of buckets, creating new buckets, and uploading files to buckets.

This first release of the tutorial covers Java, Python, and the CLI. We’ll add more programming languages in the future. Right now we’re looking at JavaScript, C#, and Go. Let us know in the comments if there’s another language we should cover!

➔ Check Out the Guide

What Else Can You Do?

If you already have experience with Amazon S3, the Quick-Start Guide shows how to use the tools and techniques you already know with Backblaze B2. You’ll be able to quickly build new applications and modify existing ones to interact with the Backblaze Storage Cloud. If you’re new to cloud object storage, on the other hand, this is the ideal way to get started.

Watch this space for future tutorials on topics such as:

  • Downloading files from a private bucket programmatically.
  • Uploading large files by splitting them into chunks.
  • Creating pre-signed URLs so that users can access private files securely.
  • Deleting versions, files and buckets.

Want More?

Have questions about any of the above? Curious about how to use Backblaze B2 with your specific application? Already a wiz at this and ready to do more? Here’s how you can get in touch and get involved:

  • Sign up for Backblaze’s virtual user group.
  • Find us at Developer Week.
  • Let us know in the comments which programming languages we should add to the Quick-Start Guide.

The post Build a Cloud Storage App in 30 Minutes appeared first on Backblaze Blog | Cloud Storage & Cloud Backup.

How to Serve Data From a Private Bucket with a Cloudflare Worker

Post Syndicated from Pat Patterson original https://www.backblaze.com/blog/how-to-serve-data-from-a-private-bucket-with-a-cloudflare-worker/

Customers storing data in Backblaze B2 Cloud Storage enjoy zero-cost downloads via our Content Delivery Network (CDN) partners: Cloudflare, Fastly, and Bunny.net. Configuring a CDN to proxy access to a Backblaze B2 Bucket is straightforward and improves the user experience, since the CDN caches data close to end-users. Ensuring that end-users can only access content via the CDN, and not directly from the bucket, requires a little more effort. A new technical article, Cloudflare Workers for Backblaze B2, provides the steps to serve content from Backblaze B2 via your own Cloudflare Worker.

In this blog post, I’ll explain why you might want to prevent direct downloads from your Backblaze B2 Bucket, and how you can use a Cloudflare Worker to do so.

Why Prevent Direct Downloads?

As mentioned above, Backblaze’s partnerships with CDN providers allow our customers to deliver content to end users with zero costs for data egress from Backblaze to the CDN. To illustrate why you might want to serve data to your end users exclusively through the CDN, let’s imagine you’re creating a website, storing your website’s images in a Backblaze B2 Bucket with public-read access, acme-images.

For the initial version, you build web pages with direct links to the images of the form https://acme-images.s3.us-west-001.backblazeb2.com/logos/acme.png. As users browse your site, their browsers will download images directly from Backblaze B2. Everything works just fine for users near the Backblaze data center hosting your bucket, but the further a user is from that data center, the longer it will take each image to appear on screen. No matter how fast the network connection, there’s no getting around the speed of light!

Aside from the degraded user experience, there are costs associated with end users downloading data directly from Backblaze. The first GB of data downloaded each day is free, then we charge $0.01 for each subsequent GB. Depending on your provider’s pricing plan, adding a CDN to your architecture can both reduce download costs and improve the user experience, as the CDN will transfer data through its own network and cache content close to end users. Another detail to note when comparing costs is that Backblaze and Cloudflare’s Bandwidth Alliance means that data flows from Backblaze to Cloudflare free of download charges, unlike data flowing from, for example, Amazon S3 to Cloudflare.

Typically, you need to set up a custom domain, say images.acme.com, that resolves to an IP address at the CDN. You then configure one or more origin servers or backends at the CDN with your Backblaze B2 Buckets’ S3 endpoints. In this example, we’ll use a single bucket, with endpoint acme-images.s3.us-west-001.backblazeb2.com, but you might use Cloud Replication to replicate content between buckets in multiple regions for greater resilience.

Now, after you update the image links in your web pages to the form https://images.acme.com/logos/acme.png, your users will enjoy an improved experience, and your operating costs will be reduced.

As you might have guessed, however, there is one chink in the armor. Clients can still download images directly from the Backblaze B2 Bucket, incurring charges on your Backblaze account. For example, users might have bookmarked or shared links to images in the bucket, or browsers or web crawlers might have cached those links.

The solution is to make the bucket private and create an edge function: a small piece of code running on the CDN infrastructure at the images.acme.com endpoint, with the ability to securely access the bucket.

Both Cloudflare and Fastly offer edge computing platforms; in this blog post, I’ll focus on Cloudflare Workers and cover Fastly Compute@Edge at a later date.

Proxying Backblaze B2 Downloads With a Cloudflare Worker

The blog post Use a Cloudflare Worker to Send Notifications on Backblaze B2 Events provides a brief introduction to Cloudflare Workers; here I’ll focus on how the Worker accesses the Backblaze B2 Bucket.

API clients, such as Workers, downloading data from a private Backblaze B2 Bucket via the Backblaze S3 Compatible API must digitally sign each request with a Backblaze Application Key ID (access key ID in AWS parlance) and Application Key (secret access key). On receiving a signed request, the Backblaze B2 service verifies the identity of the sender (authentication) and that the request was not changed in transit (integrity) before returning the requested data.

So when the Worker receives an unsigned HTTP request from an end user’s browser, it must sign it, forward it to Backblaze B2, and return the response to the browser. Here are the steps in more detail:

  1. A user views a web page in their browser.
  2. The user’s browser requests an image from the Cloudflare Worker.
  3. The Worker makes a copy of the incoming request, changing the target host in the copy to the bucket endpoint, and signs the copy with its application key and key ID.
  4. The Worker sends the signed request to Backblaze B2.
  5. Backblaze B2 validates the signature, and processes the request.
  6. Backblaze B2 returns the image to the Worker.
  7. The Worker forwards the image to the user’s browser.

These steps are illustrated in the diagram below.

The signing process imposes minimal overhead, since GET requests have no payload. The Worker need not even read the incoming response payload into memory, instead returning the response from Backblaze B2 to the Cloudflare Workers framework to be streamed directly to the user’s browser.

Now you understand the use case, head over to our newly published technical article, Cloudflare Workers for Backblaze B2, and follow the steps to serve content from Backblaze B2 via your own Cloudflare Worker.

Put the Proxy to Work!

The Cloudflare Worker for Backblaze B2 can be used as-is to ensure that clients download files from one or more Backblaze B2 Buckets via Cloudflare, rather than directly from Backblaze B2. At the same time, it can be readily adapted for different requirements. For example, the Worker could verify that clients pass a shared secret in an HTTP header, or route requests to buckets in different data centers depending on the location of the edge server. The possibilities are endless.

How will you put the Cloudflare Worker for Backblaze B2 to work? Sign up for a Backblaze B2 account and get started!

The post How to Serve Data From a Private Bucket with a Cloudflare Worker appeared first on Backblaze Blog | Cloud Storage & Cloud Backup.
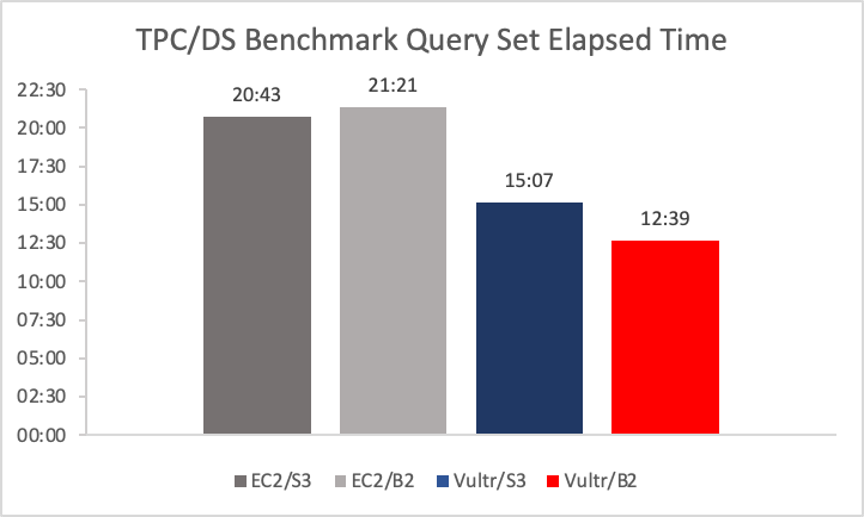
Querying a Decade of Drive Stats Data

Post Syndicated from Pat Patterson original https://www.backblaze.com/blog/querying-a-decade-of-drive-stats-data/

Last week, we published Backblaze Drive Stats for Q3 2022, sharing the metrics we’ve gathered on our fleet of over 230,000 hard drives. In this blog post, I’ll explain how we’re now using the Trino open source SQL query engine in ensuring the integrity of Drive Stats data, and how we plan to use Trino in future to generate the Drive Stats result set for publication.

Converting Zipped CSV Files into Parquet

In his blog post Storing and Querying Analytical Data in Backblaze B2, my colleague Greg Hamer explained how we started using Trino to analyze Drive Stats data earlier this year. We quickly discovered that formatting the data set as Apache Parquet minimized the amount of data that Trino needed to download from Backblaze B2 Cloud Storage to process queries, resulting in a dramatic improvement in query performance over the original CSV-formatted data.

As Greg mentioned in the earlier post, Drive Stats data is published quarterly to Backblaze B2 as a single .zip file containing a CSV file for each day of the quarter. Each CSV file contains a record for each drive that was operational on that day (see this list of the fields in each record).

When Greg and I started working with the Parquet-formatted Drive Stats data, we took a simple, but somewhat inefficient, approach to converting the data from zipped CSV to Parquet:

  • Download the existing zip files to local storage.
  • Unzip them.
  • Run a Python script to read the CSV files and write Parquet-formatted data back to local storage.
  • Upload the Parquet files to Backblaze B2.

We were keen to automate this process, so we reworked the script to use the Python ZipFile module to read the zipped CSV data directly from its Backblaze B2 Bucket and write Parquet back to another bucket. We’ve shared the script in this GitHub gist.

After running the script, the drivestats table now contains data up until the end of Q3 2022:

trino:ds> SELECT DISTINCT year, month, day 
FROM drivestats ORDER BY year DESC, month DESC, day DESC LIMIT 1;
year | month | day 
------+-------+-----
 2022 |     9 |  30 
(1 row)

In the last article, we were working with data running until the end of Q1 2022. On March 31, 2022, the Drive Stats dataset comprised 296 million records, and there were 211,732 drives in operation. Let’s see what the current situation is:

trino:ds> SELECT COUNT(*) FROM drivestats;
   _col0 
-----------
 346006813 
(1 row) 

trino:ds> SELECT COUNT(*) FROM drivestats 
    WHERE year = 2022 AND month = 9 AND day = 30;
   _col0 
--------
 230897 
(1 row)

So, since the end of March, we’ve added 50 million rows to the dataset, and Backblaze is now spinning nearly 231,000 drives—over 19,000 more than at the end of March 2022. Put another way, we’ve added more than 100 drives per day to the Backblaze Cloud Storage Platform in the past six months. Finally, how many exabytes of raw data storage does Backblaze now manage?

trino:ds> SELECT ROUND(SUM(CAST(capacity_bytes AS bigint))/1e+18, 2)
FROM drivestats WHERE year = 2022 AND month = 9 AND day = 30;
 _col0 
-------
  2.62 
(1 row)

Will we cross the three exabyte mark this year? Stay tuned to find out.

Ensuring the Integrity of Drive Stats Data

As Andy Klein, the Drive Stats supremo, collates each quarter’s data, he looks for instances of healthy drives being removed and then returned to service. This can happen for a variety of operational reasons, but it shows up in the data as the drive having failed, then later revived. This subset of data shows the phenomenon:

trino:ds> SELECT year, month, day, failure FROM drivestats WHERE 
serial_number = 'ZHZ4VLNV' AND year >= 2021 ORDER BY year, month, 
day;
 year | month | day | failure 
------+-------+-----+---------
...
 2021 |    12 |  26 |       0 
 2021 |    12 |  27 |       0 
 2021 |    12 |  28 |       0 
 2021 |    12 |  29 |       1 
 2022 |     1 |   3 |       0 
 2022 |     1 |   4 |       0 
 2022 |     1 |   5 |       0 
...

This drive appears to have failed on Dec 29, 2021, but was returned to service on Jan 3, 2022.

Since these spurious “failures” would skew the reliability statistics, Andy searches for and removes them from each quarter’s data. However, even Andy can’t see into the future, so, when a drive is taken offline at the end of one quarter and then returned to service in the next quarter, as in the above case, there is a bit of a manual process to find anomalies and clean up past data.

With the entire dataset in a single location, we can now write a SQL query to find drives that were removed, then returned to service, no matter when it occurred. Let’s build that query up in stages.

We start by finding the serial numbers and failure dates for each drive failure:

trino:ds> SELECT serial_number, DATE(FORMAT('%04d-%02d-%02d', year, 
month, day)) AS date 
FROM drivestats 
WHERE failure = 1;
  serial_number  |    date    
-----------------+------------
 ZHZ3KMX4        | 2021-04-01 
 ZA12RBBM        | 2021-04-01 
 S300Z52X        | 2017-03-01 
 Z3051FWK        | 2017-03-01 
 Z304JQAE        | 2017-03-02 
...
(17092 rows)

Now we find the most recent record for each drive:

trino:ds> SELECT serial_number, MAX(DATE(FORMAT('%04d-%02d-%02d', 
year, month, day))) AS date
    FROM drivestats 
    GROUP BY serial_number;
  serial_number   |    date    
------------------+------------
 ZHZ65F2W         | 2022-09-30 
 ZLW0GQ82         | 2022-09-30 
 ZLW0GQ86         | 2022-09-30 
 Z8A0A057F97G     | 2022-09-30 
 ZHZ62XAR         | 2022-09-30 
...
(329908 rows)

We then join the two result sets to find spurious failures; that is, failures where the drive was later returned to service. Note the join condition—we select records whose serial numbers match and where the most recent record is later than the failure:

trino:ds> SELECT f.serial_number, f.failure_date
FROM (
    SELECT serial_number, DATE(FORMAT('%04d-%02d-%02d', year, month, 
day)) AS failure_date
    FROM drivestats 
    WHERE failure = 1
) AS f
INNER JOIN (
    SELECT serial_number, MAX(DATE(FORMAT('%04d-%02d-%02d', year, 
month, day))) AS last_date
    FROM drivestats 
    GROUP BY serial_number
) AS l
ON f.serial_number = l.serial_number AND l.last_date > f.failure_date;
  serial_number  | failure_date 
-----------------+--------------
 2003261ED34D    | 2022-06-09 
 W300STQ5        | 2022-06-11 
 ZHZ61JMQ        | 2022-06-17 
 ZHZ4VL2P        | 2022-06-21 
 WD-WX31A2464044 | 2015-06-23 
(864 rows)

As you can see, the current schema makes date comparisons a little awkward, pointing the way to optimizing the schema by adding a DATE-typed column to the existing year, month, and day. This kind of denormalization is common in analytical data.

Calculating the Quarterly Failure Rates

In calculating failure rates per drive model for each quarter, Andy loads the quarter’s data into MySQL and defines a set of views. We additionally define the current_quarter view to restrict the failure rate calculation to data in July, August, and September 2022:

CREATE VIEW current_quarter AS 
    SELECT * FROM drivestats
    WHERE year = 2022 AND month in (7, 8, 9);

CREATE VIEW drive_days AS 
    SELECT model, COUNT(*) AS drive_days 
    FROM current_quarter
    GROUP BY model;

CREATE VIEW failures AS
    SELECT model, COUNT(*) AS failures
    FROM current_quarter
    WHERE failure = 1
    GROUP BY model
UNION
    SELECT DISTINCT(model), 0 AS failures
    FROM current_quarter
    WHERE model NOT IN
    (
        SELECT model
        FROM current_quarter
        WHERE failure = 1
        GROUP BY model
    );

CREATE VIEW failure_rates AS
    SELECT drive_days.model AS model,
           drive_days.drive_days AS drive_days,
           failures.failures AS failures, 
           100.0 * (1.0 * failures) / (drive_days / 365.0) AS 
annual_failure_rate
    FROM drive_days, failures
    WHERE drive_days.model = failures.model;

Running the above statements in Trino, then querying the failure_rates view, yields a superset of the data that we published in the Q3 2022 Drive Stats report. The difference is that this result set includes drives that Andy excludes from the Drive Stats report: SSD boot drives, drives that were used for testing purposes, and drive models which did not have at least 60 drives in service:

trino:ds> SELECT * FROM failure_rates ORDER BY model;
        model         | drive_days | failures | annual_failure_rate 
----------------------+------------+----------+---------------------
 CT250MX500SSD1       |      32171 |        2 |                2.27 
 DELLBOSS VD          |      33706 |        0 |                0.00 
 HGST HDS5C4040ALE630 |       2389 |        0 |                0.00 
 HGST HDS724040ALE640 |         92 |        0 |                0.00 
 HGST HMS5C4040ALE640 |     341509 |        3 |                0.32 
 ...
 WDC WD60EFRX         |        276 |        0 |                0.00 
 WDC WDS250G2B0A      |       3867 |        0 |                0.00 
 WDC WUH721414ALE6L4  |     765990 |        5 |                0.24 
 WDC WUH721816ALE6L0  |     242954 |        0 |                0.00 
 WDC WUH721816ALE6L4  |     308630 |        6 |                0.71 
(74 rows)

Query 20221102_010612_00022_qscbi, FINISHED, 1 node
Splits: 139 total, 139 done (100.00%)
8.63 [82.4M rows, 5.29MB] [9.54M rows/s, 628KB/s]

Optimizing the Drive Stats Production Process

Now that we have shown that we can derive the required statistics by querying the Parquet-formatted data with Trino, we can streamline the Drive Stats process. Starting with the Q4 2022 report, rather than wrangling each quarter’s data with a mixture of tools on his laptop, Andy will use Trino to both clean up the raw data and produce the Drive Stats result set for publication.

Accessing the Drive Stats Parquet Dataset

When Greg and I started experimenting with Trino, our starting point was Brian Olsen’s Trino Getting Started GitHub repository, in particular, the Hive connector over MinIO file storage tutorial. Since MinIO and Backblaze B2 both have S3-compatible APIs, it was easy to adapt the tutorial’s configuration to target the Drive Stats data in Backblaze B2, and Brian was kind enough to accept my contribution of a new tutorial showing how to use the Hive connector over Backblaze B2 Cloud Storage. This tutorial will get you started using Trino with data stored in Backblaze B2 Buckets, and includes a section on accessing the Drive Stats dataset.

You might be interested to know that Backblaze is sponsoring this year’s Trino Summit, taking place virtually and in person in San Francisco, on November 10. Registration is free; if you do attend, come say hi to Greg and me at the Backblaze booth and see Trino in action, querying data stored in Backblaze B2.

The post Querying a Decade of Drive Stats Data appeared first on Backblaze Blog | Cloud Storage & Cloud Backup.
Lights, Camera, Custom Action (Part Two): Inside Integrating Frame.io + Backblaze B2

Post Syndicated from Pat Patterson original https://www.backblaze.com/blog/lights-camera-custom-action-part-two-inside-integrating-frame-io-backblaze-b2/

Part 2 in a series covering the Frame.io/Backblaze B2 integration, covering the implementation. See Part 1 here, which covers the UI.

In Lights, Camera, Custom Action: Integrating Frame.io with Backblaze B2, we described a custom action for the Frame.io cloud-based media asset management (MAM) platform. The custom action allows users to export assets and projects from Frame.io to Backblaze B2 Cloud Storage and import them back from Backblaze B2 to Frame.io.

The custom action is implemented as a Node.js web service using the Express framework, and its complete source code is open-sourced under the MIT license in the backblaze-frameio GitHub repository. In this blog entry we’ll focus on how we secured the solution, how we made it deployable anywhere (including to options with free bandwidth), and how you can customize it to your needs.

What is a Custom Action?

Custom Actions are a way for you to build integrations directly into Frame.io as programmable UI components. This enables event-based workflows that can be triggered by users within the app, but controlled by an external system. You create custom actions in the Frame.io Developer Site, specifying a name (shown as a menu item in the Frame.io UI), URL, and Frame.io team, among other properties. The user sees the custom action in the contextual/right-click dropdown menu available on each asset:

When the user selects the custom action menu item, Frame.io sends an HTTP POST request to the custom action URL, containing the asset’s id. For example:

{
  "action_id": "2444cccc-7777-4a11-8ddd-05aa45bb956b",
  "interaction_id": "aafa3qq2-c1f6-4111-92b2-4aa64277c33f",
  "resource": {
    "type": "asset",
    "id": "9q2e5555-3a22-44dd-888a-abbb72c3333b"
  },
  "type": "my.action"
}

The custom action can optionally respond with a JSON description of a form to gather more information from the user. For example, our custom action needs to know whether the user wishes to export or import data, so its response is:

{
  "title": "Import or Export?",
  "description": "Import from Backblaze B2, or export to Backblaze B2?",
  "fields": [
    {
      "type": "select",
      "label": "Import or Export",
      "name": "copytype",
      "options": [
        {
          "name": "Export to Backblaze B2",
          "value": "export"
        },
        {
          "name": "Import from Backblaze B2",
          "value": "import"
        }
      ]
    }
  ]
}

When the user submits the form, Frame.io sends another HTTP POST request to the custom action URL, containing the data entered by the user. The custom action can respond with a form as many times as necessary to gather the data it needs, at which point it responds with a suitable message. For example, when it has all the information it needs to export data, our custom action indicates that an asynchronous job has been initiated:

{
  "title": "Job submitted!",
  "description": "Export job submitted for asset."
}

Securing the Custom Action

When you create a custom action in the Frame.io Developer Tools, a signing key is generated for it. The custom action code uses this key to verify that the request originates from Frame.io.

When Frame.io sends a POST request, it includes the following HTTP headers:

X-Frameio-Request-Timestamp The time the custom action was triggered, in Epoch Epoch timetime (seconds since midnight UTC, Jan 1, 1970).
X-Frameio-Signature The request signature.

The timestamp can be used to prevent replay attacks; Frame.io recommends that custom actions verify that this time is within five minutes of local time. The signature is an HMAC SHA-256 hash secured with the custom action’s signing key—a secret shared exclusively between Frame.io and the custom action. If the custom action is able to correctly verify the HMAC, then we know that the request came from Frame.io (message authentication) and it has not been changed in transit (message integrity).

The process for verifying the signature is:

    • Combine the signature version (currently “v0”), timestamp, and request body, separated by colons, into a string to be signed.
    • Compute the HMAC SHA256 signature using the signing key.
    • If the computed signature and signature header are not identical, then reject the request.

The custom action’s verify TimestampAndSignature() function implements the above logic, throwing an error if the timestamp is missing, outside the accepted range, or the signature is invalid. In all cases, 403 Forbidden is returned to the caller.

Custom Action Deployment Options

The root directory of the backblaze-frameio GitHub repository contains three directories, comprising two different deployment options and a directory containing common code:

  • node-docker—generic: Node.js deployment
  • node-risingcloud: Rising Cloud deployment
  • backblaze-frameio-common: common code

The node-docker directory contains a generic Node.js implementation suitable for deployment on any Internet-addressable machine–for example, an Optimized Cloud Compute VM on Vultr. The app comprises an Express web service that handles requests from Frame.io, providing form responses to gather information from the user, and a worker task that the web service executes as a separate process to actually copy files between Frame.io and Backblaze B2.

You might be wondering why the web service doesn’t just do the work itself, rather than spinning up a separate process to do so. Well, media projects can contain dozens or even hundreds of files, containing a terabyte or more of data. If the web service were to perform the import or export, it would tie up resources and ultimately be unable to respond to Frame.io. Spinning up a dedicated worker process frees the web service to respond to new requests while the work is being done.

The downside of this approach is that you have to deploy the custom action on a machine capable of handling the peak expected load. The node-risingcloud implementation works identically to the generic Node.js app, but takes advantage of Rising Cloud’s serverless platform to scale elastically. A web service handles the form responses, then starts a task to perform the work. The difference here is that the task isn’t a process on the same machine, but a separate job running in Rising Cloud’s infrastructure. Jobs can be queued and new task instances can be started dynamically in response to rising workloads.

Note that since both Vultr and Rising Cloud are Backblaze Compute Partners, apps deployed on those platforms enjoy zero-cost downloads from Backblaze B2.

Customizing the Custom Action

We published the source code for the custom action to GitHub under the permissive MIT license. You are free to “use, copy, modify, merge, publish, distribute, sublicense, and/or sell copies of the Software” as long as you include the copyright notice and MIT permission notice when you do so.

At present, the user must supply the name of a file when importing an asset from Backblaze B2, but it would be straightforward to add code to browse the bucket and allow the user to navigate the file tree. Similarly, it would be straightforward to extend the custom action to allow the user to import a whole tree of files based on a prefix such as raw_footage/2022-09-07. Feel free to adapt the custom action to your needs; we welcome pull requests for fixes and new features!

The post Lights, Camera, Custom Action (Part Two): Inside Integrating Frame.io + Backblaze B2 appeared first on Backblaze Blog | Cloud Storage & Cloud Backup.

Lights, Camera, Custom Action: Integrating Frame.io with Backblaze B2

Post Syndicated from Pat Patterson original https://www.backblaze.com/blog/lights-camera-custom-action-integrating-frame-io-with-backblaze-b2/

At Backblaze, we love hearing from our customers about their unique and varied storage needs. Our media and entertainment customers have some of the most interesting use cases and often tell us about their workflow needs moving assets at every stage of the process, from camera to post-production and everywhere in between.

The desire to have more flexibility controlling data movement in their media management systems is a consistent theme. In the interest of helping customers with not just storing their data, but using their data, today we are publishing a new open-source custom integration we have created for Frame.io. Read on to learn more about how to use Frame.io to streamline your media workflows.

What is Frame.io?

Frame.io, an Adobe company, has built a cloud-based media asset management (MAM) platform allowing creative professionals to collaborate at every step of the video production process. For example, videographers can upload footage from the set after each take; editors can work with proxy files transcoded by Frame.io to speed the editing process; and production staff can share sound reports, camera logs, and files like Color Decision Lists.

The Backblaze B2 Custom Action for Frame.io

Creative professionals who use Frame.io know that it can be a powerful tool for content collaboration. Many of those customers also leverage Backblaze B2 for long-term archive, and often already have large asset inventories in Backblaze B2 as well.

What our Backblaze B2 Custom Action for Frame.io does is quite simple: it allows you to quickly move data between Backblaze B2 and Frame.io. Media professionals can use the action to export selected assets or whole projects from Frame.io to B2 Cloud Storage, and then later import exported assets and projects from B2 Cloud Storage back to Frame.io.

How to Use the Backblaze B2 Custom Action for Frame.io

Let’s take a quick look at how to use the custom action:

As you can see, after enabling the Custom Action, a new option appears in the asset context dropdown. Once you select the action, you are presented with a dialog to select Import or Export of data:

After selecting Export, you can choose whether you want just the single selected asset, or the entire project sent to Backblaze B2.

Once you make a selection, that’s it! The custom action handles the movement for you behind the scenes. The export is a point-in-time snapshot of the data from Frame.io—which remains as it was—to Backblaze B2.

The Custom Action creates a new exports folder in your B2 bucket, and then uploads the asset(s) to the folder. If you opt to upload the entire Project, it will be structured the same way it is organized in Frame.io.

How to Get Started With Backblaze B2 and Frame.io

To get started using the Custom Action described above, you will need:

  • A Frame.io account.
  • Access to a compute resource to run the custom action code.
  • A Backblaze B2 account.

If you don’t have a Backblaze B2 account yet, you can sign up here and get 10GB free, or contact us here to run a proof of concept with more than 10GB.

What’s Next?

We’ve written previously about similar open-sourced custom integrations for other tools, and by releasing this one we are continuing in that same spirit. If you are interested in learning more about this integration, you can jump straight to the source code on GitHub.

Watch this space for a follow-up post diving into more of the technical details. We’ll discuss how we secured the solution, made it deployable anywhere (including to options with free bandwidth), and how you can customize it to your needs.

We would love to hear your feedback on this integration, and also any other integrations you would like to see from Backblaze. Feel free to reach out to us in the comments below or through our social channels. We’re particularly active on Twitter and Reddit—let’s chat!

The post Lights, Camera, Custom Action: Integrating Frame.io with Backblaze B2 appeared first on Backblaze Blog | Cloud Storage & Cloud Backup.

Roll Camera! Streaming Media From Backblaze B2

Post Syndicated from Pat Patterson original https://www.backblaze.com/blog/roll-camera-streaming-media-from-backblaze-b2/

You can store many petabytes of audio and video assets in Backblaze B2 Cloud Storage, and lots of our customers do. Many of these assets are archived for long-term safekeeping, but a growing number of customers use Backblaze B2 to deliver media assets to their end consumers, often embedded in web pages.

Embedding audio and video files in web pages for playback in the browser is nothing new, but there are a lot of ingredients in the mix, and it can be tricky to get right. After reading this blog post, you’ll be ready to deliver media assets from Backblaze B2 to website users reliably and affordably. I’ll cover:

  • A little bit of history on how streaming media came to be.
  • A primer on the various strands of technology and how they work.
  • A how-to guide for streaming media from your Backblaze B2 account.

First, Some Internet History

Back in the early days of the web, when we still called it the World Wide Web, audio and video content was a rarity. Most people connected to the internet via a dial-up link, and just didn’t have the bandwidth to stream audio, let alone video, content to their computer. Consequently, the early web standards specified how browsers should show images in web pages via the <img> tag, but made no mention of audio/visual resources.

As bandwidth increased to the point where it was possible for more of us to stream large media files, Adobe’s Flash Player became the de facto standard for playing audio and video in the web browser. When YouTube launched, for example, in early 2005, it required the Flash Player plug-in to be installed in the browser.

The HTML5 Video Element

At around the same time, however, a consortium of the major browser vendors started work on a new version of HTML, the markup language that had been a part of the web since its inception. A major goal of HTML5 was to support multimedia content, and so, in its initial release in 2008, the specification introduced new <audio> and <video> tags to embed audiovisual content directly in web pages, no plug-ins required.

While web pages are written in HTML, they are delivered from the web server to the browser via the HTTP protocol. Web servers don’t just deliver web pages, of course—images, scripts, and, yep, audio and video files are also delivered via HTTP.

How Streaming Technology Works

Teasing apart the various threads of technology will serve you later when you’re trying to set up streaming on your site for yourself. Here, we’ll cover:

  • Streaming vs. progressive download.
  • HTTP 1.1 byte range serving.
  • Media file formats.
  • MIME types.

Streaming vs. Progressive Download

At this point, it’s necessary to clarify some terminology. In common usage, the term, “streaming,” in the context of web media, can refer to any situation where the user can request content (for example, press a play button) and consume that content almost immediately, as opposed to downloading a media file, where the user has to wait to receive the entire file before they can watch or listen.

Technically, the term, “streaming,” refers to a continuous delivery method, and uses transport protocols such as RTSP rather than HTTP. This form of streaming requires specialized software, particularly for live streaming.

Progressive download blends aspects of downloading and streaming. When the user presses play on a video on a web page, the browser starts to download the video file. However, the browser may begin playback before the download is complete. So, the user experience of progressive download is much the same as streaming, and I’ll use the term, “streaming” in its colloquial sense in this blog post.

HTTP 1.1 Byte Range Serving

HTTP enables progressive download via byte range serving. Introduced to HTTP in version 1.1 back in 1997, byte range serving allows an HTTP client, such as your browser, to request a specific range of bytes from a resource, such as a video file, rather than the entire resource all at once.

Imagine you’re watching a video online and you realize you’ve already seen the first half. You can click the video’s slider control, picking up the action at the appropriate point. Without byte range serving, your browser would be downloading the whole video, and you might have to wait several minutes for it to reach the halfway point and start playing. With byte range serving, the browser can specify a range of bytes in each request, so it’s easy for the browser to request data from the middle of the video file, skipping any amount of content almost instantly.

Backblaze B2 supports byte range serving in downloads via both the Backblaze B2 Native and S3 Compatible APIs. (Check out this post for an explainer of the differences between the two.)

Here’s an example range request for the first 10 bytes of a file in a Backblaze B2 bucket, using the cURL command line tool. You can see the Range header in the request, specifying bytes zero to nine, and the Content-Range header indicating that the response indeed contains bytes zero to nine of a total of 555,214,865 bytes. Note also the HTTP status code: 206, signifying a successful retrieval of partial content, rather than the usual 200.

% curl -I https://metadaddy-public.s3.us-west-004.backblazeb2.com/
example.mp4 -H 'Range: bytes=0-9'

HTTP/1.1 206 
Accept-Ranges: bytes
Last-Modified: Tue, 12 Jul 2022 20:06:09 GMT
ETag: "4e104e1bd9a2111002a74c9c798515e6-106"
Content-Range: bytes 0-9/555214865
x-amz-request-id: 1e90f359de28f27a
x-amz-id-2: aMYY1L2apOcUzTzUNY0ZmyjRRZBhjrWJz
x-amz-version-id: 4_zf1f51fb913357c4f74ed0c1b_f202e87c8ea50bf77_
d20220712_m200609_c004_v0402006_t0054_u01657656369727
Content-Type: video/mp4
Content-Length: 10
Date: Tue, 12 Jul 2022 20:08:21 GMT

I recommend that you use S3-style URLs for media content, as shown in the above example, rather than Backblaze B2-style URLs of the form: https://f004.backblazeb2.com/file/metadaddy-public/example.mp4.

The B2 Native API responds to a range request that specifies the entire content, e.g., Range: 0-, with HTTP status 200, rather than 206. Safari interprets that response as indicating that Backblaze B2 does not support range requests, and thus will not start playing content until the entire file is downloaded. The S3 Compatible API returns HTTP status 206 for all range requests, regardless of whether they specify the entire content, so Safari will allow you to play the video as soon as the page loads.

Media File Formats

The third ingredient in streaming media successfully is the file format. There are several container formats for audio and video data, with familiar file name extensions such as .mov, .mp4, and .avi. Within these containers, media data can be encoded in many different ways, by software components known as codecs, an abbreviation of coder/decoder.

We could write a whole series of blog articles on containers and codecs, but the important point is that the media’s metadata—information regarding how to play the media, such as its length, bit rate, dimensions, and frames per second—must be located at the beginning of the video file, so that this information is immediately available as download starts. This optimization is known as “Fast Start” and is supported by software such as ffmpeg and Premiere Pro.

MIME Types

The final piece of the puzzle is the media file’s MIME type, which identifies the file format. You can see a MIME type in the Content-Type header in the above example request: video/mp4. You must specify the MIME type when you upload a file to Backblaze B2. You can set it explicitly, or use the special value b2/x-auto to tell Backblaze B2 to set the MIME type according to the file name’s extension, if one is present. It is important to set the MIME type correctly for reliable playback.

Putting It All Together

So, we’ve covered the ingredients for streaming media from Backblaze B2 directly to a web page:

  • The HTML5 <audio> and <video> elements.
  • HTTP 1.1 byte range serving.
  • Encoding media for Fast Start.
  • Storing media files in Backblaze B2 with the correct MIME type.

Here’s an HTML5 page with a minimal example of an embedded video file:

<!DOCTYPE html>
<html>
  <body>
    <h1>Video</h1>
    <video controls src="my-video.mp4" width="640px"></video>
  </body>
</html>

The controls attribute tells the browser to show the default set of controls for playback. Setting the width of the video element makes it a more manageable size than the default, which is the video’s dimensions. This short video shows the video element in action:

Download Charges

You’ll want to take download charges into consideration when serving media files from your account, and Backblaze offers a few ways to manage these charges. To start, the first 1GB of data downloaded from your Backblaze B2 account per day is free. After that, we charge $0.01/GB—notably less than AWS at $0.05+/GB, Azure at $0.04+, and Google Cloud Platform at $0.12.

We also cover the download fees between Backblaze B2 and many CDN partners like Cloudflare, Fastly, and Bunny.net, so you can serve content closer to your end users via their edge networks. You’ll want to make sure you understand if there are limits on your media downloads from those vendors by checking the terms of service for your CDN account. Some service levels do restrict downloads of media content.

Time to Hit Play!

Now you know everything you need to know to get started encoding, uploading, and serving audio/visual content from Backblaze B2 Cloud Storage. Backblaze B2 is a great way to experiment with multimedia—the first 10GB of storage is free, and you can download 1GB per day free of charge. Sign up free, no credit card required, and get to work!

The post Roll Camera! Streaming Media From Backblaze B2 appeared first on Backblaze Blog | Cloud Storage & Cloud Backup.
Optimize Your Media Production Workflow With iconik, LucidLink, and Backblaze B2

Post Syndicated from Pat Patterson original https://www.backblaze.com/blog/optimize-your-media-production-workflow-with-iconik-lucidlink-and-backblaze-b2/

In late April, thousands of professionals from all corners of the media, entertainment, and technology ecosystem assembled in Las Vegas for the National Association of Broadcasters trade show, better known as the NAB Show. We were delighted to sponsor NAB after its two year hiatus due to COVID-19. Our staff came in blazing hot and ready to hit the tradeshow floor.

One of the stars of the 2022 event was Backblaze partner LucidLink, named a Cloud Computing and Storage category winner in the NAB Show Product of the Year Awards. In this blog post, I’ll explain how to combine LucidLink’s Filespaces product with Backblaze B2 Cloud Storage and media asset management from iconik, another Backblaze partner, to optimize your media production workflow. But first, some context…

How iconik, LucidLink, and Backblaze B2 Fit in a Media Storage Architecture

The media and entertainment industry has always been a natural fit for Backblaze. Some of our first Backblaze Computer Backup customers were creative professionals looking to protect their work, and the launch of Backblaze B2 opened up new options for archiving, backing up, and distributing media assets.

As the media and entertainment industry moved to 4K Ultra HD for digital video recording over the past few years, file sizes ballooned. An hour of high quality 4K video shot at 60 frames per second can require up to one terabyte of storage. Backblaze B2 matches well with today’s media and entertainment storage demands, as customers such as Fortune Media, Complex Networks, and Alton Brown of “Good Eats” fame have discovered.

Alongside Backblaze B2, an ecosystem of tools has emerged to help professionals manage their media assets, including iconik and LucidLink. iconik’s cloud-native media management and collaboration solution gathers and organizes media securely from a wide range of locations, including Backblaze B2. iconik can scan and index content from a Backblaze B2 bucket, creating an asset for each file. An iconik asset can combine a lower resolution proxy with a link to the original full-resolution file in Backblaze B2. For a large part of the process, the production team can work quickly and easily with these proxy files, previewing and selecting clips and editing them into a sequence.

Complementing iconik and B2 Cloud Storage, LucidLink provides a high-performance, cloud-native, network-attached storage (NAS) solution that allows professionals to collaborate on files stored in the cloud almost as if the files were on their local machine. With LucidLink, a production team can work with multi-terabyte 4K resolution video files, making final edits and rendering the finished product at full resolution.

It’s important to understand that the video editing process is non-destructive. The original video files are immutable—they are never altered during the production process. As the production team “edits” a sequence, they are actually creating a series of transformations that are applied to the original videos as the final product is rendered.

You can think of B2 Cloud Storage and LucidLink as tiers in a media storage architecture. Backblaze B2 excels at cost-effective, durable storage of full-resolution video assets through their entire lifetime from acquisition to archive, while LucidLink shines during the later stages of the production process, from when the team transitions to working with the original full-resolution files to the final rendering of the sequence for release.

iconik brings B2 Cloud Storage and LucidLink together; not only can an iconik asset include a proxy and links to copies of the original video in both B2 Cloud Storage and LucidLink, iconik Storage Gateway can copy the original file from Backblaze B2 to LucidLink when full-resolution work commences, and later delete the LucidLink copy at the end of the production process, leaving the original archived in Backblaze B2. All that’s missing is a little orchestration.

The Backblaze B2 Storage Plugin for iconik

The Backblaze B2 Storage Plugin for iconik allows creative professionals to copy files from B2 Cloud Storage to LucidLink, and later delete them from LucidLink, in a couple of mouse clicks. The plugin adds a pair of custom actions to iconik: “Add to LucidLink” and “Remove from LucidLink,” applicable to one or many assets or collections, accessible from the Search page and the Asset/Collection page. You can see them on the lower right of this screenshot:

The user experience could hardly be simpler, but there is a lot going on under the covers.

There are several components involved:

  • The plugin, deployed as a serverless function. The initial version of the plugin is written in Python for deployment on Google Cloud Functions, but it could easily be adapted for other serverless cloud platforms.
  • A LucidLink Filespace.
  • A machine with both the LucidLink client and iconik Storage Gateway installed. The iconik Storage Gateway accesses the LucidLink Filespace as if it were local file storage.
  • iconik, accessed both by the user via its web interface and by the plugin via the iconik API. iconik is configured with two iconik “storages”, one for Backblaze B2 and one for the iconik Storage Gateway instance.

When the user selects the “Add to LucidLink” custom action, iconik sends an HTTP request, containing the list of selected entities, to the plugin. The plugin calls the iconik API with a request to copy those entities from Backblaze B2 to the iconik Storage Gateway. The gateway writes the files to the LucidLink Filespace, exactly as if it were writing to the local disk, and the LucidLink client sends the files to LucidLink. Now the full-resolution files are available for the production team to access in the Filespace, while the originals remain in B2 Cloud Storage.

Later, when the user selects the “Remove from LucidLink” custom action, iconik sends another HTTP request containing the list of selected entities to the plugin. This time, the plugin has more work to do. Collections can contain other collections as well as assets, so the plugin must access each collection in turn, calling the iconik API for each file in the collection to request that it be deleted from the iconik Storage Gateway. The gateway simply deletes each file from the Filespace, and the LucidLink client relays those operations to LucidLink. Now the files are no longer stored in the Filespace, but the originals remain in B2 Cloud Storage, safely archived for future use.

This short video shows the plugin in action, and walks through the flow in a little more detail:

Deploying the Backblaze B2 Storage Plugin for iconik

The plugin is available open-source under the MIT license at https://github.com/backblaze-b2-samples/b2-iconik-plugin. Full deployment instructions are included in the plugin’s README file.

Don’t have a Backblaze B2 account? You can get started here, and the first 10GB are on us. We can also set up larger scale trials involving terabytes of storage—enter your details and we’ll get back to you right away.

Customize the Plugin to Your Requirements

You can use the plugin as is, or modify it to your requirements. For example, the plugin is written to be deployed on Google Cloud Functions, but you could adapt it to another serverless cloud platform. Please report any issues with the plugin via the issues tab in the GitHub repository, and feel free to submit contributions via pull requests.

The post Optimize Your Media Production Workflow With iconik, LucidLink, and Backblaze B2 appeared first on Backblaze Blog | Cloud Storage & Cloud Backup.
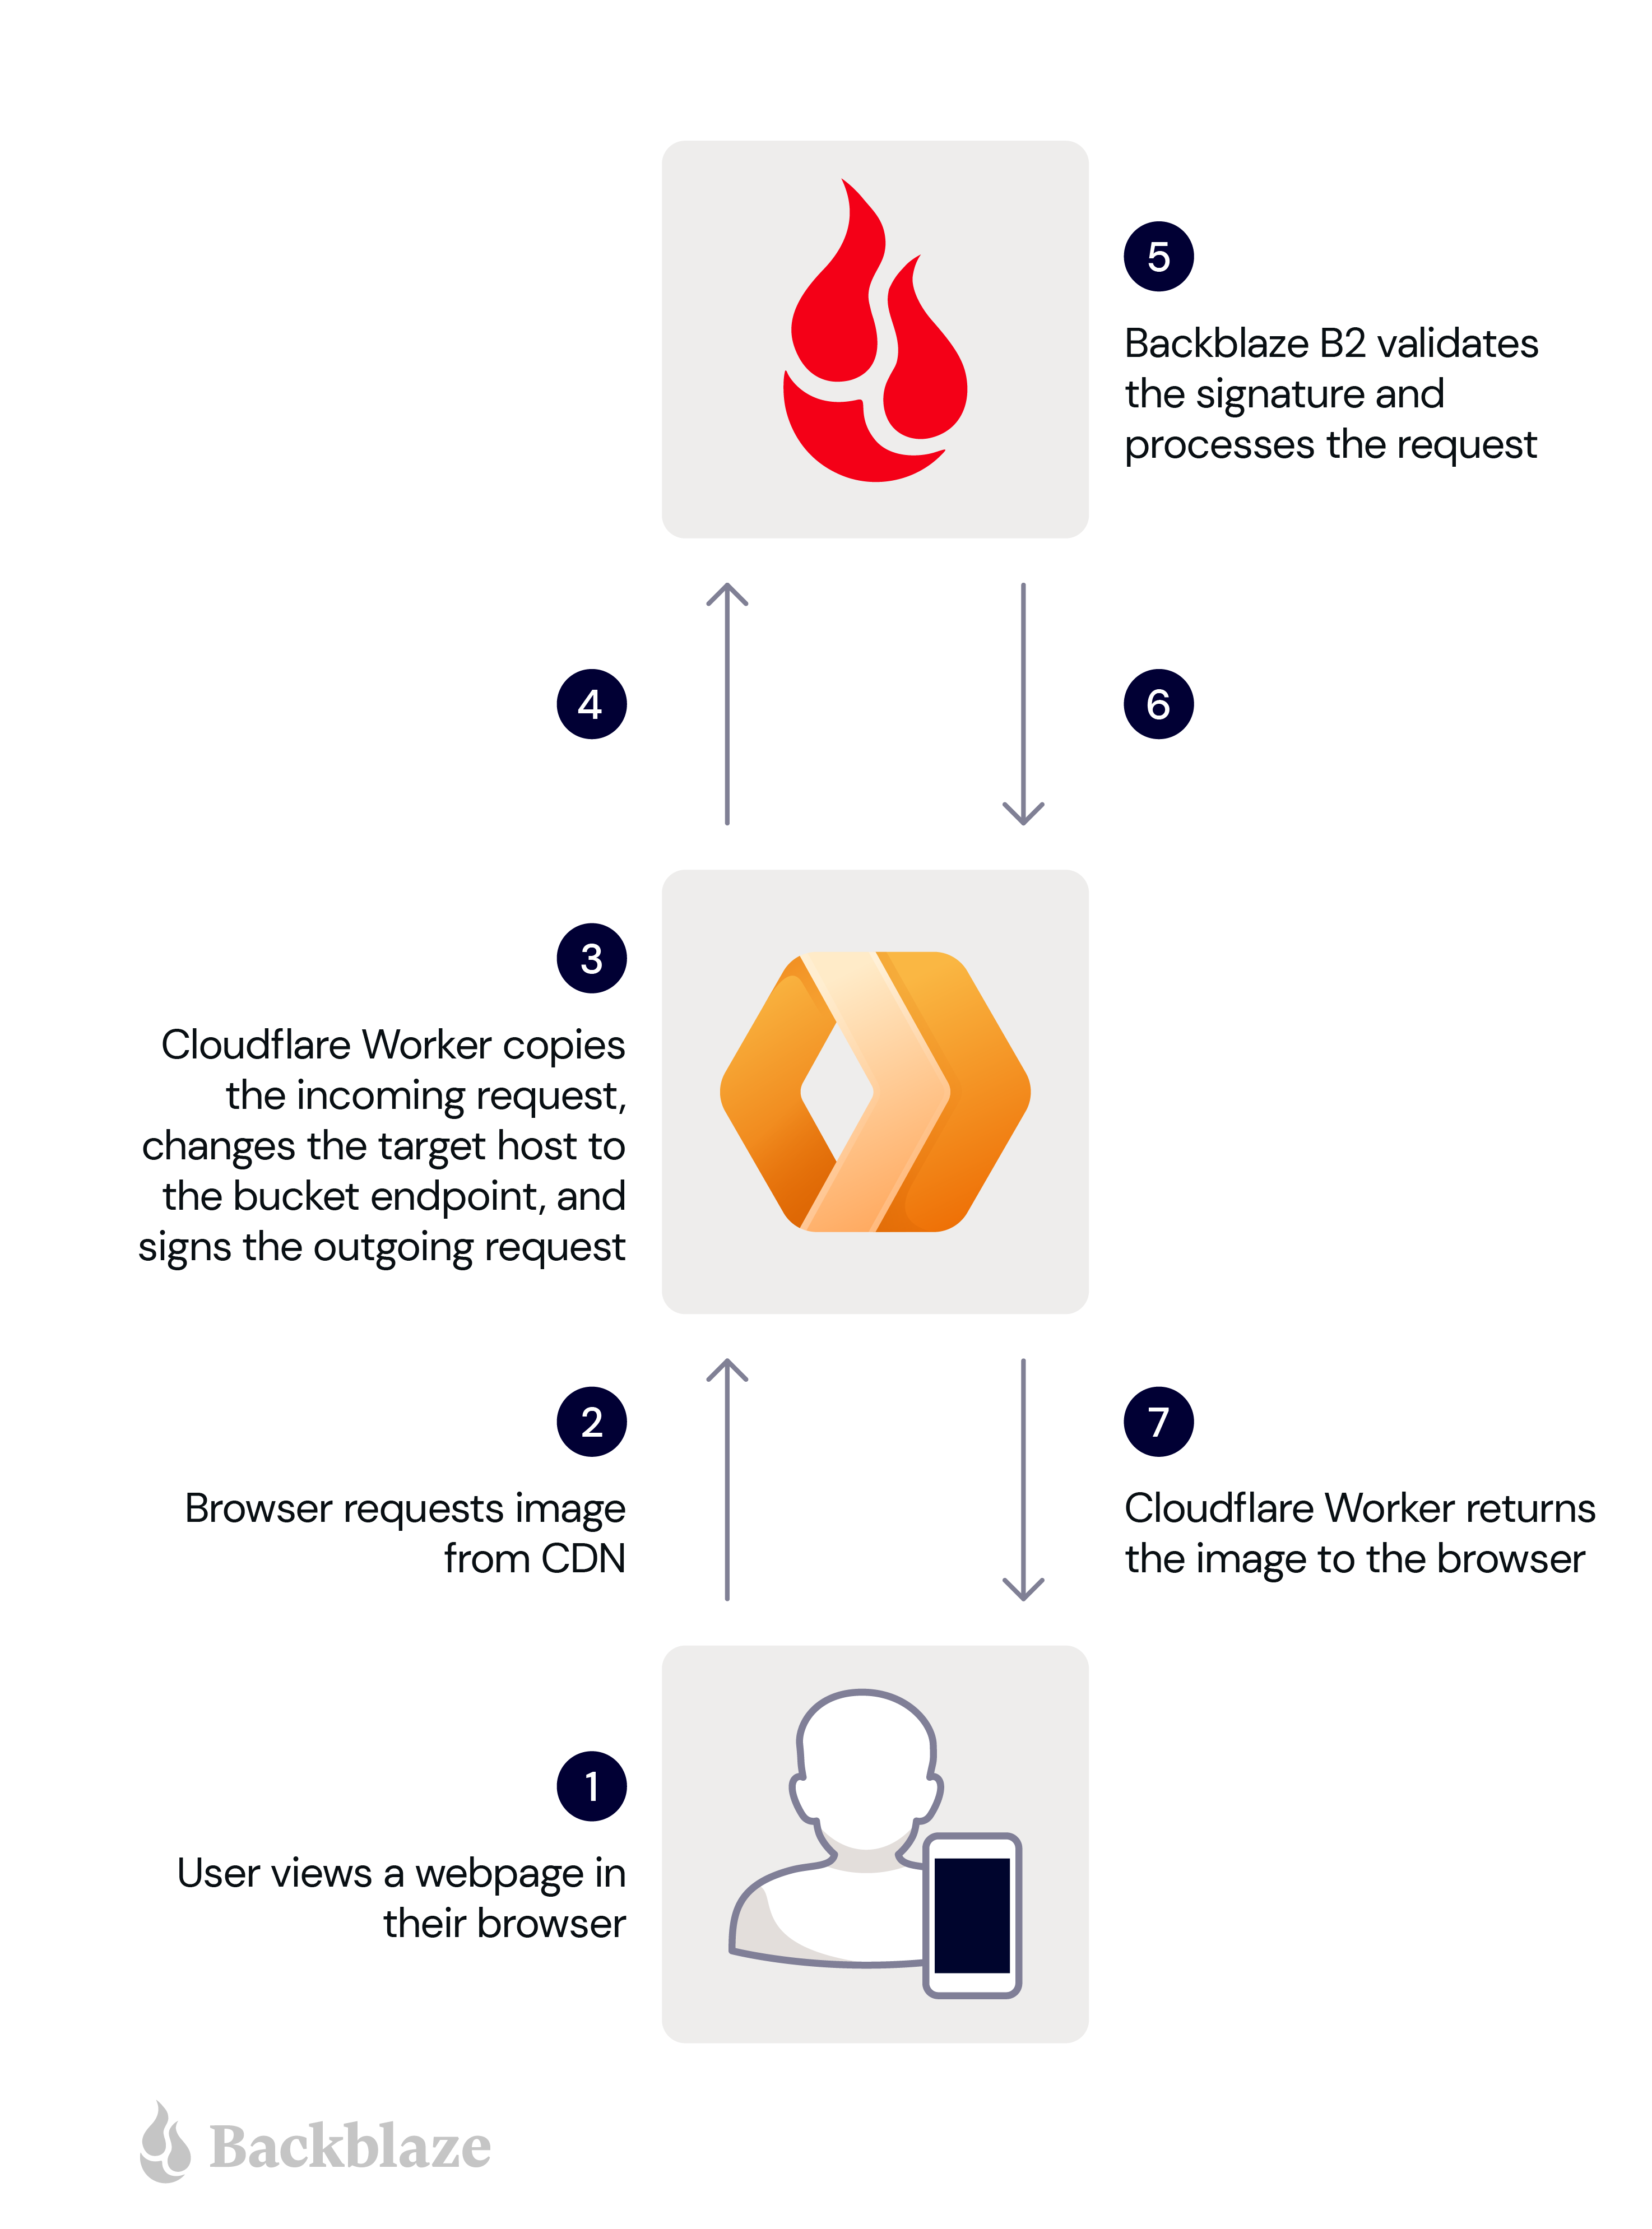
Looking Forward to Backblaze Cloud Replication: Everything You Need to Know

Post Syndicated from Pat Patterson original https://www.backblaze.com/blog/looking-forward-to-backblaze-cloud-replication-everything-you-need-to-know/

Backblaze Cloud Replication—currently in private beta—enables Backblaze customers to store files in multiple regions, or create multiple copies of files in one region, across the Backblaze Storage Cloud. This capability, as we explained in an earlier blog post, allows you to create geographically separate copies of data for compliance and continuity, keep data closer to its consumers, or maintain a live copy of production data for testing and staging. Today we’ll look at how you can get started with Cloud Replication, so you’ll be ready for its release, likely early next month.

Backblaze Cloud Replication: The Basics

Backblaze B2 Cloud Storage organizes data into files (equivalent to Amazon S3’s objects) in buckets. Very simply, Cloud Replication allows you to create rules that control replication of files from a source bucket to a destination bucket. The source and destination buckets can be in the same or different accounts, or in the same or different regions.

Here’s a simple example: Suppose I want to replicate files from my-production-bucket to my-staging-bucket in the same account, so I can run acceptance tests on an application with real-life data. Using either the Backblaze web interface or the B2 Native API, I would simply create a Cloud Replication rule specifying the source and destination buckets in my account. Let’s walk through a couple of examples in each interface.

Cloud Replication via the Web Interface

Log in to the account containing the source bucket for your replication rule. Note that the account must have a payment method configured to participate in replication. Cloud Replication will be accessible via a new item in the B2 Cloud Storage menu on the left of the web interface:

Clicking Cloud Replication opens a new page in the web interface:

Click Replicate Your Data to create a new replication rule:

Configuring Replication Within the Same Account

To implement the simple rule, “replicate files from my-production-bucket to my-staging-bucket in the same account,” all you need to do is select the source bucket, set the destination region the same as the source region, and select or create the destination bucket:

Configuring Replication to a Different Account

To replicate data via the web interface to a different account, you must be able to log in to the destination account. Click Authenticate an existing account to log in. Note that the destination account must be enabled for Backblaze B2 and, again, must have a payment method configured:

After authenticating, you must select a bucket in the destination account. The process is the same whether the destination account is in the same or a different region:

Note that, currently, you may configure a bucket as a source in a maximum of two replication rules. A bucket can be configured as a destination in any number of rules.

Once you’ve created the rule, it is accessible via the web interface. You can pause a running rule, run a paused rule, or delete the rule altogether:

Replicating Data

Once you have created the replication rule, you can manipulate files in the source bucket as you normally would. By default, existing files in the source bucket will be copied to the destination bucket. New files, and new versions of existing files, in the source bucket will be replicated regardless of whether they are created via the Backblaze S3 Compatible API, the B2 Native API, or the Backblaze web interface. Note that the replication engine runs on a distributed system, so the time to complete replication is based on the number of other replication jobs scheduled, the number of files to replicate, and the size of the files to replicate.

Checking Replication Status

Click on a source or destination file in the web interface to see its details page. The file’s replication status is at the bottom of the list of attributes:

There are four possible values of replication status:

  • pending: The file is in the process of being replicated. If there are two rules, at least one of the rules is processing. (Reminder: Currently, you may configure a bucket as a source in a maximum of two replication rules.) Check again later to see if it has left this status.
  • completed: This status represents a successful replication. If two rules are configured, both rules have completed successfully.
  • failed: A non-recoverable error has occurred, such as insufficient permissions to write the file into the destination bucket. The system will not try again to process this file. If two rules are configured, at least one has failed.
  • replica: This file was created by the replication process. Note that replica files cannot be used as the source for further replication.

Cloud Replication and Application Keys

There’s one more detail to examine in the web interface before we move on to the API. Creating a replication rule creates up to two Application Keys; one with read permissions for the source bucket, if the source bucket is not already associated with an Application Key, and one with write permissions for the destination bucket.

The keys are visible in the App Keys page of the web interface:

You don’t need to worry about these keys if you are using the web interface, but it is useful to see how the pieces fit together if you are planning to go on to use the B2 Native API to configure Cloud Replication.

This short video walks you through setting up Cloud Replication in the web interface:

Cloud Replication via the B2 Native API

Configuring cloud replication in the web interface is quick and easy for a single rule, but quickly becomes burdensome if you have to set up multiple replication rules. The B2 Native API allows you to programmatically create replication rules, enabling automation and providing access to two features not currently accessible via the web interface: setting a prefix to constrain the set of files to be replicated and excluding existing files from the replication rule.

Configuring Replication

To create a replication rule, you must include replicationConfiguration when you call b2_create_bucket or b2_update_bucket. The source bucket’s replicationConfiguration must contain asReplicationSource, and the destination bucket’s replicationConfiguration must contain asReplicationDestination. Note that both can be present where a given bucket is the source in one replication rule and the destination in another.

Let’s illustrate the process with a concrete example. Let’s say you want to replicate newly created files with the prefix master_data/, and new versions of those files, from a bucket in the U.S. West region to one in the EU Central region so that you have geographically separate copies of that data. You don’t want to replicate any files that already exist in the source bucket.

Assuming the buckets already exist, you would first create a pair of Application Keys: one in the source account, with read permissions for the source bucket, and another in the destination account, with write permissions for the destination bucket.

Next, call b2_update_bucket with the following message body to configure the source bucket:

{
    "accountId": "<source account id/>",
    "bucketId": "<source bucket id/>",
    "replicationConfiguration": {
        "asReplicationSource": {
            "replicationRules": [
                {
                    "destinationBucketId": "<destination bucket id>",
                    "fileNamePrefix": "master_data/",
                    "includeExistingFiles": false,
                    "isEnabled": true,
                    "priority": 1,
                    "replicationRuleName": "replicate-master-data"
                }
            ],
            "sourceApplicationKeyId": "<source application key id/>"
        }
    }
}

Finally, call b2_update_bucket with the following message body to configure the destination bucket:

{
  "accountId": "<destination account id>",
  "bucketId": "<destination bucket id>",
  "replicationConfiguration": {
    "asReplicationDestination": {
      "sourceToDestinationKeyMapping": {
        "<source application key id/>": "<destination application key id>"
      }
    },
    "asReplicationSource": null
  }
}

You can check your work in the web interface:

Note that the “file prefix” and “include existing buckets” configuration is not currently visible in the web interface.

Viewing Replication Rules

If you are planning to use the B2 Native API to set up replication rules, it’s a good idea to experiment with the web interface first and then call b2_list_buckets to examine the replicationConfiguration property.

Here’s an extract of the configuration of a bucket that is both a source and destination:

{
  "accountId": "e92db1923dce",
  "bucketId": "2e2982ddebf12932830d0c1e",
  ...
  "replicationConfiguration": {
    "isClientAuthorizedToRead": true,
    "value": {
      "asReplicationDestination": {
        "sourceToDestinationKeyMapping": {
          "000437047f876700000000005": "003e92db1923dce0000000004"
        }
      },
      "asReplicationSource": {
        "replicationRules": [
          {
            "destinationBucketId": "0463b7a0a467fff877f60710",
            "fileNamePrefix": "",
            "includeExistingFiles": true,
            "isEnabled": true,
            "priority": 1,
            "replicationRuleName": "replication-eu-to-us"
          }
        ],
        "sourceApplicationKeyId": "003e92db1923dce0000000003"
      }
    }
  },
  ...
}

Checking a File’s Replication Status

To see the replication status of a file, including whether the file is itself a replica, call b2_get_file_info and examine the replicationStatus field. For example, looking at the same file as in the web interface section above:

{
  ...
  "bucketId": "548377d0a467fff877f60710",
  ...
  "fileId": "4_z548377d0a467fff877f60710_f115587450d2c8336_d20220406_
m162741_c000_v0001066_t0046_u01649262461427",
  ...
  "fileName": "Logo Slide.png",
  ...
  "replicationStatus": "completed",
  ...
}

This short video runs through the various API calls:

How Much Will This Cost?

The majority of fees for Cloud Replication are identical to standard B2 Cloud Storage billing: You pay for the total data you store, replication (download) fees, and for any related transaction fees. For details regarding billing, click here.

The replication fee is only incurred between cross-regional accounts. For example, a source in the U.S. West and a destination in EU Central would incur replication fees, which are priced identically to our standard download fee. If the replication rule is created within a region—for example, both source and destination are located in our U.S. West region—there is no replication fee.

How to Start Replicating

Watch the Backblaze Blog for an announcement when we make Backblaze Cloud Replication generally available (GA), likely early next month. As mentioned above, you will need to set up a payment method on accounts included in replication rules. If you don’t yet have a Backblaze B2 account, or you need to set up a Backblaze B2 account in a different region from your existing account, sign up here and remember to select the region from the dropdown before hitting “Sign Up for Backblaze B2.”

The post Looking Forward to Backblaze Cloud Replication: Everything You Need to Know appeared first on Backblaze Blog | Cloud Storage & Cloud Backup.
Go Serverless with Rising Cloud and Backblaze B2

Post Syndicated from Pat Patterson original https://www.backblaze.com/blog/go-serverless-with-rising-cloud-and-backblaze-b2/

Go Serverless With Rising Cloud and Backblaze B2

In my last blog post, I explained how to use a Cloudflare Worker to send notifications on Backblaze B2 events. That post focused on how a Worker could proxy requests to Backblaze B2 Cloud Storage, sending a notification to a webhook at Pipedream that logged each request to a Google Spreadsheet.

Developers integrating applications and solutions with Backblaze B2 can use the same technique to solve a wide variety of use cases. As an example, in this blog post, I’ll explain how you can use that same Cloudflare Worker to trigger a serverless function at our partner Rising Cloud that automatically creates thumbnails as images are uploaded to a Backblaze B2 bucket, without incurring any egress fees for retrieving the full-size images.

What is Rising Cloud?

Rising Cloud hosts customer applications on a cloud platform that it describes as Intelligent-Workloads-as-a-Service. You package your application as a Linux executable or a Docker-style container, and Rising Cloud provisions instances as your application receives HTTP requests. If you’re familiar with AWS Lambda, Rising Cloud satisfies the same set of use cases while providing more intelligent auto-scaling, greater flexibility in application packaging, multi-cloud resiliency, and lower cost.

Rising Cloud’s platform uses artificial intelligence to predict when your application is expected to receive heavy traffic volumes and scales up server resources by provisioning new instances of your application in advance of when they are needed. Similarly, when your traffic is low, Rising Cloud spins down resources.

So far, so good, but, as we all know, artificial intelligence is not perfect. What happens when Rising Cloud’s algorithm predicts a rise in traffic and provisions new instances, but that traffic doesn’t arrive? Well, Rising Cloud picks up the tab—you only pay for the resources your application actually uses.

As is common with most cloud platforms, Rising Cloud applications must be stateless—that is, they cannot themselves maintain state from one request to the next. If your application needs to maintain state, you have to bring your own data store. Our use case, creating image thumbnails, is a perfect match for this model. Each thumbnail creation is a self-contained operation and has no effect on any other task.

Creating Image Thumbnails on Demand

As I explained in the previous post, the Cloudflare Worker will send a notification to a configured webhook URL for each operation that it proxies to Backblaze B2 via the Backblaze S3 Compatible API. That notification contains JSON-formatted metadata regarding the bucket, file, and operation. For example, on an image download, the notification looks like this:

{
    "contentLength": 3015523,
    "contentType": "image/png",
    "method": "GET",
    "signatureTimestamp": "20220224T193204Z",
    "status": 200,
    "url": "https://s3.us-west-001.backblazeb2.com/my-bucket/image001.png"
}

If the metadata indicates an image upload (i.e. the method is PUT, the content type starts with image, and so on), the Rising Cloud app will retrieve the full-size image from the Backblaze B2 bucket, create a thumbnail image, and write that image back to the same bucket, modifying the filename to distinguish it from the original.

Here’s the message flow between the user’s app, the Cloudflare Worker, Backblaze B2, and the Rising Cloud app:

  1. A user uploads an image in a Backblaze B2 client application.
  2. The client app creates a signed upload request, exactly as it would for Backblaze B2, but sends it to the Cloudflare Worker rather than directly to Backblaze B2.
  3. The Worker validates the client’s signature and creates its own signed request.
  4. The Worker sends the signed request to Backblaze B2.
  5. Backblaze B2 validates the signature and processes the upload.
  6. Backblaze B2 returns the response to the Worker.
  7. The Worker forwards the response to the client app.
  8. The Worker sends a notification to the Rising Cloud Web Service.
  9. The Web Service downloads the image from Backblaze B2.
  10. The Web Service creates a thumbnail for the image.
  11. The Web Service uploads the thumbnail to Backblaze B2.

These steps are illustrated in the diagram below.

I decided to write the application in JavaScript, since the Node.js runtime environment and its Express web application framework are well-suited to handling HTTP requests. Also, the open-source Sharp Node.js module performs this type of image processing task 4x-5x faster than either ImageMagick or GraphicsMagick. The source code is available on GitHub.

The entire JavaScript application is less than 150 lines of well-commented JavaScript and uses the AWS SDK’s S3 client library to interact with Backblaze B2 via the Backblaze S3 Compatible API. The core of the application is quite straightforward:

    // Get the image from B2 (returns a readable stream as the body)
    console.log(`Fetching image from ${inputUrl}`);
    const obj = await client.getObject({
      Bucket: bucket,
      Key: keyBase + (extension ? "." + extension : "")
    });

    // Create a Sharp transformer into which we can stream image data
    const transformer = sharp()
      .rotate()                // Auto-orient based on the EXIF Orientation tag
      .resize(RESIZE_OPTIONS); // Resize according to configured options

    // Pipe the image data into the transformer
    obj.Body.pipe(transformer);

    // We can read the transformer output into a buffer, since we know 
    // that thumbnails are small enough to fit in memory
    const thumbnail = await transformer.toBuffer();

    // Remove any extension from the incoming key and append '_tn.'
    const outputKey = path.parse(keyBase).name + TN_SUFFIX 
                        + (extension ? "." + extension : "");
    const outputUrl = B2_ENDPOINT + '/' + bucket + '/' 
                        + encodeURIComponent(outputKey);

    // Write the thumbnail buffer to the same B2 bucket as the original
    console.log(`Writing thumbnail to ${outputUrl}`);
    await client.putObject({
      Bucket: bucket,
      Key: outputKey,
      Body: thumbnail,
      ContentType: 'image/jpeg'
    });

    // We're done - reply with the thumbnail's URL
    response.json({
      thumbnail: outputUrl
    });

One thing you might notice in the above code is that neither the image nor the thumbnail is written to disk. The getObject() API provides a readable stream; the app passes that stream to the Sharp transformer, which reads the image data from B2 and creates the thumbnail in memory. This approach is much faster than downloading the image to a local file, running an image-processing tool such as ImageMagick to create the thumbnail on disk, then uploading the thumbnail to Backblaze B2.

Deploying a Rising Cloud Web Service

With my app written and tested running locally on my laptop, it was time to deploy it to Rising Cloud. There are two types of Rising Cloud applications: Web Services and Tasks. A Rising Cloud Web Service directly accepts HTTP requests and returns HTTP responses synchronously, with the condition that it must return an HTTP response within 44 seconds to avoid a timeout—an easy fit for my thumbnail creator app. If I was transcoding video, on the other hand, an operation that might take several minutes, or even hours, a Rising Cloud Task would be more suitable. A Rising Cloud Task is a queueable function, implemented as a Linux executable, which may not require millisecond-level response times.

Rising Cloud uses Docker-style containers to deploy, scale, and manage apps, so the next step was to package my app as a Docker image to deploy as a Rising Cloud Web Service by creating a Dockerfile.

With that done, I was able to configure my app with its Backblaze B2 Application Key and Key ID, endpoint, and the required dimensions for the thumbnail. As with many other cloud platforms, apps can be configured via environment variables. Using the AWS SDK’s variable names for the app’s Backblaze B2 credentials meant that I didn’t have to explicitly handle them in my code—the SDK automatically uses the variables if they are set in the environment.

Rising Cloud Environment
Click to enlarge.

Notice also that the RESIZE_OPTIONS value is formatted as JSON, allowing maximum flexibility in configuring the resize operation. As you can see, I set the withoutEnlargement parameter as well as the desired width, so that images already smaller than the width would not be enlarged.

Calling a Rising Cloud Web Service

By default, Rising Cloud requires that app clients supply an API key with each request as an HTTP header with the name X-RisingCloud-Auth:

Rising Cloud Security
Click to enlarge.

So, to test the Web Service, I used the curl command-line tool to send a POST request containing a JSON payload in the format emitted by the Cloudflare Worker and the API key:

curl -d @example-request.json \
	-H 'Content-Type: application/json' \
	-H 'X-RisingCloud-Auth: ' \
	https://b2-risingcloud-demo.risingcloud.app/thumbnail

As expected, the Web Service responded with the URL of the newly created thumbnail:

{
  "thumbnail":"https://s3.us-west-001.backblazeb2.com/my-bucket/image001_tn.jpg"
}

(JSON formatted for clarity)

The final piece of the puzzle was to create a Cloudflare Worker from the Backblaze B2 Proxy template, and add a line of code to include the Rising Cloud API key HTTP header in its notification. The Cloudflare Worker configuration includes its Backblaze B2 credentials, Backblaze B2 endpoint, Rising Cloud API key, and the Web Service endpoint (webhook):

Environment Variables
Click to enlarge.

This short video shows the application in action, and how Rising Cloud spins up new instances to handle an influx of traffic:

Process Your Own B2 Files in Rising Cloud

You can deploy an application on Rising Cloud to respond to any Backblaze B2 operation(s). You might want to upload a standard set of files whenever a bucket is created, or keep an audit log of Backblaze B2 operations performed on a particular set of buckets. And, of course, you’re not limited to triggering your Rising Cloud application from a Cloudflare worker—your app can respond to any HTTP request to its endpoint.

Submit your details here to set up a free trial of Rising Cloud. If you’re not already building on Backblaze B2, sign up to create an account today—the first 10 GB of storage is free!

The post Go Serverless with Rising Cloud and Backblaze B2 appeared first on Backblaze Blog | Cloud Storage & Cloud Backup.
Use a Cloudflare Worker to Send Notifications on Backblaze B2 Events

Post Syndicated from Pat Patterson original https://www.backblaze.com/blog/use-a-cloudflare-worker-to-send-notifications-on-backblaze-b2-events/

When building an application or solution on Backblaze B2 Cloud Storage, a common requirement is to be able to send a notification of an event (e.g., a user uploading a file) so that an application can take some action (e.g., processing the file). In this blog post, I’ll explain how you can use a Cloudflare Worker to send event notifications to a wide range of recipients, allowing great flexibility when building integrations with Backblaze B2.

Why Use a Proxy to Send Event Notifications?

Event notifications are useful whenever you need to ensure that a given event triggers a particular action. For example, last month, I explained how a video sharing site running on Vultr’s Infrastructure Cloud could store raw and transcoded videos in Backblaze B2. In that example, when a user uploaded a video to a Backblaze B2 bucket via the web application, the web app sent a notification to a Worker app instructing the Worker to read the raw video file from the bucket, transcode it, and upload the processed file back to Backblaze B2.

A drawback of this approach is that, if we were to create a mobile app to upload videos, we would have to copy the notification logic into the mobile app. As the system grows, so does the maintenance burden. Each new app needs code to send notifications and, worse, if we need to add a new field to the notification message, we have to update all of the apps. If, instead, we move the notification logic from the web application to a Cloudflare Worker, we can send notifications on Backblaze B2 events from a single location, regardless of the origin of the request. This pattern of wrapping an API with a component that presents the exact same API but adds its own functionality is known as a proxy.

Cloudflare Workers: A Brief Introduction

Cloudflare Workers provides a serverless execution environment that allows you to create applications that run on Cloudflare’s global edge network. A Cloudflare Worker application intercepts all HTTP requests destined for a given domain, and can return any valid HTTP response. Your Worker can create that HTTP response in any way you choose. Workers can consume a range of APIs, allowing them to directly interact with the Cloudflare cache, manipulate globally unique Durable Objects, perform cryptographic operations, and more.

Cloudflare Workers often, but not always, implement the proxy pattern, sending outgoing HTTP requests to servers on the public internet in the course of servicing incoming requests. If we implement a proxy that intercepts requests from clients to Backblaze B2, it could both forward those requests to Backblaze B2 and send notifications of those requests to one or more recipient applications.

This example focuses on proxying requests to the Backblaze S3 Compatible API, and can be used with any S3 client application that works with Backblaze B2 by simply changing the client’s endpoint configuration.

Implementing a similar proxy for the B2 Native API is much simpler, since B2 Native API requests are secured by a bearer token rather than a signature. A B2 Native API proxy would simply copy the incoming request, including the bearer token, changing only the target URL. Look out for a future blog post featuring a B2 Native API proxy.

Proxying Backblaze B2 Operations With a Cloudflare Worker

S3 clients send HTTP requests to the Backblaze S3 Compatible API over a TLS-secured connection. Each request includes the client’s Backblaze Application Key ID (access key ID in AWS parlance) and is signed with its Application Key (secret access key), allowing Backblaze B2 to authenticate the client and verify the integrity of the request. The signature algorithm, AWS Signature Version 4 (SigV4), includes the Host header in the signed data, ensuring that a request intended for one recipient cannot be redirected to another. Unfortunately, this is exactly what we want to happen in this use case!

Our proxy Worker must therefore validate the signature on the incoming request from the client, and then create a new signature that it can include in the outgoing request to the Backblaze B2 endpoint. Note that the Worker must be configured with the same Application Key and ID as the client to be able to validate and create signatures on the client’s behalf.

Here’s the message flow:

  1. A user performs an action in a Backblaze B2 client application, for example, uploading an image.
  2. The client app creates a signed request, exactly as it would for Backblaze B2, but sends it to the Cloudflare Worker rather than directly to Backblaze B2.
  3. The Worker validates the client’s signature, and creates its own signed request.
  4. The Worker sends the signed request to Backblaze B2.
  5. Backblaze B2 validates the signature, and processes the request.
  6. Backblaze B2 returns the response to the Worker.
  7. The Worker forwards the response to the client app.
  8. The Worker sends a notification to the webhook recipient.
  9. The recipient takes some action based on the notification.

These steps are illustrated in the diagram below.

The validation and signing process imposes minimal overhead, even for requests with large payloads, since the signed data includes a SHA-256 digest of the request payload, included with the request in the x-amz-content-sha256 HTTP header, rather than the payload itself. The Worker need not even read the incoming request payload into memory, instead passing it to the Cloudflare Fetch API to be streamed directly to the Backblaze B2 endpoint.

The Worker returns Backblaze B2’s response to the client unchanged, and creates a JSON-formatted webhook notification containing the following parameters:

  • contentLength: Size of the request body, if there was one, in bytes.
  • contentType: Describes the request body, if there was one. For example, image/jpeg.
  • method: HTTP method, for example, PUT.
  • signatureTimestamp: Request timestamp included in the signature.
  • status: HTTP status code returned from B2 Cloud Storage, for example 200 for a successful request or 404 for file not found.
  • url: The URL requested from B2 Cloud Storage, for example, https://s3.us-west-004.backblazeb2.com/my-bucket/hello.txt.

The Worker submits the notification to Cloudflare for asynchronous processing, so that the response to the client is not delayed. Once the interaction with the client is complete, Cloudflare POSTs the notification to the webhook recipient.

Prerequisites

If you’d like to follow the steps below to experiment with the proxy yourself, you will need to:

1. Creating a Cloudflare Worker Based on the Proxy Code

The Cloudflare Worker B2 Webhook GitHub repository contains full source code and configuration details. You can use the repository as a template for your own Worker using Cloudflare’s wrangler CLI. You can change the Worker name (my-proxy in the sample code below) as you see fit:

wrangler generate my-proxy
https://github.com/backblaze-b2-samples/cloudflare-b2-proxy
cd my-proxy

2. Configuring and Deploying the Cloudflare Worker

You must configure AWS_ACCESS_KEY_ID and AWS_S3_ENDPOINT in wrangler.toml before you can deploy the Worker. Configuring WEBHOOK_URL is optional—you can set it to empty quotes if you just want a vanity URL for Backblaze B2.

[vars]

AWS_ACCESS_KEY_ID = "<your b2 application key id>"
AWS_S3_ENDPOINT = "</your><your endpoint - e.g. s3.us-west-001.backblazeb2.com>"
AWS_SECRET_ACCESS_KEY = "Remove this line after you make AWS_SECRET_ACCESS_KEY a secret in the UI!"
WEBHOOK_URL = "<e.g. https://api.example.com/webhook/1 >"

Note the placeholder for AWS_SECRET_ACCESS_KEY in wrangler.toml. All variables used in the Worker must be set before the Worker can be published, but you should not save your Backblaze B2 application key to the file (see the note below). We work around these constraints by initializing AWS_SECRET_ACCESS_KEY with a placeholder value.

Use the CLI to publish the Worker project to the Cloudflare Workers environment:

wrangler publish

Now log in to the Cloudflare dashboard, navigate to your new Worker, and click the Settings tab, Variables, then Edit Variables. Remove the placeholder text, and paste your Backblaze B2 Application Key as the value for AWS_SECRET_ACCESS_KEY. Click the Encrypt button, then Save. The environment variables should look similar to this:

Finally, you must remove the placeholder line from wrangler.toml. If you do not do so, then the next time you publish the Worker, the placeholder value will overwrite your Application Key.

Why Not Just Set AWS_SECRET_ACCESS_KEY in wrangler.toml?

You should never, ever save secrets such as API keys and passwords in source code files. It’s too easy to forget to remove sensitive data from source code before sharing it either privately or, worse, on a public repository such as GitHub.

You can access the Worker via its default endpoint, which will have the form https://my-proxy.<your-workers-subdomain>.workers.dev, or create a DNS record in your own domain and configure a route associating the custom URL with the Worker.

If you try accessing the Worker URL via the browser, you’ll see an error message:

<Error>
<Code>AccessDenied</Code>
<Message>
Unauthenticated requests are not allowed for this api
</Message>
</Error>

This is expected—the Worker received the request, but the request did not contain a signature.

3. Configuring the Client Application

The only change required in your client application is the S3 endpoint configuration. Set it to your Cloudflare Worker’s endpoint rather than your Backblaze account’s S3 endpoint. As mentioned above, the client continues to use the same Application Key and ID as it did when directly accessing the Backblaze S3 Compatible API.

4. Implementing a Webhook Consumer

The webhook consumer must accept JSON-formatted messages via HTTP POSTs at a public endpoint accessible from the Cloudflare Workers environment. The webhook notification looks like this:

{
"contentLength": 30155,
"contentType": "image/png",
"method": "PUT",
"signatureTimestamp": "20220224T193204Z",
"status": 200,
"url": "https://s3.us-west-001.backblazeb2.com/my-bucket/image001.png"
}

You might implement the webhook consumer in your own application or, alternatively, use an integration platform such as IFTTT, Zapier, or Pipedream to trigger actions in downstream systems. I used Pipedream to create a workflow that logs each Backblaze B2 event as a new row in a Google Sheet. Watch it in action in this short video:

Put the Proxy to Work!

The Cloudflare Worker/Backblaze B2 Proxy can be used as-is in a wide variety of integrations—anywhere you need an event in Backblaze B2 to trigger an action elsewhere. At the same time, it can be readily adapted for different requirements. Here are a few ideas.

In this initial implementation, the client uses the same credentials to access the Worker as the Worker uses to access Backblaze B2. It would be straightforward to use different credentials for the upstream and downstream connections, ensuring that clients can’t bypass the Worker and access Backblaze B2 directly.

POSTing JSON data to a webhook endpoint is just one of many possibilities for sending notifications. You can integrate the worker with any system accessible from the Cloudflare Workers environment via HTTP. For example, you could use a stream-processing platform such as Apache Kafka to publish messages reliably to any number of consumers, or, similarly, send a message to an Amazon Simple Notification Service (SNS) topic for distribution to SNS subscribers.

As a final example, the proxy has full access to the request and response payloads. Rather than sending a notification to a separate system, the worker can operate directly on the data, for example, transparently compressing incoming uploads and decompressing downloads. The possibilities are endless.

How will you put the Cloudflare Worker Backblaze B2 Proxy to work? Sign up for a Backblaze B2 account and get started!

The post Use a Cloudflare Worker to Send Notifications on Backblaze B2 Events appeared first on Backblaze Blog | Cloud Storage & Cloud Backup.
Media Transcoding With Backblaze B2 and Vultr Optimized Cloud Compute

Post Syndicated from Pat Patterson original https://www.backblaze.com/blog/media-transcoding-with-backblaze-b2-and-vultr-optimized-cloud-compute/

Since announcing the Backblaze + Vultr partnership last year, we’ve seen our mutual customers build a wide variety of applications combining Vultr’s Infrastructure Cloud with Backblaze B2 Cloud Storage, taking advantage of zero-cost data transfer between Vultr and Backblaze. This week, Vultr announced Optimized Cloud Compute instances, virtual machines pairing dedicated best-in-class AMD CPUs with just the right amount of RAM and NVMe SSDs.

To mark the occasion, I built a demonstration that both showcases this new capability and gives you an example application to adapt to your own use cases.

Imagine you’re creating the next big video sharing site—CatTube—a spin-off of Catblaze, your feline-friendly backup service. You’re planning all sorts of amazing features, but the core of the user experience is very familiar:

  • A user uploads a video from their mobile or desktop device.
  • The user’s video is available for viewing on a wide variety of devices, from anywhere in the world.

Let’s take a high-level look at how this might work…

Transcoding Explained: How Video Sharing Sites Make Videos Shareable

The user will upload their video to a web application from their browser or a mobile app. The web application must store the uploaded user videos in a highly scalable, highly available service—enter Backblaze B2 Cloud Storage. Our customers store, in the aggregate, petabytes of media data including video, audio, and still images.
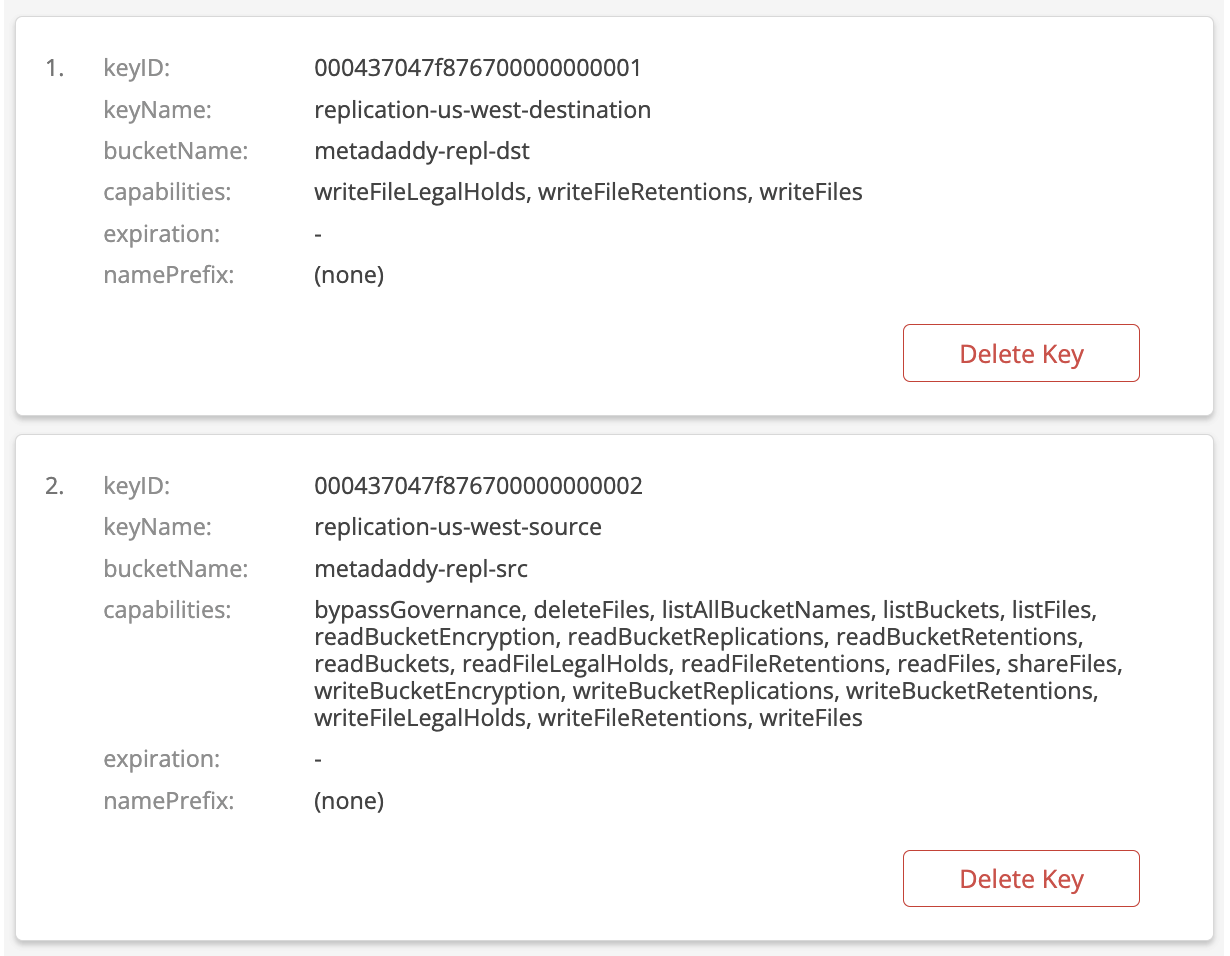
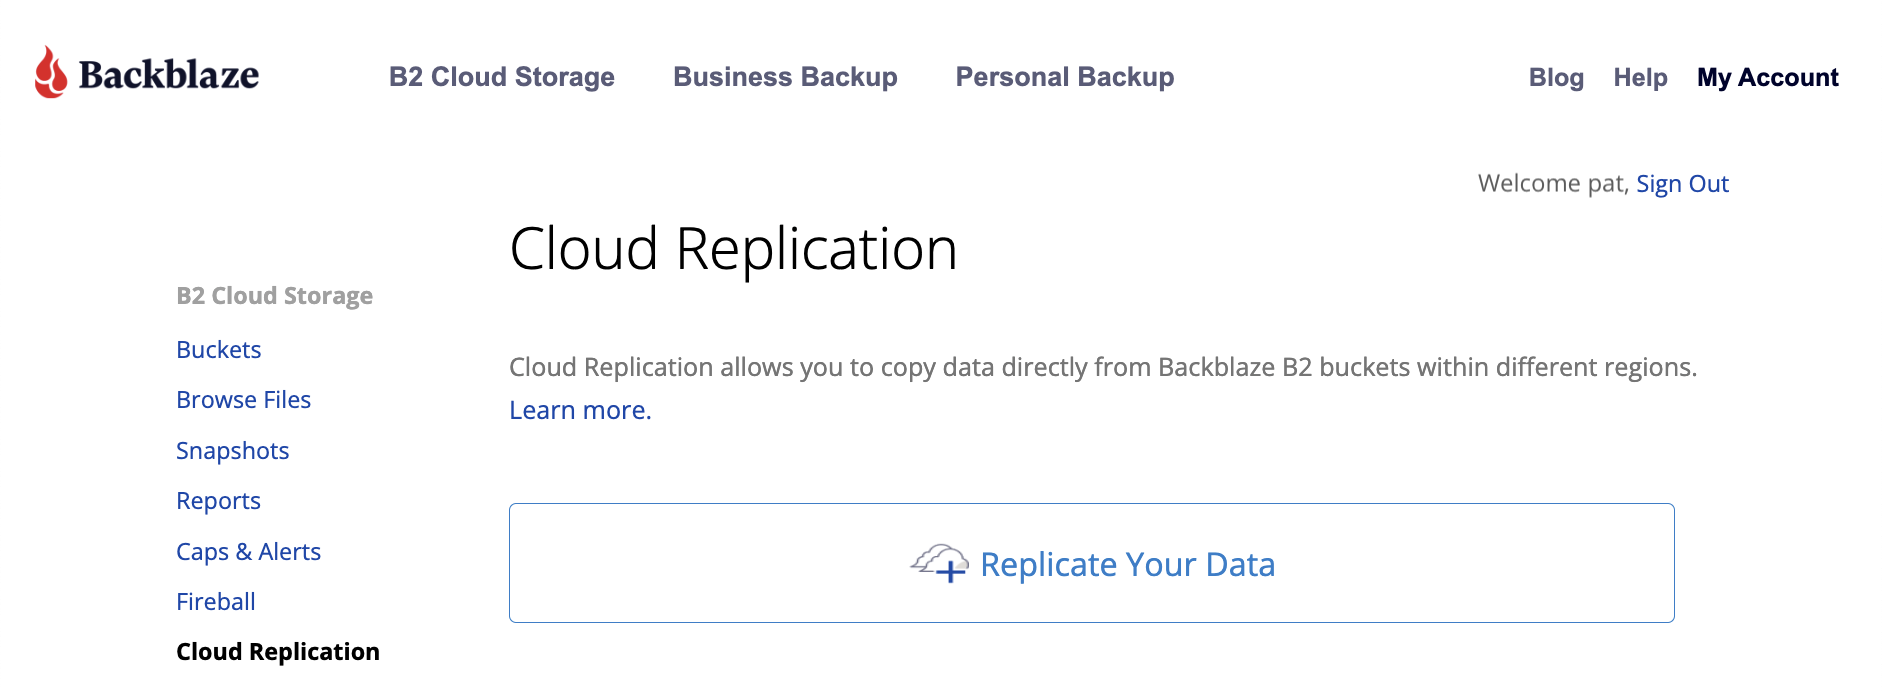
But, those videos may be too large for efficient sharing and streaming. Today’s mobile devices can record video with stunning quality at 4K resolution, typically 3840 × 2160 pixels. While 4K video looks great, the issue is that even with compression, it’s a lot of data—about 1MB per second. Not all of your viewers will have that kind of bandwidth available, particularly if they’re on the move.

So, CatTube, in common with other popular video sharing sites, will need to convert raw uploaded video to one or more standard, lower-resolution formats, a process known as transcoding.

Transcoding is a very different workload from running a web application’s backend. Where an application server requires high I/O capability, but relatively little CPU power, transcoding is extremely CPU-intensive. You decide that you’ll need two sets of machines for CatTube—application servers and workers. The worker machines can be optimized for the transcoding task, taking advantage of the fastest available CPUs.

For these tasks, you need appropriate cloud compute instances. I’ll walk you through how I implemented CatTube as a very simple video sharing site with Backblaze B2 and Vultr’s Infrastructure Cloud using Vultr’s Cloud Compute instances for the application servers and their new Optimized Cloud Compute instances for the transcoding workers.

Building a Video Sharing Site With Backblaze B2 + Vultr

The video sharing example comprises a web application, written in Python using the Django web framework, and a worker application, also written in Python, but using the Flask framework.

Here’s how the pieces fit together:

  1. The user uploads a video from their browser to the web app.
  2. The web app uploads the raw video to a private bucket on Backblaze B2.
  3. The web app sends a message to the worker instructing it to transcode the video.
  4. The worker downloads the raw video to local storage and transcodes it, also creating a thumbnail image.
  5. The worker uploads the transcoded video and thumbnail to Backblaze B2.
  6. The worker sends a message to the web app with the addresses of the input and output files in Backblaze B2.
  7. Viewers around the world can enjoy the video.

These steps are illustrated in the diagram below.

Click to enlarge.

There’s a more detailed description in the Backblaze B2 Video Sharing Example GitHub repository, as well as all of the code for the web application and the worker. Feel free to fork the repository and use the code as a starting point for your own projects.

Here’s a short video of the system in action:

Some Caveats:

Note that this is very much a sample implementation. The web app and the worker communicate via HTTP—this works just fine for a demo, but doesn’t account for the worker being too busy to receive the message. Nor does it scale to multiple workers. In a production implementation, these issues would be addressed by the components communicating via an asynchronous messaging system such as Kafka. Similarly, this sample transcodes to a single target format: 720p. A real video sharing site would transcode the raw video to a range of formats and resolutions.

Want to Try It for Yourself?

Vultr’s new Cloud Compute Optimized instances are a perfect match for CPU-intensive tasks such as media transcoding. Zero-cost ingress and egress between Backblaze B2 and Vultr’s Infrastructure Cloud allow you to build high performance, scalable applications to satisfy a global audience. Sign up for Backblaze B2 and Vultr’s Infrastructure Cloud today, and get to work!

The post Media Transcoding With Backblaze B2 and Vultr Optimized Cloud Compute appeared first on Backblaze Blog | Cloud Storage & Cloud Backup.