 Star Trails

Stars make an amazing backdrop. The darker the night and the clearer the sky, the better the stars will look. Here’s how to get great pictures of stars:
- Get away from the city. Lights reflect off the atmosphere, causing the night sky to glow.
- Shoot well after the sun has set. Even after the sun has disappeared below the horizon, it will light the night sky.
- Shoot before the moon rises. The moon reflects sunlight. Even bounced off the moon, that light is bright enough to illuminate the Earth and obscure the stars. Check the moon rise and set times for your area, and plan your shoot for when the moon’s on the other side of the Earth.
- Choose a clear, cold night. Just as a hazy sky obscures the horizon, it will blur bright stars and completely hide dim stars. Day or night, lower humidity creates sharper pictures of faraway subjects.
- Shoot toward the dark part of the sky. Even on a night with no moon, parts of the horizon will be brightly illuminated. When you shoot with a long enough exposure to capture the stars, those parts of the sky will appear very bright.
- Get closer to the stars. The higher you are, the less the atmosphere will obscure the starlight. The next time you’re on top of a mountain, spend the night—and bring a tripod.
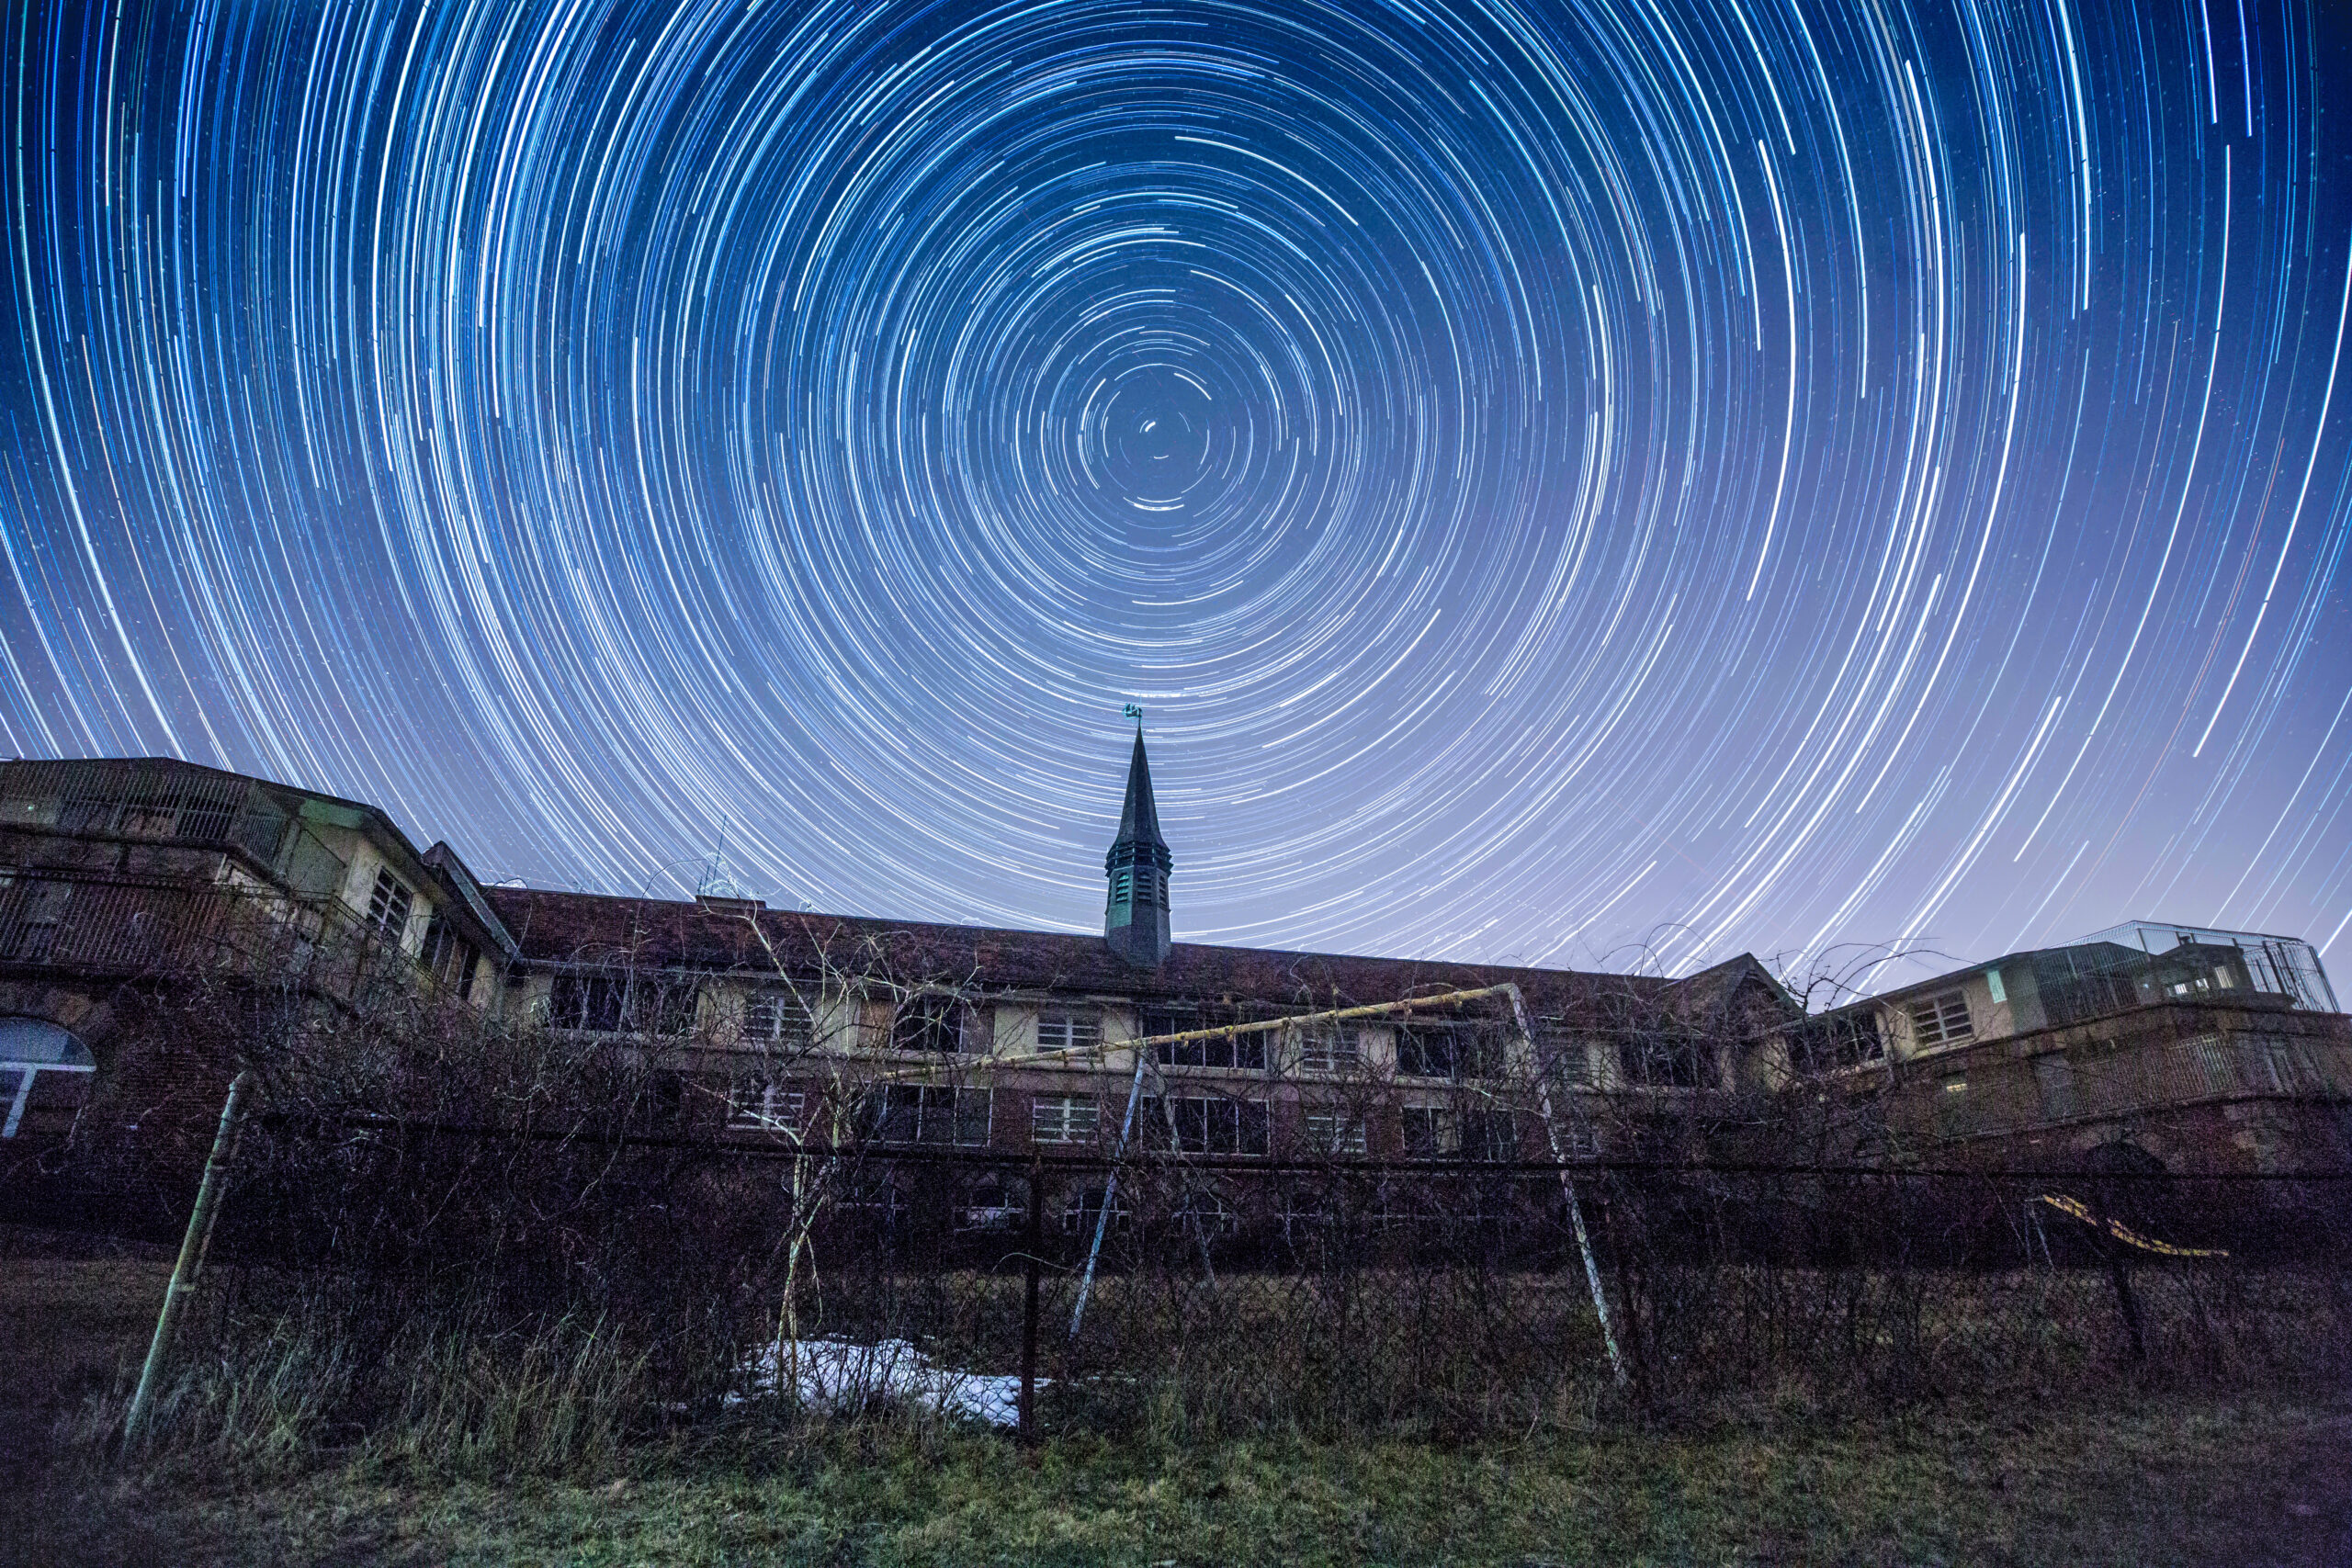
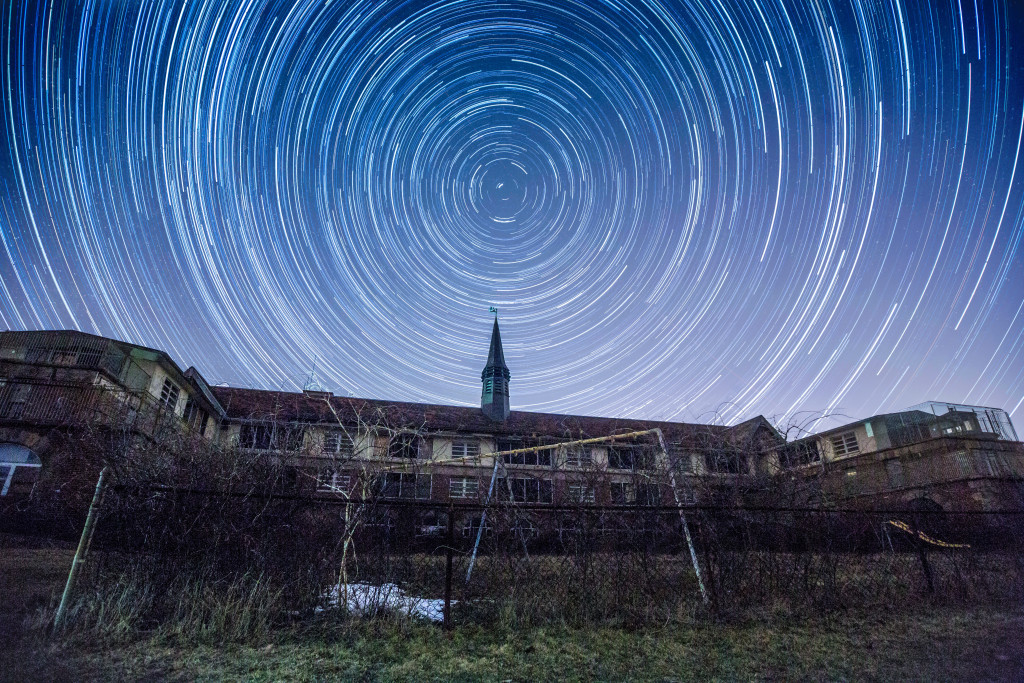
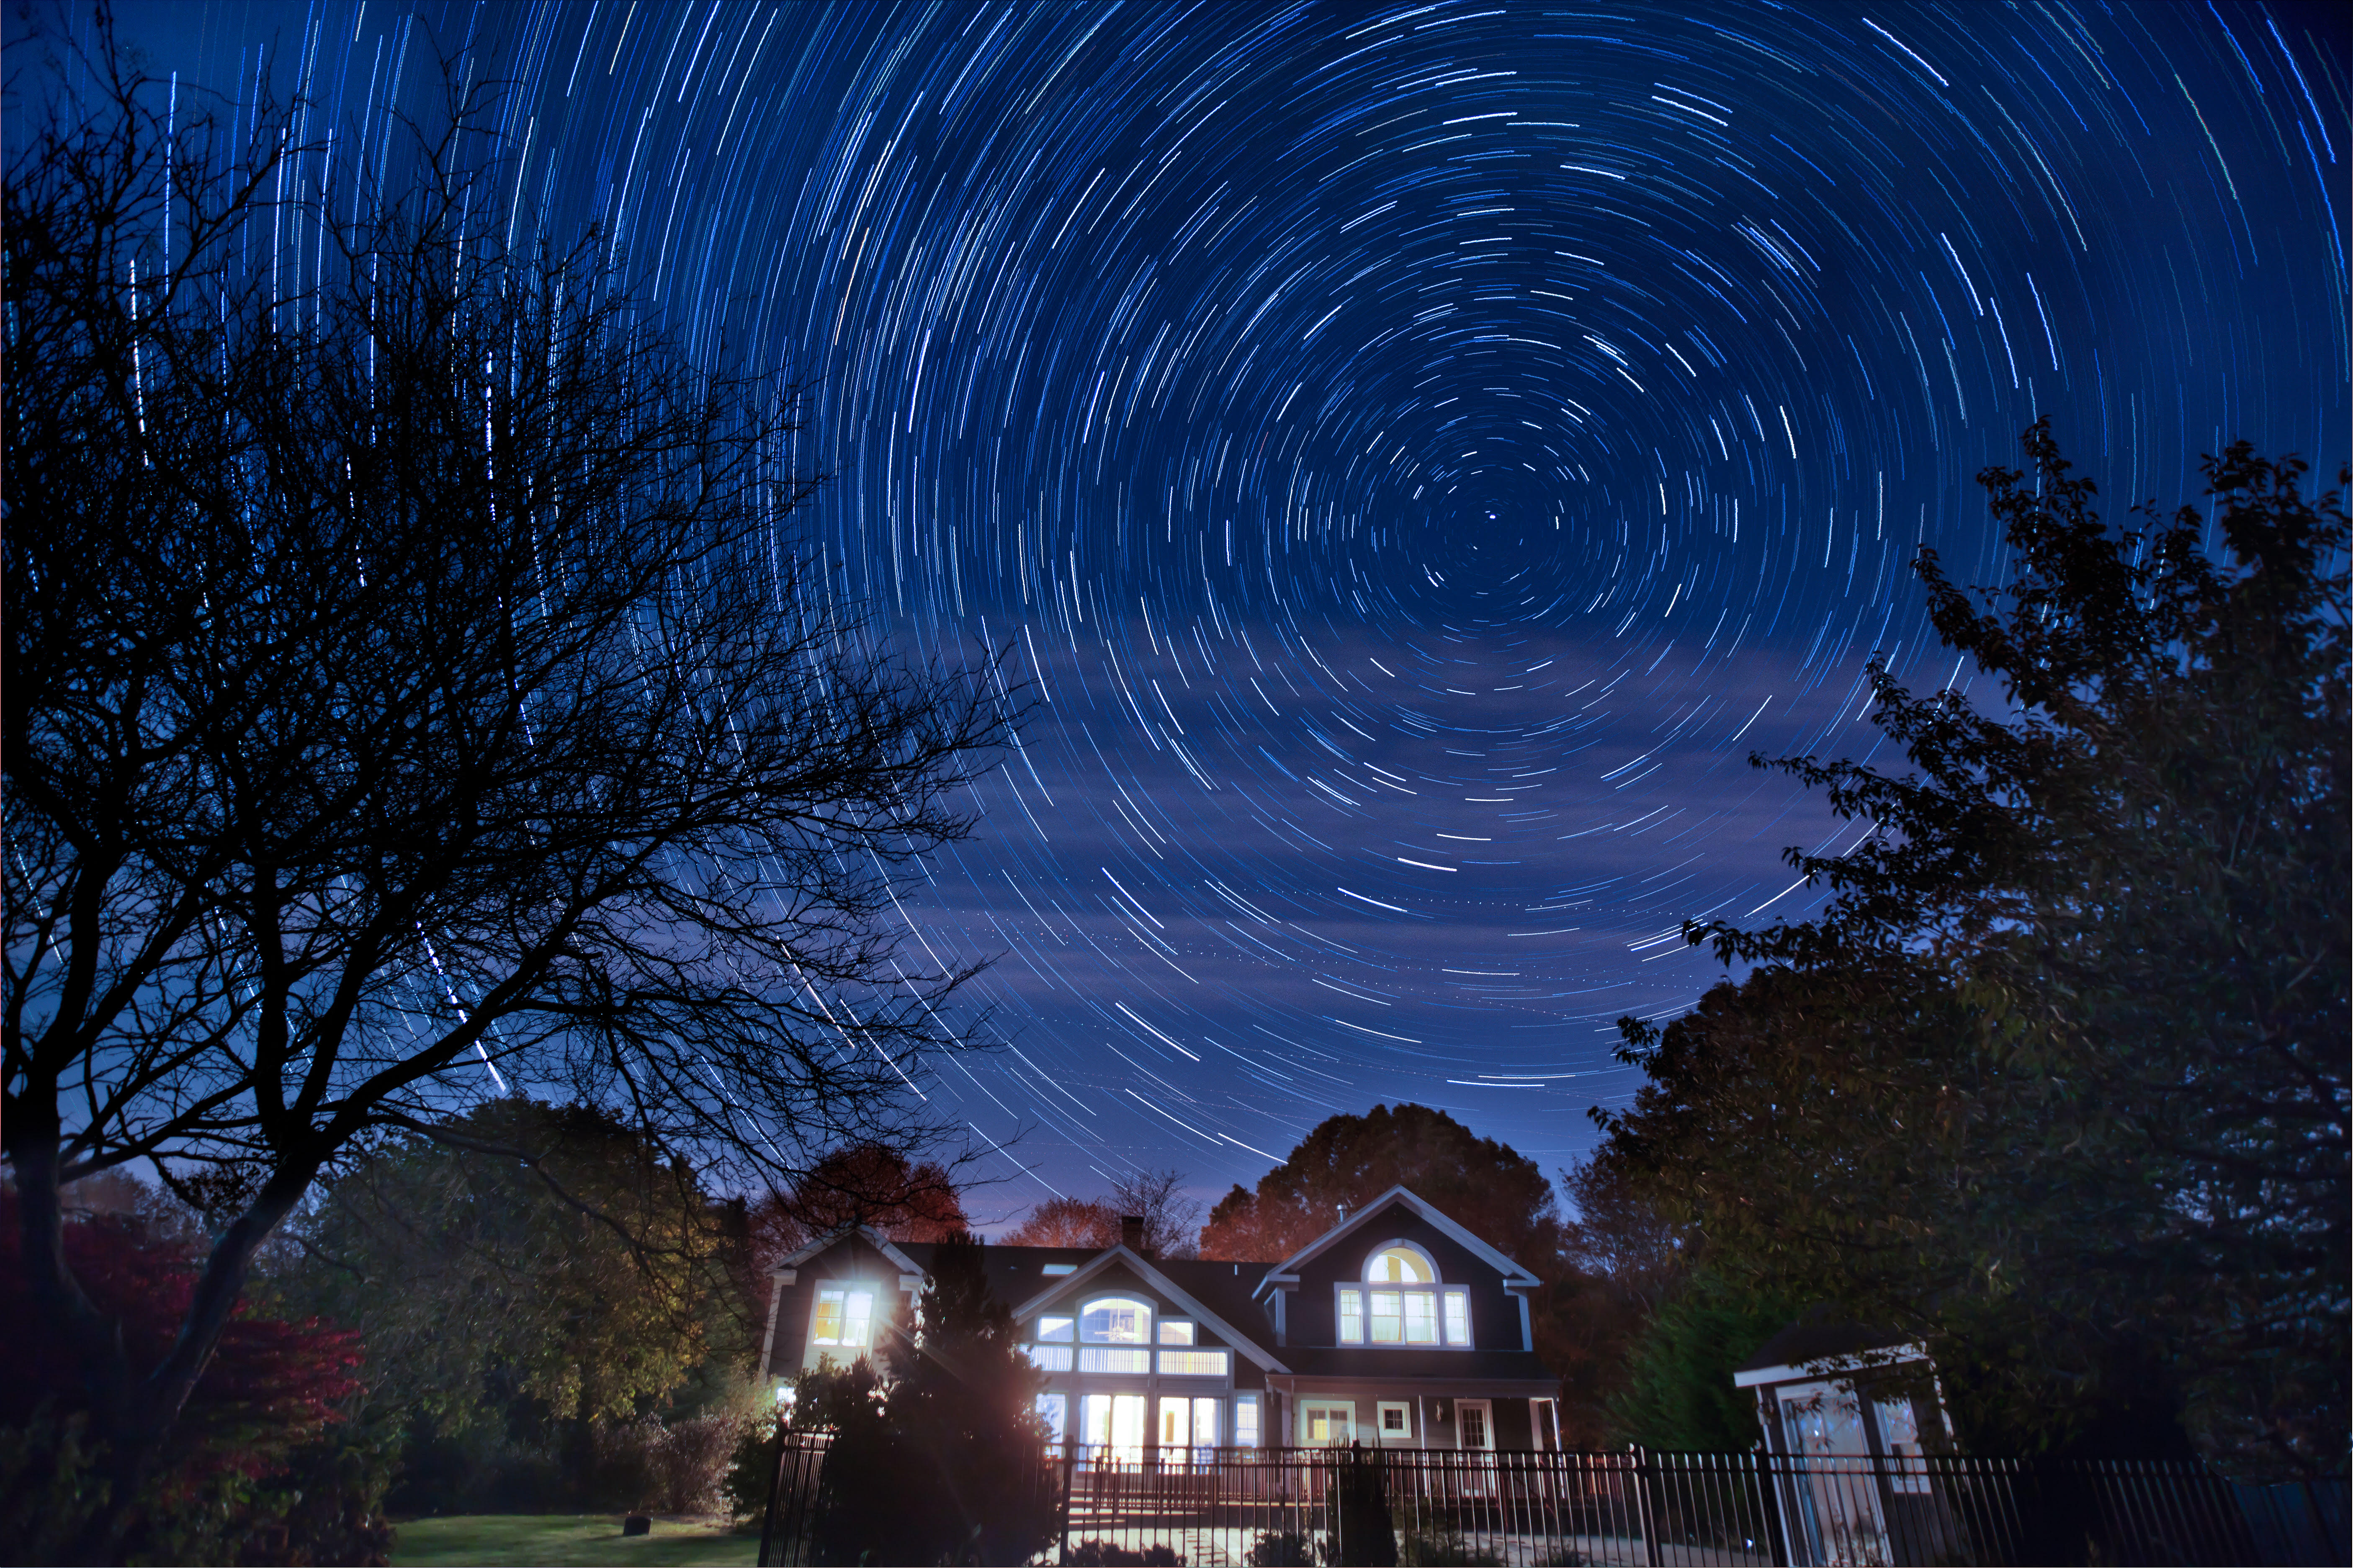
While stars are quite good at holding still for long exposures, the earth is spinning quite fast. Just like shooting from a moving car, long exposures cause everything to be blurred. Star trails can be beautiful, and many people do them intentionally to amazing effect.
To minimize star trails, keep your shutter speed at 30 seconds or less. Depending on the direction you’re facing, you still might see visible star trails at 30 seconds—or you might be able to get away with a shutter speed up to a minute.
You can also deliberately create star trails using one of two different techniques:
- One long exposure. Choose a low ISO setting (such as ISO 200), a moderate f/stop number (such as f/5.6 or f/8), set your camera to Bulb mode, and use a remote timer to set a shutter speed of ten minutes or more. The exact settings will take some experimentation, because the brightness of the sky and stars can vary. This approach doesn’t require post-processing, but non-moving lights (such as the glow near the horizon) will be brighter than the stars (as shown in Figure 10-4). Additionally, depending on your camera, noise can be amplified with very long exposures.
- Image stacking (the preferred method). Use a timer to take a series of thirty-second photos, and then combine them using an image stacking tool. For example, to create one hour exposure, you would take 120 thirty-second photos. Image stacking provides a darker sky and brighter stars. Image stacking can also automatically align pictures, fixing problems created by a tripod that moves slightly (something that is almost impossible to avoid over long periods of time).
Either approach requires a remote timer and manually focusing your lens. If you can’t see the stars well enough to manually focus, simply adjust the focus to infinity using the markings on your lens, take test shots with a high ISO (so you don’t have to wait as long), and refocus until the stars are sharp.
Image Stacking:
If you choose to use image stacking, set your camera to Manual mode with a shutter speed of 30 seconds, an ISO of 400, and an aperture of f/5.6. Experiment to determine the correct ISO and aperture settings to properly expose the stars with a 30-second shutter speed; if your first picture is too dark, decrease the f/stop number or double the ISO, and try again. Set your camera to continuous shooting, so that it will continue to take pictures as long as the shutter is held down. Then, use your remote timer to lock the shutter open (which simulates you holding down the shutter button). Your camera will continue to take pictures every 30 seconds until you stop it, it runs out of batteries, or it fills the memory card.
There are many different ways to perform image stacking. You can do it natively in Photoshop, manually using layers, or with the Stack-a-Matic script (http://www.russellbrown.com/scripts.html,) or by using stand-alone applications such as StarStaX (http://www.starstax.net,) Image Stacker (http://www.tawbaware.com/imgstack.htm,) or StarTrails (http://startrails.de.) Star Tracer (http://www.tawbaware.com/startracer.htm) can even fill in gaps in your star trails created by delays taking the next picture (for example, if you need to change the battery) and can lengthen star trails, allowing you to pretend you spent hours out in the dark, rather than just a few minutes.
 Shooting Tips:
- Bring extra batteries. Battery life is a problem, especially on cold nights. If you use image stacking, bring an extra fully charged battery, and swap it out as quickly as possible when the battery begins to run low. The time it takes you to swap the battery still might leave a tiny gap in your star trails.
- Prevent lens dew. Check your lens for moisture every 20-30 minutes, and use a lens cloth to dry off your lens’ front element. It gets dewy and cold at night, and the condensation is unavoidable. This is another good reason to use image stacking; when you clean the lens, you’ll no doubt move the camera slightly. Image stacking software can automatically adjust for the alignment change. You can help reduce moisture by storing your camera in a sealed plastic bag or the trunk of your car and allowing it to gradually acclimate to the temperature before you begin taking your pictures and after you bring your camera back inside. However, this technique won’t prevent dew from forming as the temperature falls overnight.
- Mind the clouds. You should also monitor the sky for clouds. If clouds roll in, no matter how wispy they are, they will ruin your star trails. With image stacking, simply release the remote shutter and stack the images that were not ruined by clouds.
- Consider Your Foreground. To create really exciting star trail pictures, choose a perspective with something interesting in the foreground, such as a building, a tree, or a rock formation, and shoot wide-angle to show enough stars. If it is not naturally lit, use light painting techniques (described here) to illuminate it.
- Know your Earth. Star trails move in a circular pattern revolving around the North Star (if you’re in the Northern Hemisphere), or the Southern Celestial Pole. Actually, you’re on the Earth, and the Earth is spinning on its North/South axis, so if you’re looking up at the relatively motionless stars near either axis, you’ll see them appear to be rotating around the axis point. If you’re not pointed at your hemisphere’s pole, stars trails will be slightly curved lines.
- Find the North star. In the Northern Hemisphere, you can find the North Star by finding the big dipper. The two stars at the end of the big dipper’s scoop (the two stars farthest from the handle) are called the “pointer stars” because they point to the North Star. Unfortunately, there’s no star at the right location that you can use in the Southern Hemisphere. You’ll just have to find south using a compass and experiment with long exposures to align your picture.
- Edit your photo. As with all night photography, shooting stars requires some post-processing. You’ll probably need to bring the black point up to hide noise and distracting light. You should also pull the color temperature toward the cool end of the spectrum to better show the different colors stars give off.
- Remove airplanes. When you’re done, you’ll have several straight, dashed lines through your picture created by the blinking lights on airplanes. Airlines can be very inflexible about rerouting their flights around your pictures, so your best bet is to remove the lines in post-processing. It’s more easily done with image stacking, since the airplane would only appear in one or two frames.
Whichever approach you choose, plan to wait for hours while the software processes your pictures. The more pictures and the larger the files, the longer the processing will take. If the script or application outputs a file with each image in a separate layer (as the Stack-a-Matric script can,) merge the layers before saving it—otherwise your file might take several gigabytes of space.
Happy shooting!
This is an excerpt from our book Stunning Digital Photography, if you like it and want to learn more, you can purchase the book here or search for us on Amazon.