
The first weekend after finishing the build of my R/C KAP rig, the wind was good enough to test it out. I decided to go to St. Mary’s College, which I’d KAPed one time before, but I hadn’t gotten pictures from quite the best angles. The new rig would allow me to see what the camera is pointing at, so I could be sure to get the desired composition. Plus, the wind was out of the west, which is ideal for this site.
The wind was gusty and near the upper limit of what my kites can handle: 15 mph with gusts to about 20. I had flown the Mini Dopero in wind like this several times before, though, so I knew it would be up to the task. The good thing about flying in a stronger wind is that it takes no effort to get the kite in the air, and this time was no exception. Apparently, I last flew this kite in similar winds, because it required no trimming once in the air, and the pull seemed reasonable for the wind speed (i.e., plenty but not too much).
Besides the rig, I was also experimenting with another new piece of equipment: a dog stake to hold the line while I set up and take down the rig. This stake replaced my big-ol’-bag-o’-rocks. It turns out it is much easier and more convenient than the bag. I think I will use it from now on any time there is suitable ground to put it in. Thanks to Kidafi Byer on the KAP Facebook page for the suggestion!

I let the kite fly by itself with the winder attached to the stake for a few minutes to make sure it was stable. Then I attached the rig by wrapping the line about four times around each of the Brooxes Hangups at the ends of the picavet suspension, separated from each other by a few feet on the line. I plugged in the battery for the rig, turned on the PowerShot S100, grabbed the winder, and away it went! Here are a couple pictures of the rig attached to the line.


Another good thing about flying in a stronger wind is that the kite has no problem lifting the rig. This rig does weigh about 4 oz / 115 g more than my fixed one, which I imagine will make a difference on those days with barely enough wind to fly, but today the kite could have certainly lifted a lot more if it had to.
Since this was my first time flying an R/C rig, the process was a bit new to me too. When I wanted to take some pictures, here is what I had to do:
- Turn on the transmitter. I leave it off when not taking pictures because that seems to put the receiver in a sort of standby mode, with the servos completely still and, I assume, consuming minimum power.
- Turn on the FPV monitor.
- Switch on the video downlink, which is controlled by the flaps switch. (The VTx is also left off when not in use to save the battery.)
- Pan and tilt until the rig is facing approximately the desired direction, and then flip the switch to take a bunch of pictures. Hopefully some of them turn out well!
- Turn off the VTx and the transmitter again and fly the kite some more!
The way the sticks and switches are arranged on my transmitter, and because it is attached around my neck with a strap, I can operate the rig completely with my left hand while holding onto the kite reel with my right hand. If the kite suddenly needs attention, the transmitter can be pushed aside so that I can focus on just flying the kite again.
Above is a video showing what the video downlink looks like. It was a gusty day, and that definitely shows up in the video! (Remember, this video is not high quality nor stabilized, as the stills from the main camera are the “end product.” Its purpose is just to show me where the rig is pointed and what the general composition of the photo will be.) With all the bouncing around, taking pictures is definitely a somewhat approximate endeavor. For that reason, I leave the camera in continuous shooting mode and leave the switch down to take a bunch of pictures once the rig is pointing in the right direction. On less gusty days, I imagine things will be a lot smoother!
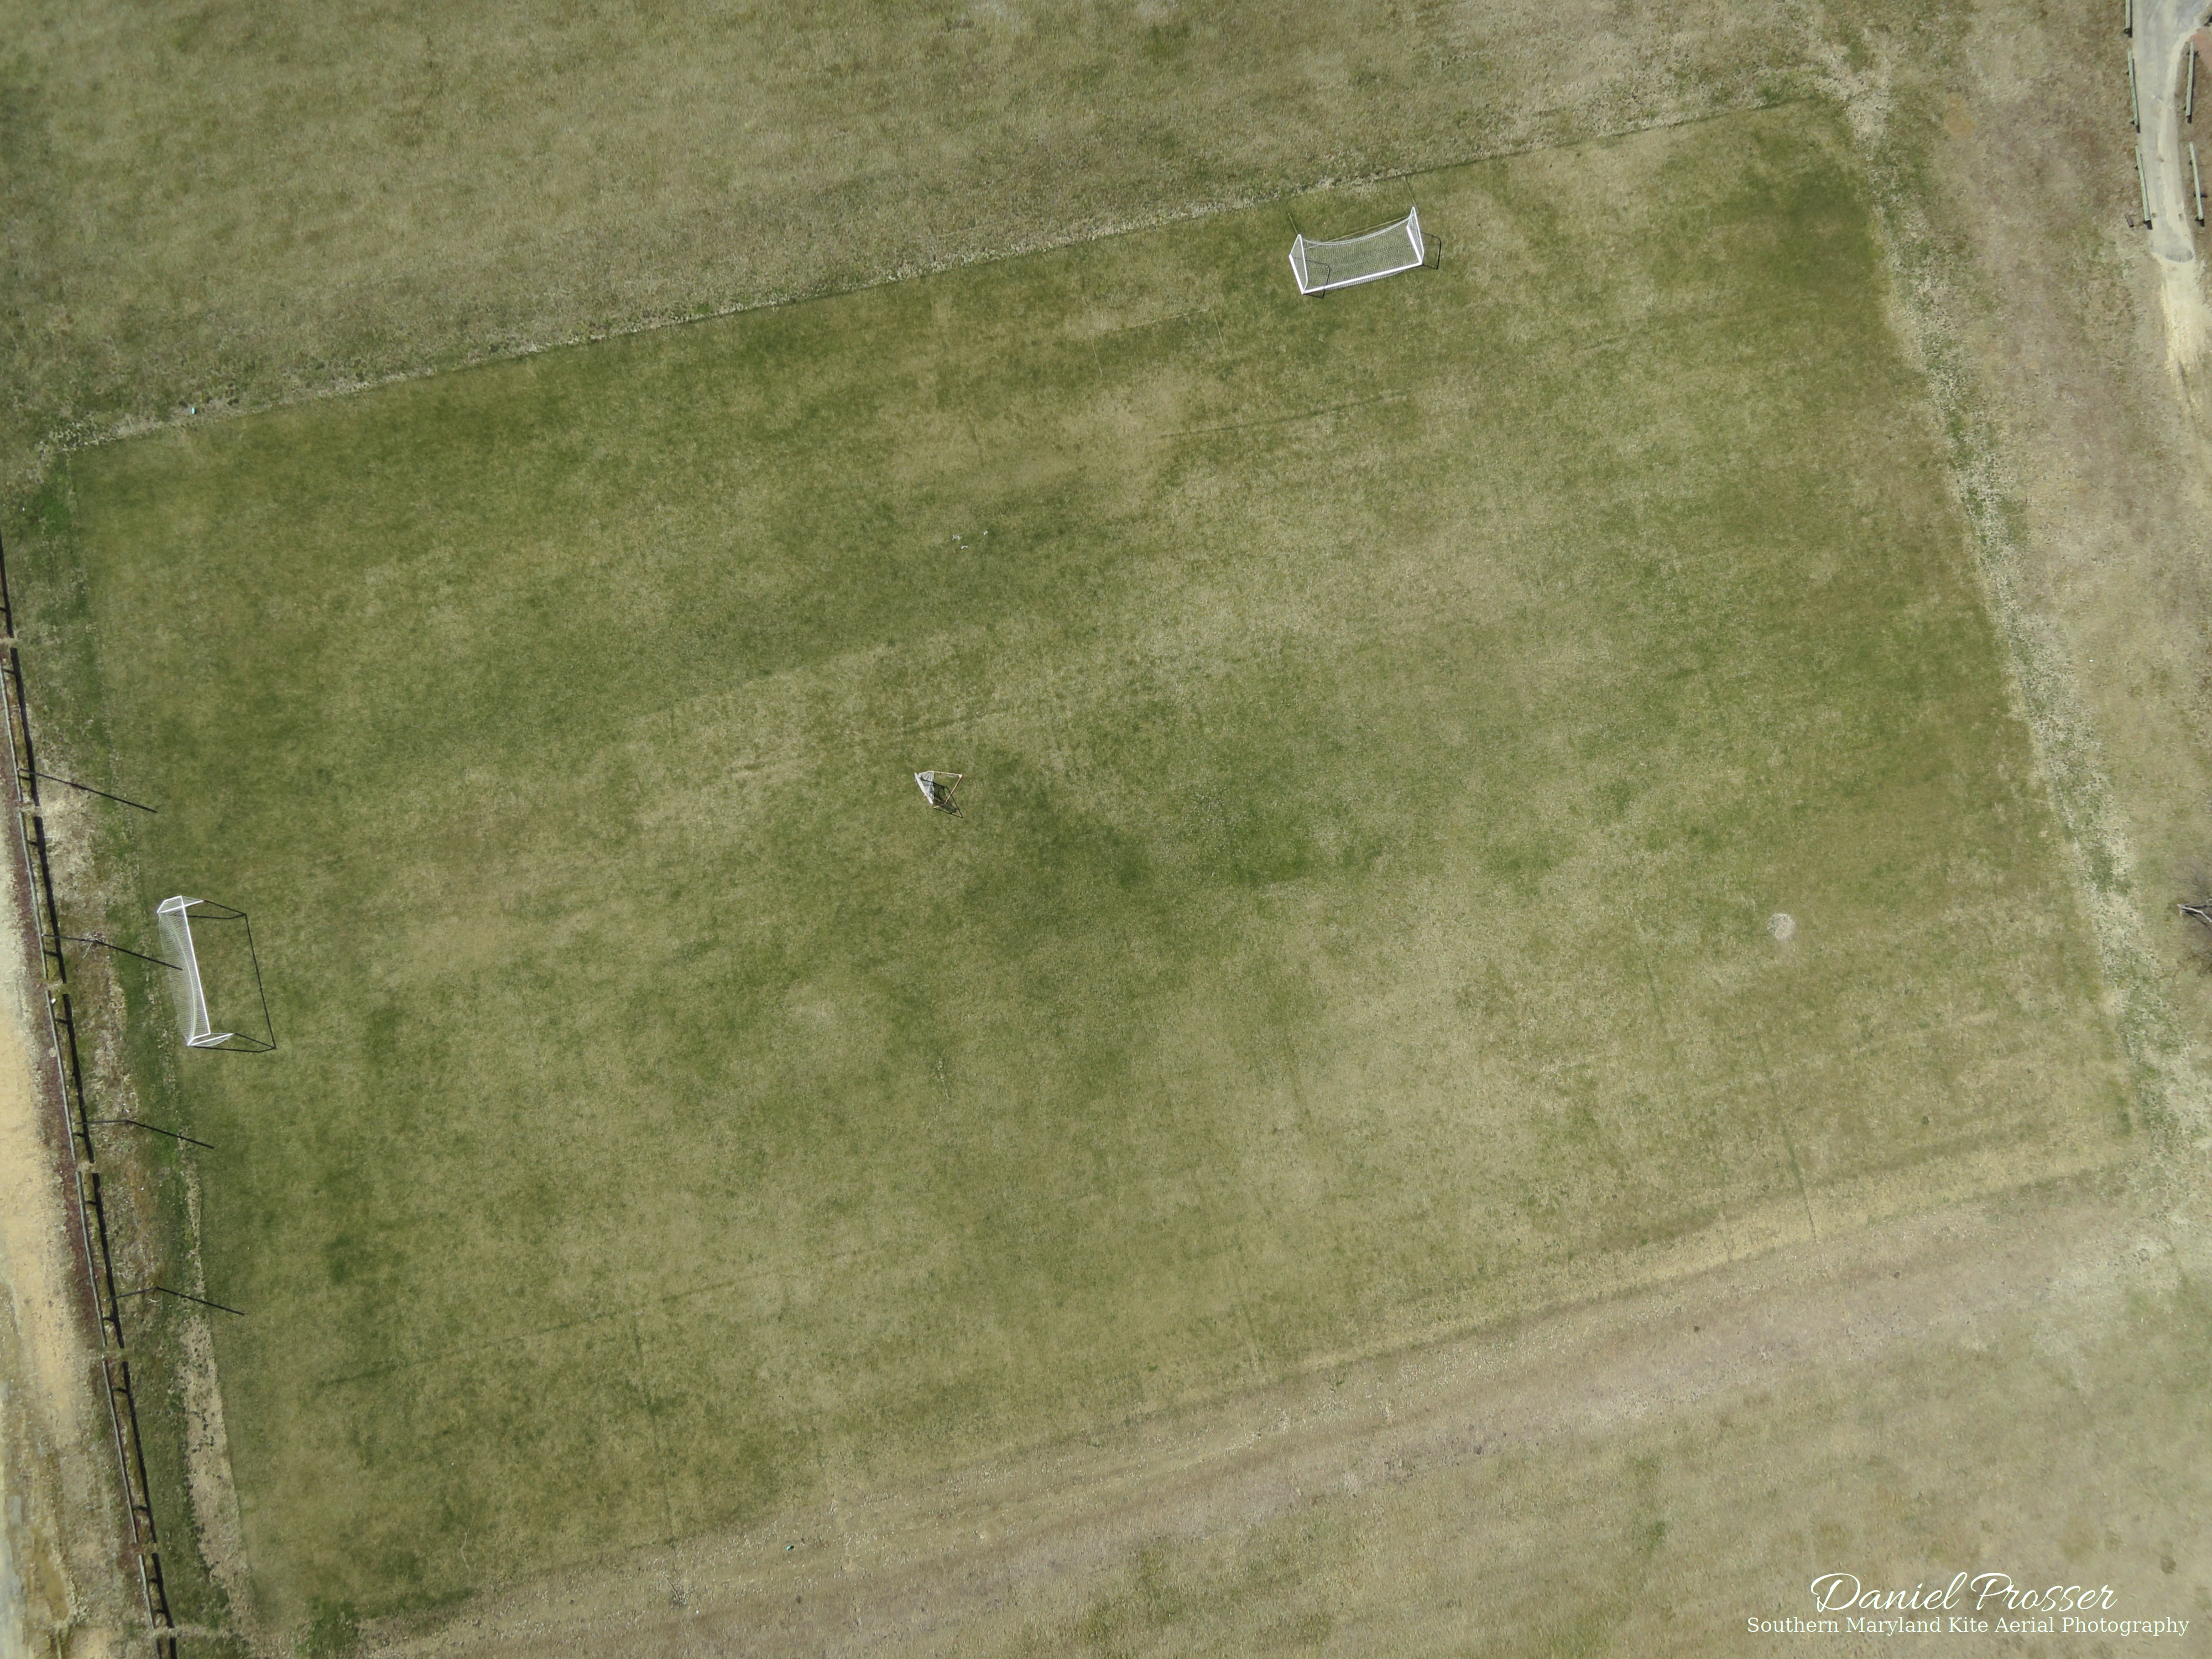
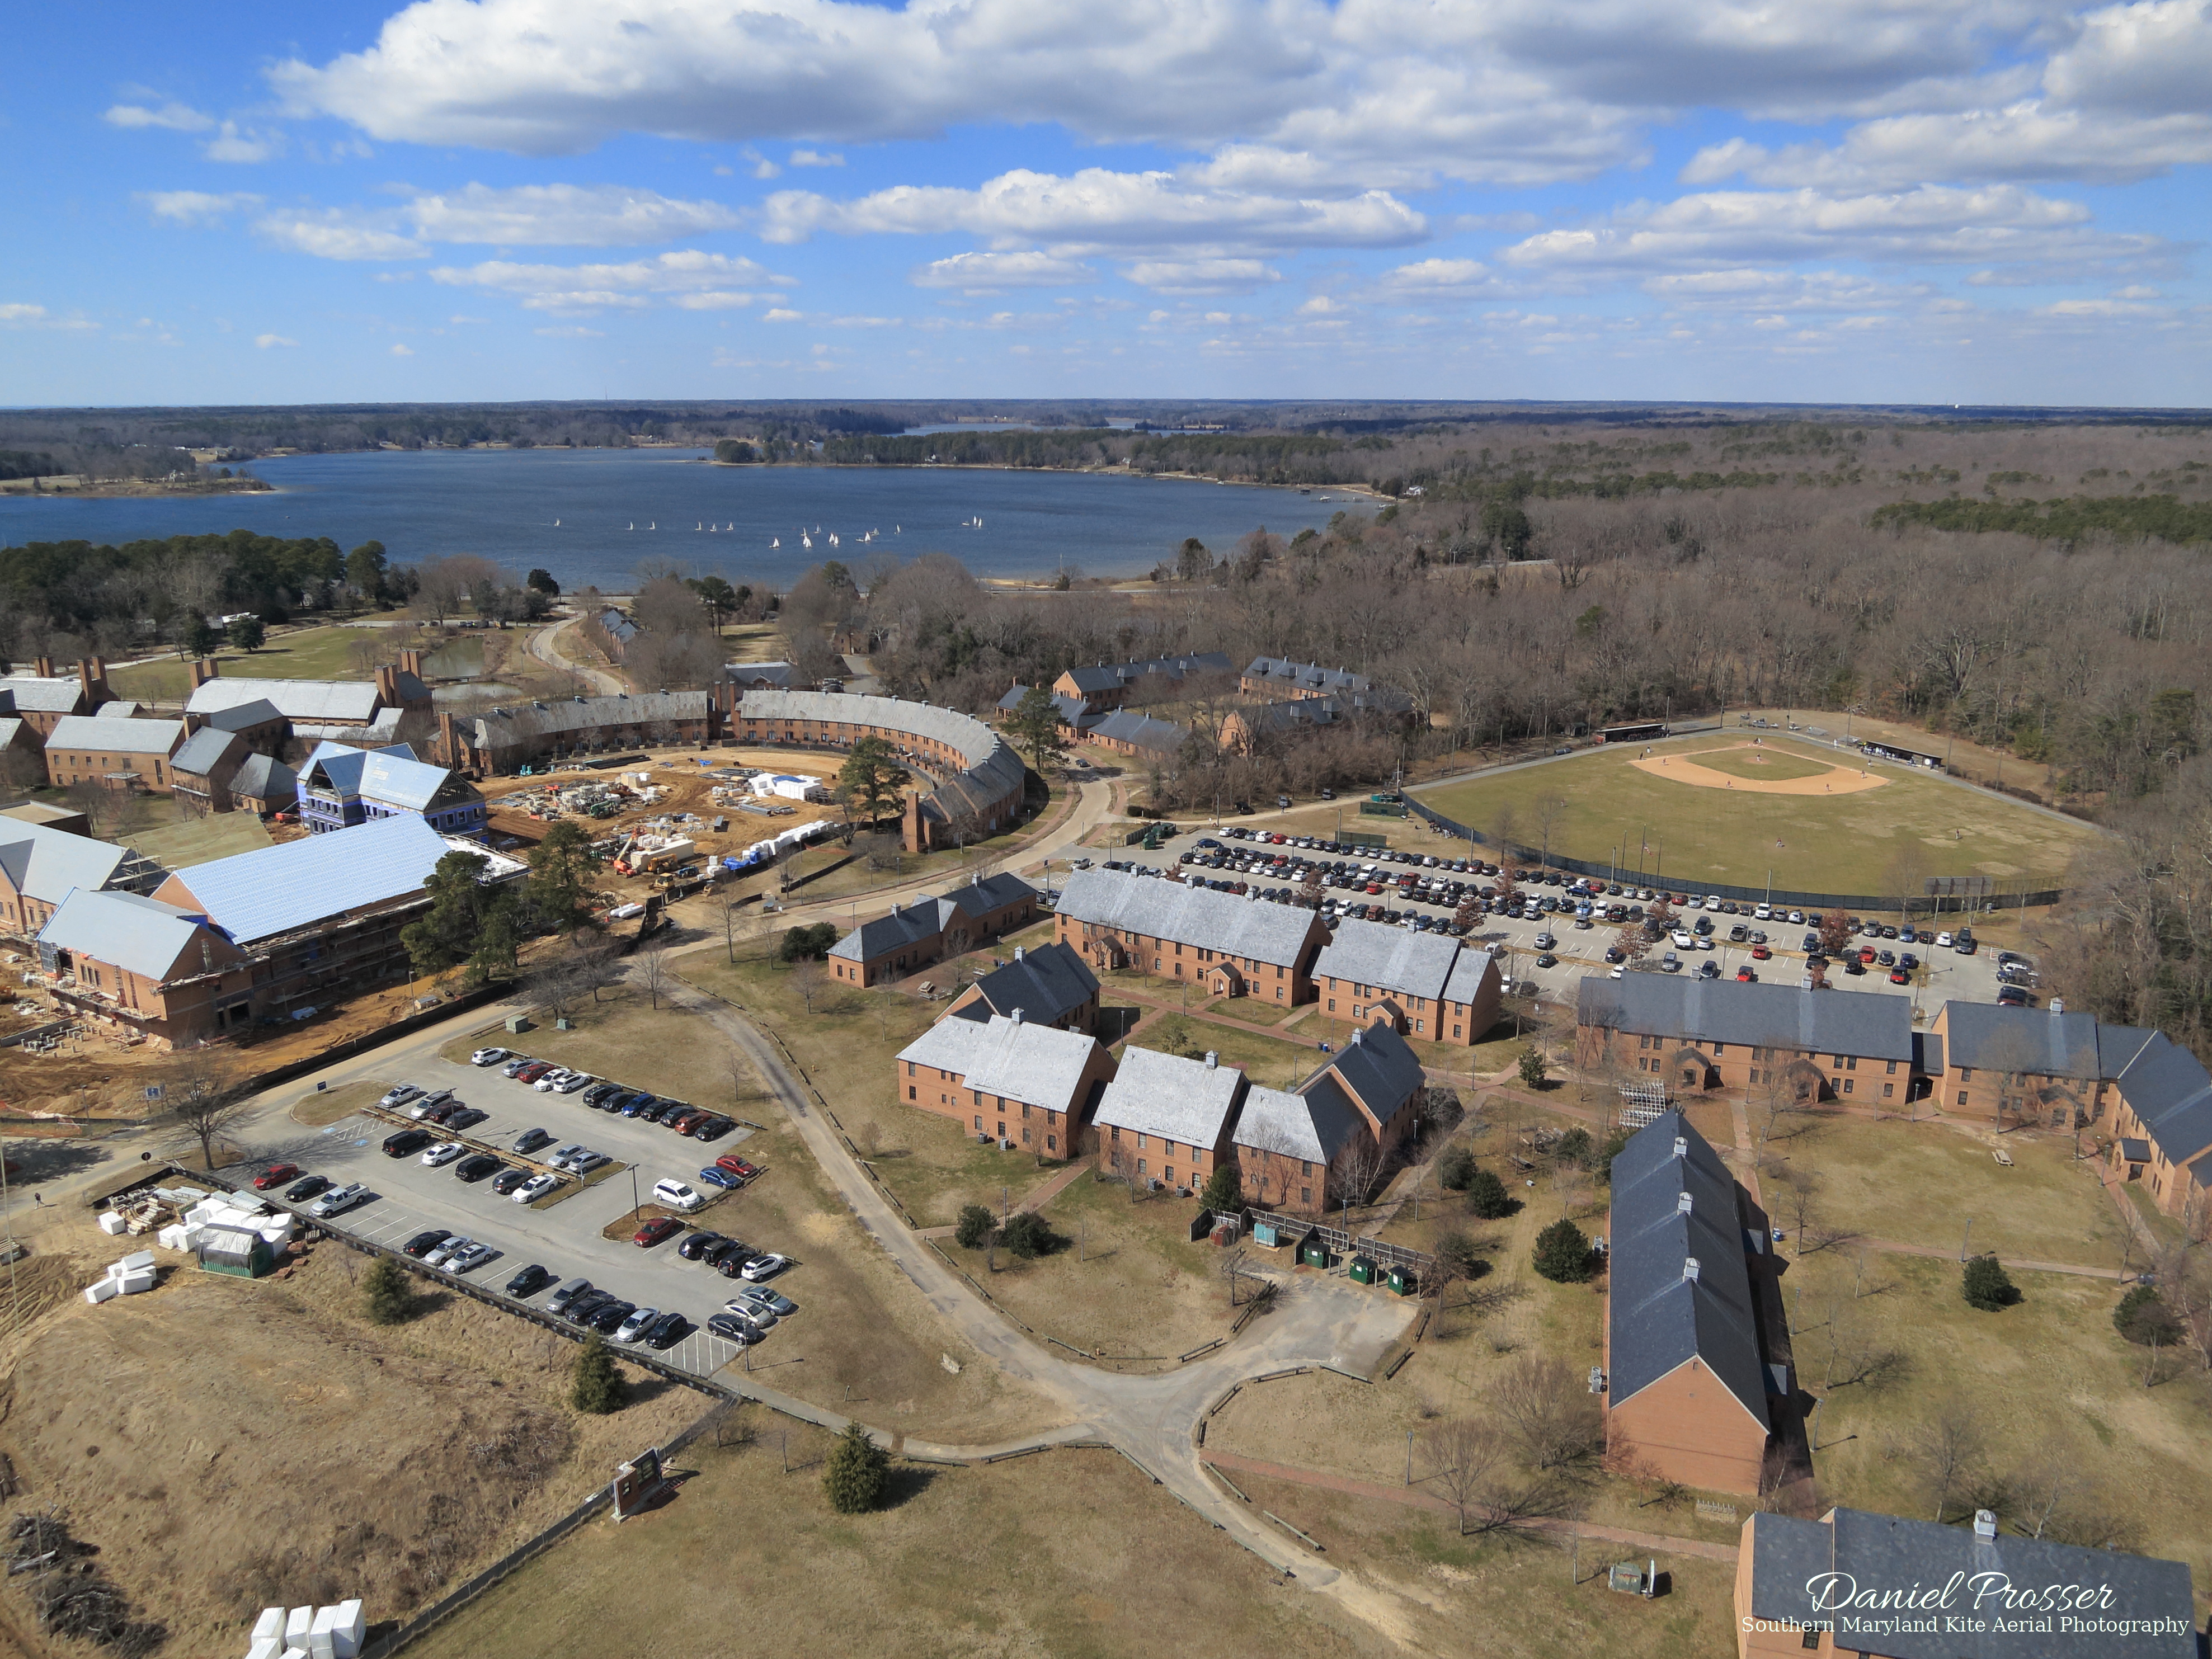
Despite all the gusts, I did manage to capture pretty much all the pictures I wanted from this session. The money shot is up above, and also at the end of the gallery below. I really like how that one turned out. The composition is just about perfect, with most of the school visible in the foreground, St. Mary’s River prominent in the background (with some sailboat racing going on), and a beautiful big blue sky. Also of note is the baseball field — which I didn’t even know existed until I saw it from the air — with a game in progress. There were several other good pictures too, taken from a variety of angles and heights. The straight-down image of the soccer field is something I never could do before!


The first time out with the R/C rig was definitely a smashing success. I’m sure I will still use the fixed rig sometimes, maybe on days with very light wind, but being able to see and control the camera is really fun and rewarding. Even though the video feed may be shaky, it still gave the results I was hoping for.
The one big mistake I made was accidentally stepping on my transmitter after I was done taking pictures and had put it on the ground. Woops! 😕 That happened due to a sudden lull in the wind, to which I responded by backing up quickly to keep the rig from falling to the ground. Then I heard that gut-wrenching CRACK! Thankfully, the only damage was a broken monitor mount, which can be fixed with some sanding and glue.
Here are some things I learned from this first session with the new rig:
- The low power setting (25 mW) on the VTx seems to be plenty. I didn’t experience any problems with reception.
- The 500 mah battery for the rig ended up about halfway expended after what I consider a pretty typical flight, so the capacity is fine. That would not have been the case if I didn’t have a way to turn on and off the VTx from the ground, so that is a very valuable feature. (The alternative is a much bigger and heavier battery.)
- I will take more pictures next time. I came back with only 31, which resulted in plenty of “keepers,” but it wouldn’t have hurt to have more to choose from. Part of the reason for the small number is that the S100 is pretty slow in continuous shooting mode, especially when saving RAW images. Next time I’ll just hold down the shutter for longer each time. Still, it was nice only having to sift through 31 images instead of the 400 that I normally get with the fixed rig!
- When putting down the transmitter, make sure it is far away from where you might step. I was lucky to get away with no damage to the electronics.
Well, this has been fun. I’m sure I will have many more adventures with this R/C rig in the future!

One thought on “First KAP Session with an R/C Rig”