Ever wondered what the Android Recovery Mode is, what is it actually used for, and how to enter it on your device? Here is your complete guide on everything that you need to know about the recovery mode and under what circumstances is it useful for.
The age of smartphones is just a decade old, but it could be long enough for some to forget how the first generation of smartphones functioned. Back when the Symbian OS by Nokia still reigned supreme, Google chose to acquire an up and coming mobile software company called Android under its leadership. The introduction of Android OS by Google may not have been explosive right from the start, but slowly and steadily, the platform has become the biggest name in the mobile market today.
While the user interface with which mobile phones, especially Android devices are designed, you’d almost forget the complexity that happens right under the hood. Android OS is actually based on the same code that is behind Linux, the popular open-source computer operating system. So while Google may have designed the surface of Android to look polished and simplified, the system is entirely built upon a framework, and the Android Recovery Mode is a part of it all.
What is Android Recovery Mode?
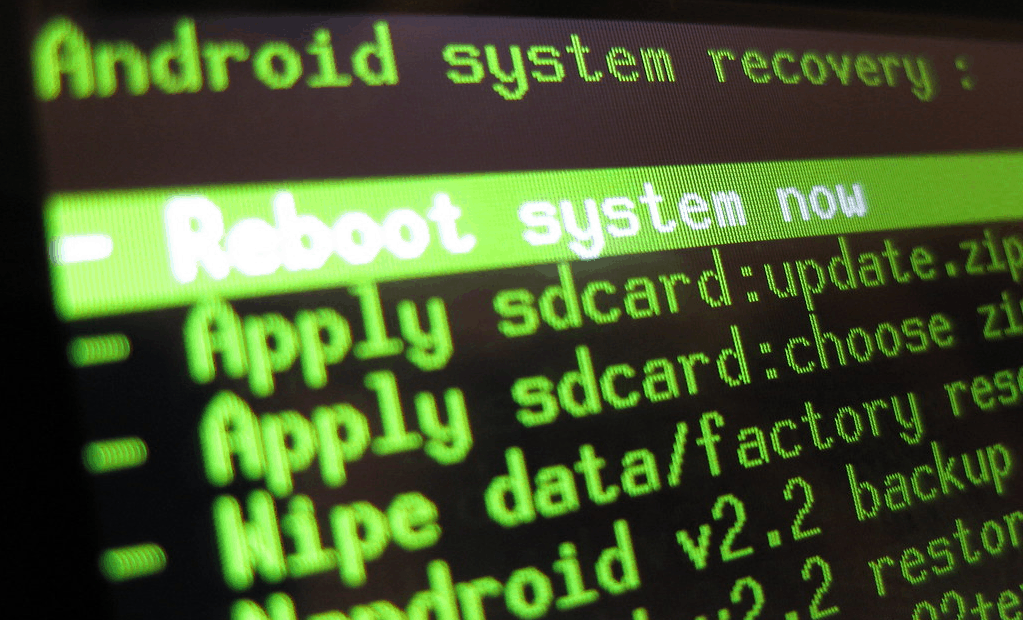
Consider your Android device as nothing short of a full-fledged computer, with storage that includes bootable partitions for the system as well as file storage. By either using a command line function or by pressing a combination of buttons on your Android device, you can force the device to boot up in the recovery mode. The recovery mode for Android by default includes a list of features that allow you to resolve issues and errors that may have occurred during the installation of new software or system repairs.
In general, the stock recovery mode in Android comes preinstalled on all devices that run Android OS, but it is not the only recovery mode available. Since Android OS is open-source, this leaves plenty of room for tinkering, which has led to the invention of custom recovery. In comparison to the stock recovery mode which contains only a handful of general system repair and installation features, custom recovery for Android such as TWRP (Team Win Recovery Project) unlock a world of possibilities for you to discover.
What you can you do with Android Recovery Mode?
When comparing stock recovery to custom recovery, there certainly is a fair amount of difference between the two. While stock recovery may grant you the ability to factory reset the device and clear the cache, custom recovery gives you unprecedented access to the system files, allowing you to root the device, install a custom ROM, install a custom kernel, and so much more. Although the potential of a custom recovery goes above and beyond the stock recovery mode, there’s still plenty that you can do with it. Here’s everything that you can do using the stock Android recovery mode that comes preinstalled on your device.
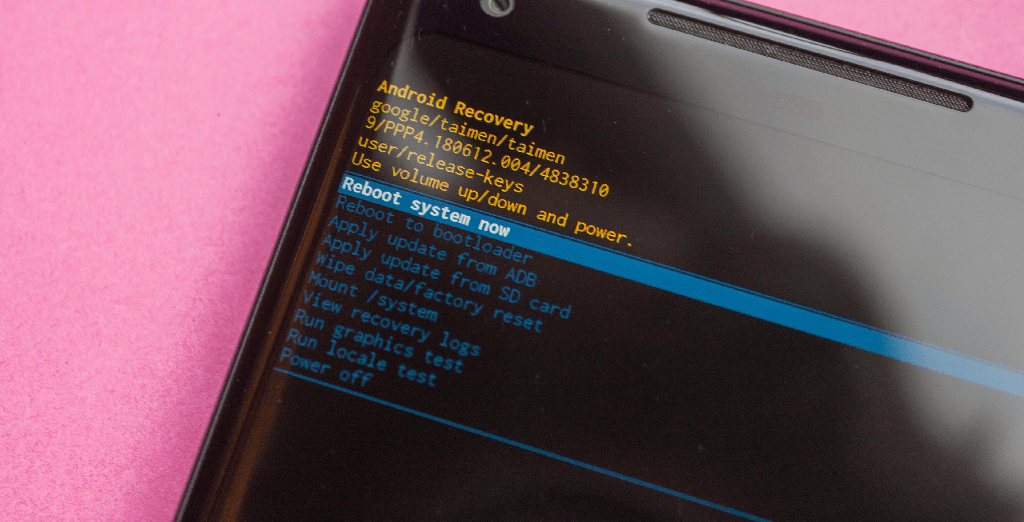
Reboot system now – The straightforward menu option allows you to exit the recovery mode screen and reboot the Android device with the normal system menu.
Reboot to bootloader – This menu option allows you to exit from the recovery mode screen and reboot to the bootloader menu screen. The bootloader of your Android device is required to be unlocked for you to root the device or install a custom ROM.
Apply update from ADB – Allows you to push an update file from your computer to the Android device and install it using the ADB (Android Debug Bridge) connection. This is a handy feature for the times when the device is stuck in a boot loop and you need to flash the software update manually.
Apply update from SD card – The feature allows you to navigate, select, and update thesystem software manually by using the file that is stored on the SD card of the device.This method is useful for when you want to repair the system or restore the device without the use of a computer (ADB).
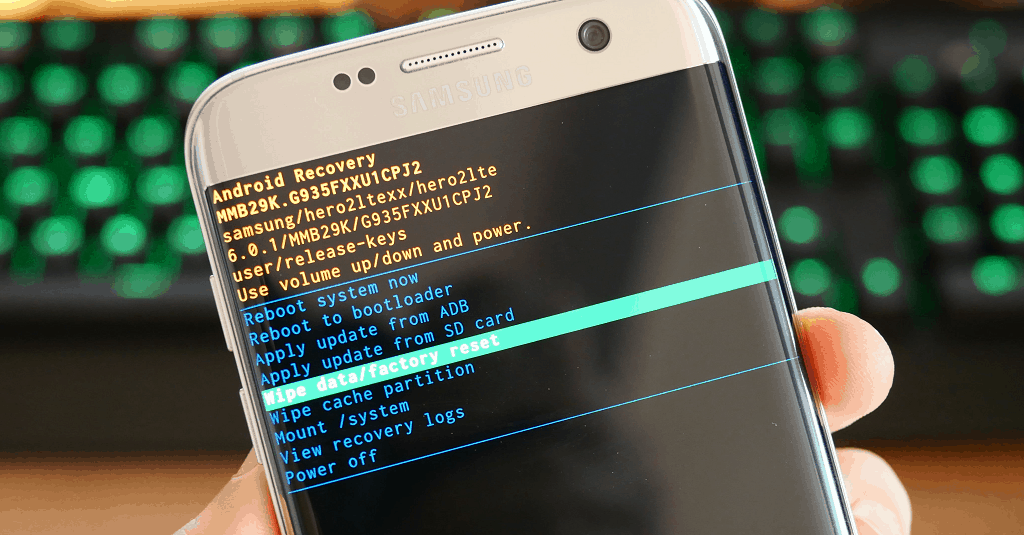
Wipe data/factory reset – Just as the name suggests, this recovery menu command gives you the ability to perform a factory reset on your Android device. Confirming this action removes all of the stored data and settings on your device in one clean sweep.
Wipe cache partition – The feature enables you to get rid of the cached data, which includes temporary files from the system and third-party apps, along with broken files at times as well. By clearing the cached data of your Android device, you do not lose the personal data, apps, and files that are saved on the system storage.
Note: With the release of Android 7.1 Nougat, Google has removed the “Wipe cache partition” option from the recovery mode screen. However, you can still perform this function by heading over to Settings – Storage – Cached data and confirm by pressing the OK button.
How to Enter Android Recovery Mode
Now that you have understood what the recovery mode on your Android device actually is and how you can use it to your advantage, here’s what you need to know about entering the recovery mode screen. Although the ADB command is universal for all Android devices to enter the recovery mode, the combination of buttons that need to be pressed to manually enter the recovery mode screen differs from device to device. We’ve covered all of the most popular Android OEMs and listed the combination of buttons that you need to press on these devices to enter the recovery mode screen.
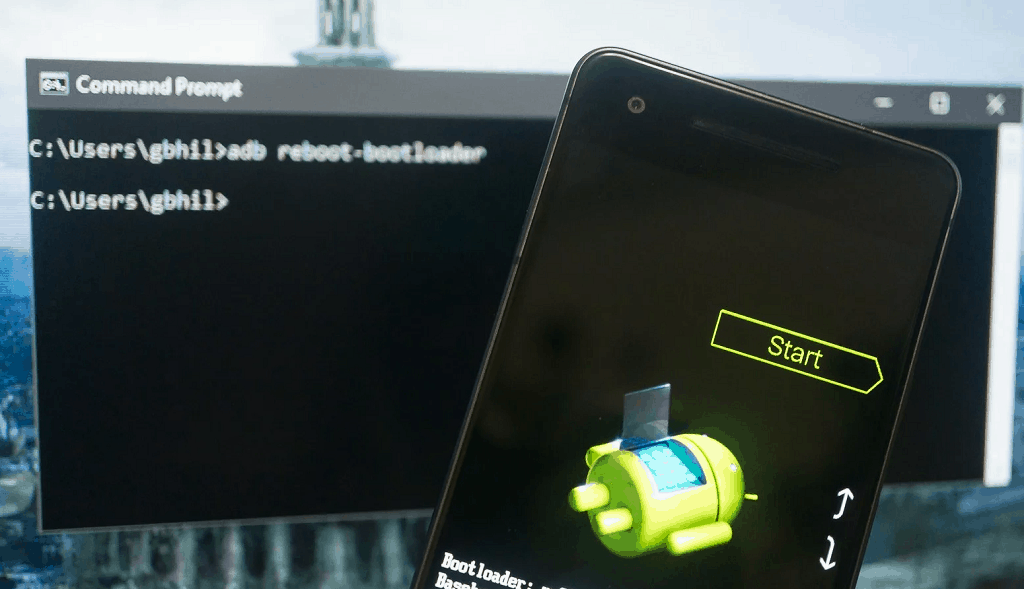
Enter Recovery Mode using ADB
The universally accepted method of entering the Android recovery mode, regardless of your Android OEM brand, is by using the ADB commands. This is especially useful for those who always have trouble clamping down on multiple buttons at the right time to trigger the recovery mode boot up.
- Make sure that the ADB drivers are installed on your computer before you begin.
- Connect the Android device to the computer using a USB cable and launch the ADB command shell window.
- Type in the following command in the ADB shell window –
adb reboot recovery - The Android device will now automatically turn off and boot into recovery mode.
Enter Recovery Mode on Google Pixel Phones
For smartphones such as the Google Pixel line which is blessed with the purest version of Android OS right out of the box, here’s how the process of booting into recovery mode works:
- Turn off the phone by pressing down on the Power button and selecting the Power off option.
- Once the phone turns off, release the Power button for a second, and then press and hold the Power button again, along with the Volume Down button.
- Wait until the Android logo of the recovery menu shows up, at which point you can let go of the buttons.
- Using the Volume Up and Volume Down buttons for navigation, you can scroll through the options available and select either of them by pressing the Power button.
The combination of buttons that have been mentioned above seem to be the go-to setting to boot into recovery mode for the majority of Android OEMs as well. So if you own an Android device apart from the Samsung Galaxy line of devices, chances are that the above steps are just what you need to boot into Android recovery mode on your device.
Enter Recovery Mode on Samsung Galaxy Phones
Being one of the largest Android third-party brands in the mobile market today, Samsung Galaxy devices do deserve a special mention. Especially since the combination of buttons that need to be pressed to boot into recovery mode on Galaxy devices differs from the rest.
- Turn off the phone by pressing down on the Power button and selecting the Power off option.
- Once the phone turns off, release the Power button for a second.
- Now press and hold down the Power button along with the Volume Up button and the Bixby button (or the Home button on older Galaxy devices).
- Release the Power button once you see the Samsung logo appear on the screen.
- Wait until the recovery menu screen shows up, at which point you can let go of the buttons you’ve been pressing.
Final Words
The recovery menu is the easiest way to clear the cache or even perform a factory reset on your device. But before you start using it, make sure that you’re aware of the Factory Reset Protection (FRP) protocol that has been put in place. After the release of Android 5.0 Lollipop, Google has included a security safety net for users which is similar to the iCloud Activation Lock on iOS devices. The FRP security feature enforces the entry of username and password of the Google account that is associated with the phone before it can be turned on.
If you choose to perform a factory reset on your Android device using the recovery menu, make sure that you have access to the Google account first. What do you plan to use the Android recovery menu for, now that you know how to use it better? Be sure to give us a piece of your mind in the comments section right down below.