
This is my precious grandbaby Nora, just a few weeks old and so snuggly. I mainly made this Cluster Stitch Baby Bonnet so I could take cute pictures of her. The newborn stage goes by so quickly I am trying to get as many photos of her as I can.
Making baby bonnets are a nice easy gift to go with a baby blanket or to just tuck into a gift basket. You can really turn any rectangle into a bonnet easily, and for this bonnet, I was able to make a video tutorial so you have something to follow along if you need it.
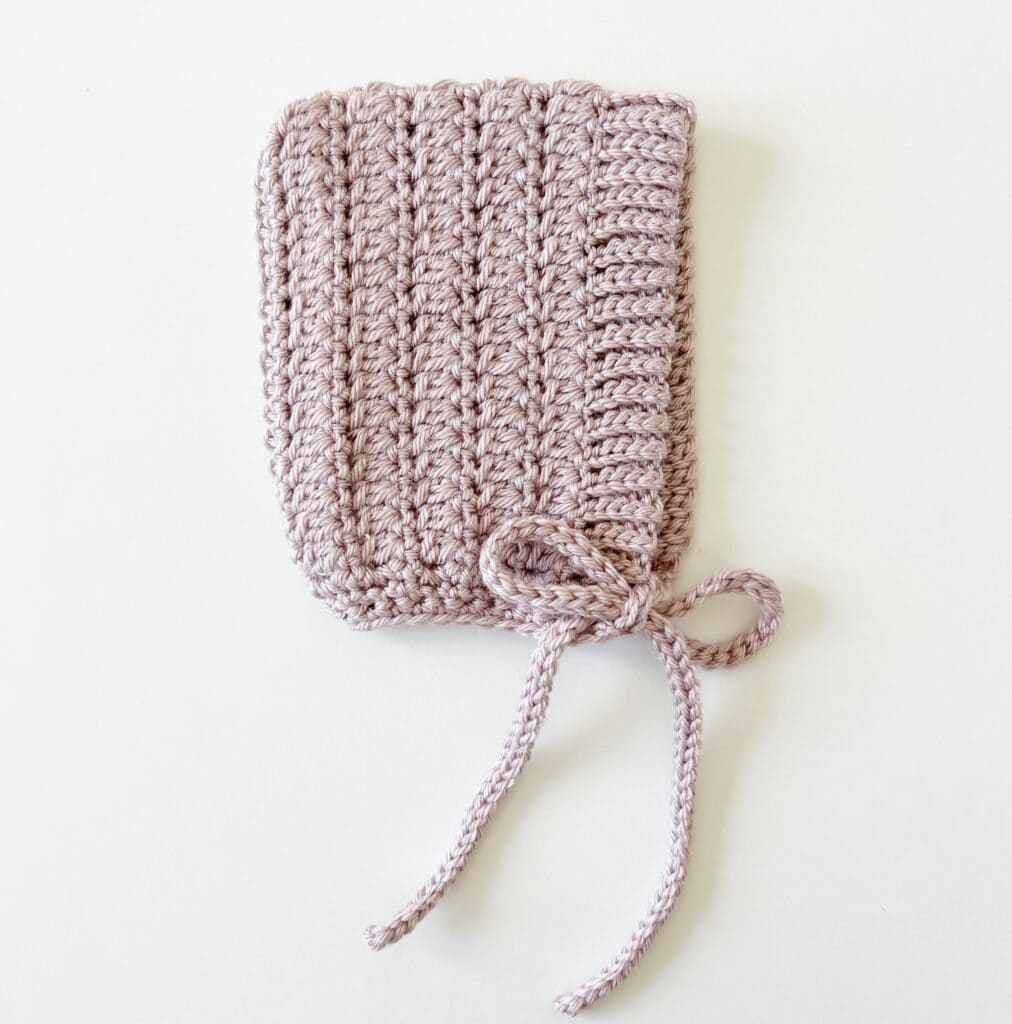
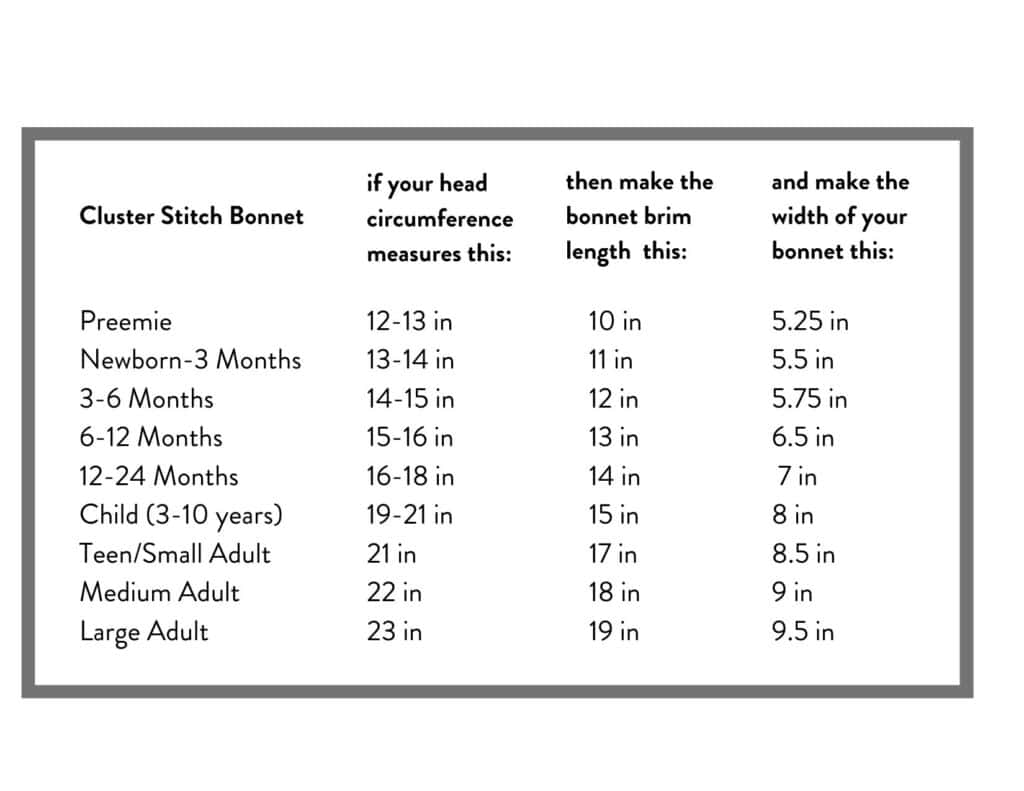
Getting the size just right on this bonnet depends on when you want to do the photo shoot. Babies grow so fast. If you are wanting to take that darling photo before they are a month old, make the size closer to the preemie size in the chart. Nora was a 9lb baby and the photo was taken when she was 10 days old.
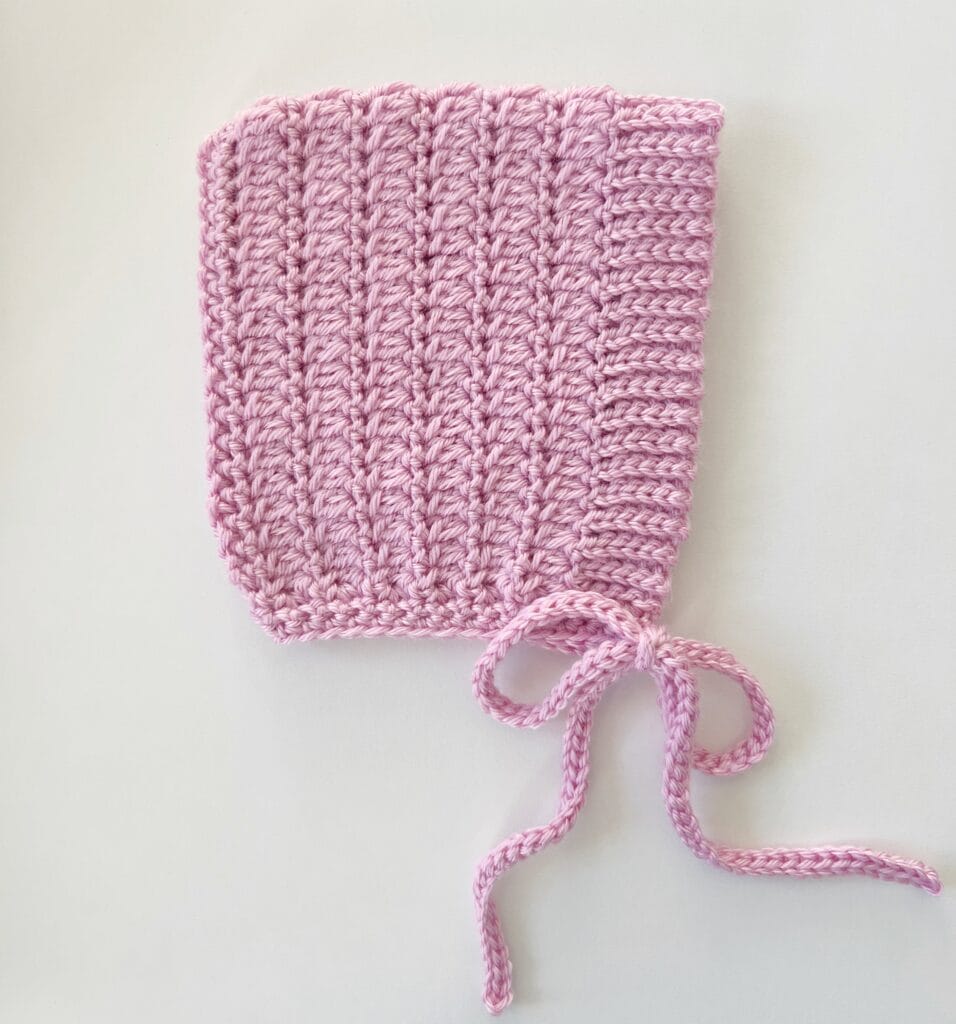
I made a slightly larger bonnet for the video tutorial and I’m expecting that to fit her when she is two months old.
For the most accurate measurement, measure the brim section after you have made the first row of single crochet and a row of clusters. The brim will stretch about a half inch to an inch, (depending on the yarn you are using.)
This is the pink bonnet I made for the video tutorial and it has one more row of cluster stitches for a bit more depth:
And here is one more photo of her as she is just snoozing away. So cute!

Be sure and scroll to the end of this post for the video tutorial and the printable pdf.
Materials
Patons Canadiana (100% acrylic, 100 g / 3.5 oz, 187 m / 205 yds, 4 weight) Tap name of yarn to see on Yarnspirations.com
1 skein in Pink Dust (the lavender bonnet), or Cherished Pink (the pink bonnet)
size H 5.00mm hook, tapestry needle, scissors
Stitches
Slip Stitch (SL ST): Insert hook, YO, pull loop back through and through loop on hook.
Single Crochet (SC): Insert hook, YO, pull loop back through, YO, pull through two loops on hook.
Double Crochet 2 together cluster (DC2togCL): YO, insert hook into stitch, YO, pull loop back through, YO, pull through 2 loops on hook, YO, insert hook into same stitch, YO, pull loop back through, YO, pull through two loops on hook, YO, pull through all three remaining loops.
Size
gauge: 4 inches = 13 cluster sts and 11 rows of pattern.
Pattern written for newborn – 3 months see size chart for other sizes. Baby Nora is wearing a bonnet that is in between the preemie and newborn size. She was 10 days old when the photo was taken. I worked 5 rows of clusters for the width. The video tutorial linked is for the newborn to 3 month size and has 6 rows of clusters worked for width.
The brim is one inch wide, add another inch for child sizes and up.
Pattern
Chain 6.
ROW 1: In the second chain from the hook, work 1 SL ST. SL ST into each chain across the row. CH 1 and turn. (5).
ROW 2: Work 1 SL ST into each of the back loops of the previous row. CH 1 and turn.
Repeat row 2 until you have 11 inches in length. (Brim will stretch about .5 inches after making the next row of SC and row of clusters.)
ROW 3: CH 1 and turn brim to work the long side. SC into every other row. (see video for exact placement) CH 2 and turn.
ROW 4: Work 1 DC into the first sc from the previous row. (The ch 2 and dc count as the first cluster.) DC2togCL into each of the sc across the row, except in the last sc, work 1 DC. CH 1 and turn.
ROW 5: Work 1 SC into each stitch across the row. CH 2 and turn.
Repeat row 4 and 5 until you have 6 rows of clusters and sc, or the width you need for size.
Fold bonnet in half and SL ST the last row of sc together. You may use a tapestry needle if easier, or I like the zig zag SL ST (see video tutorial for demonstration.) Tie off.
Bottom of bonnet and ties:
ROUND 1: Pull up a loop in the first st of the brim, SC into that same st. Work SC into each of the next 4 sts of the brim. Work one SC at the end of the SC rows and two SC at the end of each CL rows. Work SC into each of the remaining 5 sts of the brim. CH 60 and turn.
ROUND 2: Beginning in the second chain from the hook, SL ST into each chain (first tie made). SC into each of the first 5 sc (the brim), *Skip one sc, SC into each of the next two sc . Repeat from * across the row, working SC into each of the last 5 sc of the brim. CH 60 and turn.
ROUND 3: Beginning in the second chain from the hook, SL ST into each chain. (second tie made.) Work SC into each sc across the back of the hat. SL ST to the last sc of the round just before the first tie. Tie off and weave in all the ends.
The video tutorial is linked below:
Thank you as always for stopping by!
XO, Tiffany
Click here or image below to download a printable pdf.
![]()
